Overhaul. Chapter 1. Friday. - Toyota Altezza, 2.0L, 2000
Hello my dear lovers of logbooks -).
Today I will talk about how the unfortunate Japanese engine 3S-GE BEAMS from my Altezza, tortured in his homeland, having sailed to Russia and having survived a fierce winter in it (up to -40 in the area), began to eat oil with an unimaginable appetite, and in as a result, alas, I did it. And about how we will now disassemble it, clean it and wash it, change everything that is broken, put it back together and breathe again into it all his joyful agility and desire to burn rubber in sets -).
So, the input data:
- Waste oil : 1 liter per 100 km.
- Compression : 10-10-10-4
These depressing figures give rise to the following equally depressing assumptions:
- Valve seals, rings - this is understandable.
- Burnt valves? Piston?
- Well, and all sorts of terrible: a burnt valve seat, head for blowout, etc., but the diagnosis can only be made by opening the motor.
And so, one evening, on a recent sunny Friday after work, my friend banshee and I took the car from the storage in the parking lot, and went from one end of the city to the other, to the garage, in which everything that will be described in the subsequent chapters took place. our story -).
At first, as usual, all sorts of problems began, for example, we could not drive into the garage for a long time -) and the point here is not even my extraordinary ability to drive backwards -), but that my beloved car either the belly sagged from the long-doing nothing-doing in the parking lot, or it’s not at all clear what (after all, you drove there before!), but somehow it was not possible to push it inside the first time and only using engineering minds, hands and boards. And so we settled in the garage ...
... and began to eat shawarma -). In general, I believe that people have not come up with anything more suitable for such matters than hot sweet tea (lyrical digression) from a thermos and sandwiches with cheese on black bread with butter, but, alas, there is not always enough time to prepare well for the process and then you have to be content with what is at hand -). So, having spent most of the time allotted to us on chatting -), we finally got down to what, in fact, we came here for.
The bumper had already been removed and was preparing for minor repairs, so the first thing we did was to remove the bonnet. You perfectly understand how many hours of work you are doomed if you are faced with the same thing that we do, so it makes no sense to squirm under it, it is much more convenient to remove it immediately to facilitate access to the engine compartment, having previously circled the bolt attachment points with a marker, so that later easier to set gaps.
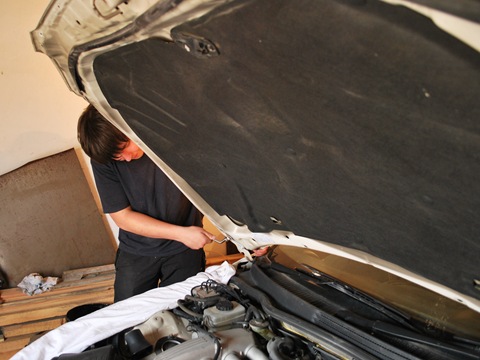
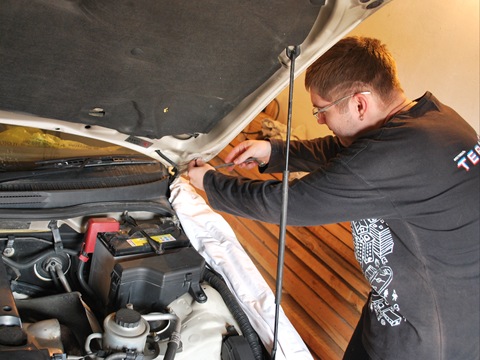
So the patient is ready on the operating table -). On the one hand, it was a joke, but on the other, it was somehow sad and a little nervous.
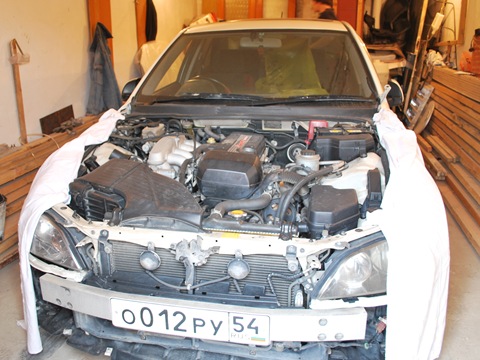
We remove the air filter box, which is located in the front right corner of the hood (let's agree this way: all geometric references are made from the point of view of the pilot sitting in the cockpit, so the right frontal corner is not the one on the right, but the one on which the turn signal blinks, when you turn right). The filter, of course, is immediately released: with our clean air, this can be done at least every weekend -). By the way, the dimensions of this box make it clear to everyone the second main reason why the tuners put a filter of zero resistance: this does not fit into any gate, so much precious space is wasted.
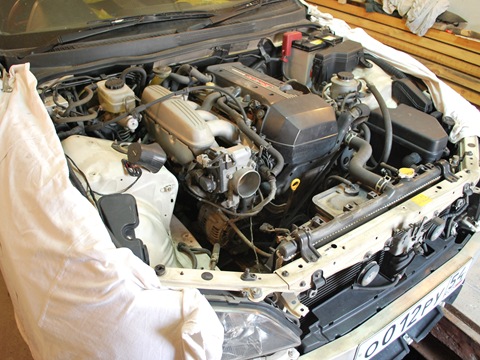
All removed attachments are proposed to be stored in different places in the garage, without mixing with each other. Despite the fact that the Japanese are excellent designers and, in principle, you can repair their cars even without having the appropriate education, you just need to buy a book that will describe all the places that require a specialized approach, and about which later; and that all the bolts are, in principle, different and do not fit each other, however, it is easier and better to keep everything clean and tidy right away: screw the screws back into the threaded mounting holes or leave them in the holes in the lid, but then put it there, where a person's leg or hand cannot randomly reach -).
And here is my favorite design -)
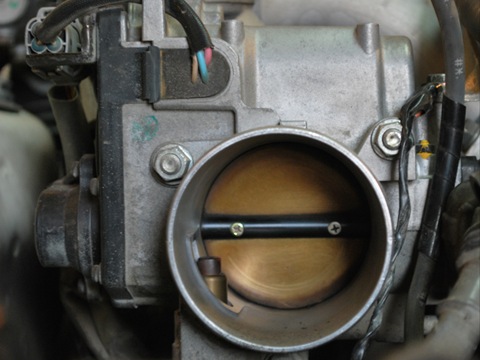
It looks especially good, of course, when it sticks out of the hood in the amount of three pieces, but even in this form I really like it. By the way, I was personally convinced that Altezza has an electronic throttle - if you pull the throttle hook with the ignition off (you know how it is usually done on the beam, the car is started, you, such a cool specialist, look under the hood and pull this hook to gas), then the damper will not open, but will remain silently closing the inlet. Alas, this is not very good for a drift machine, all this electronics gives hateful delays in the actuation of mechanisms and assemblies that are simply impermissible for a combat vehicle, but somewhere I heard, out of my ear, that the decision to mechanize the throttle back into the pedal-cable system there is a throttle, so no one minds, so that I threw this same electronic component to hell -). And throw out (bye-bye, TRC!).
It is necessary to put a rag into the hole of this damper so that any rubbish that has the physical ability to fly there does not fly there.
Carefully remove the wiring from the sensors located at the inlet (DMRV), and then remove the intake manifold itself, which is nothing more than an element that breaks one inlet air stream that has passed through the filter and the open throttle valve into 4 streams, which and then go into the cylinders to let the gasoline burn there. That's all, that's all. By the way, there is nothing complicated in the motor at all -). Here it is, the collector (cool shade by the lamp on the wall, huh?):
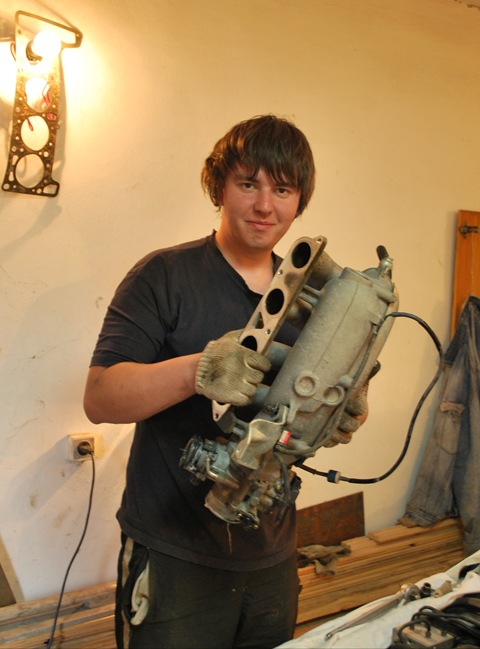
You also need to put rags into the holes on the engine, where the collector pipes fit, for the same reason - to prevent clogging.
Now - take off the engine protection, foul on stupid breaking clips, look at these plastic tweaks, which, strictly speaking, can hardly be called protection at all, think about whether to weigh your face down with iron protection, decide nothing, and start draining the oil. This tin, of course, how black it pours out of there, although nothing has passed. Castrol, which in principle cannot be found with us, is not something that is worth pouring into your car, but last time there was nothing else at hand. The oil is drained, if someone suddenly does not know, with the help of a nut that is accessible under several conditions - you are standing under the car, you have a bucket in your hands, and you know for sure what you are going to do now -). For example, I was going to open the engine -).
In parallel with this, since we are already downstairs, we are draining the antifreeze, I have it freshly poured this winter, so we poured it into a canister so that we could turn it back later. It drains from the crank, which is also sticking out at the bottom, if you need to put a bucket somewhere, then you can use the tube from the dropper, heat it with a thirst-rod, and pull it on the faucet, unscrew the bolt next to it and look like antifreeze dripped into the bucket with a beautiful stream. We drained the antifreeze, because at the top we have to remove all the pipes, including the radiator pipes.
Now we get out upstairs and remove these pipes and pipes for ventilation of crankcase gases, a breather. We will wash all this at home in the bathroom. In general, since we have decided on such a feat here, we can do a lot of things along the way: clean everything, wash everything, replace everything that does not inspire confidence, which is evident that it is already ready to die. Naturally, this should be approached with joy, it should bring a buzz, and not depress, otherwise it is better to prepare money and go to the service station, although the amount that will be asked from you there will depress you much more than any dirty pipes - ).
We remove the decorative cover, on which the proud word BEAMS is written in a firm, sweeping handwriting -), by the way, I do not know what it is called correctly? Maybe a "valve cover cap"? -) The cover is removed after we have unscrewed all the hexagons and the oil filler cap, by the way, there is also a thin washer-gasket, you don't need to lose it -). We screw the lid back on.
We remove the connectors from the ignition coils, unscrew the coils themselves and take them out.
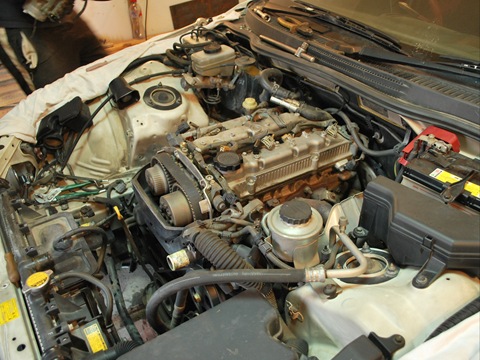
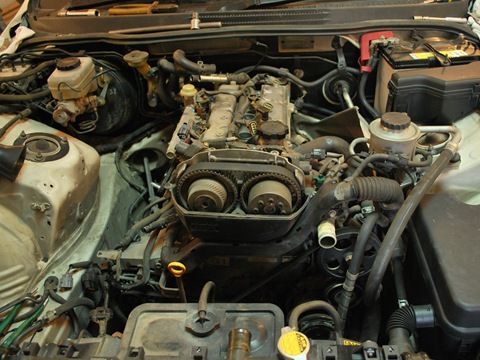
Here was the intake manifold. It is these holes that must be closed so that dust does not fly in.
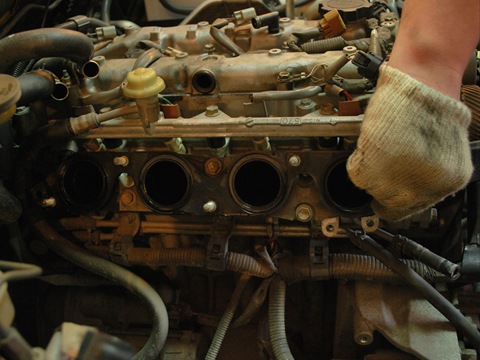
We remove the wiring. In fact, you start filming it earlier, because it is stretched everywhere, and it prevents you from filming the rest. There are about 50 Stupid Toyota Connectors on it (I do not even exclude the thought that you need to introduce a special abbreviation: DTR), so you should prepare for the fact that all your fingers by the end of the operation will ache from removing these stupid ponytails, clamps and buttons. Fortunately, Max possessed the know-how of removing Toyota clamps, so it was much easier for us than it could have been, but I don't even know what to do for the rest -). The wiring, which is also a braid (and why it is called that, it will become clear when looking at the pictures below), is everywhere thoroughly attached to the engine head and prevents it from being removed, or prevents it from taking off something else, or just interferes -), i.e. you need to shoot it. It goes from the port side, entangling the entire engine,
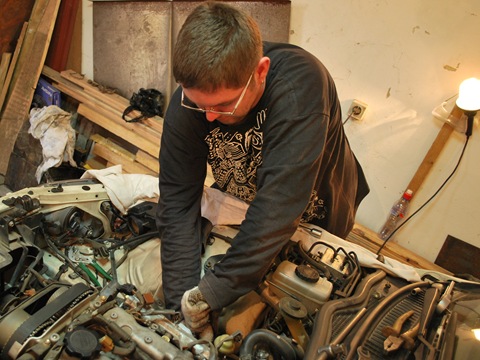
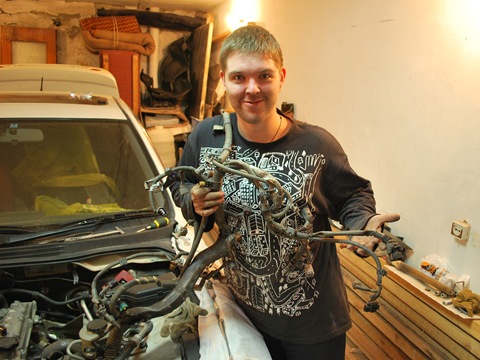
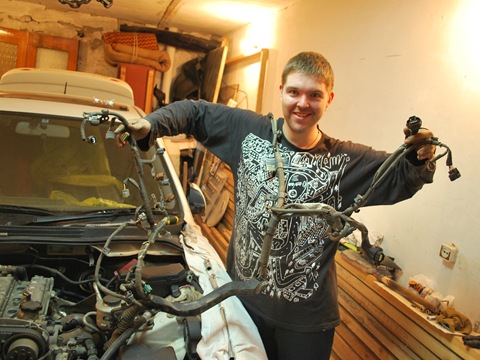
That's how healthy it is and branches like bushes, and wires are braided like braids -). It was not weak to take a steam bath, special problems arose with the reverse sensor, the connector of which is located on the box, or rather the clamp that held this wire most of all problems. It is located between the box itself and the bottom of the body, that is, you need to put your hand there up to the elbow, and, having groped for it, start to tear with all your might, because the back in this position quickly becomes numb, and soon you have to start saying aloud bad words out loud.
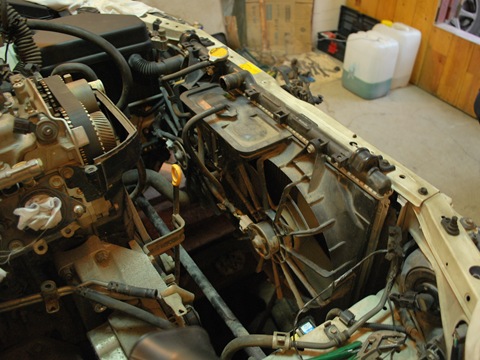
Here is the result of the first day:
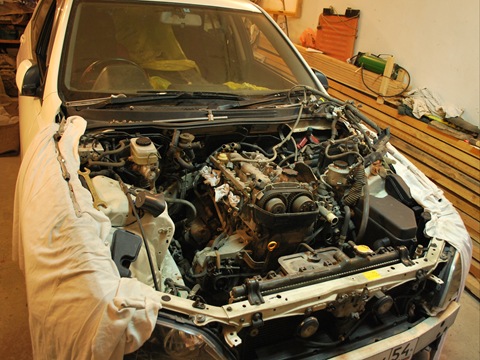
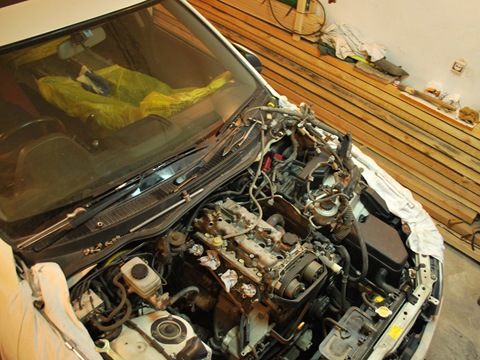
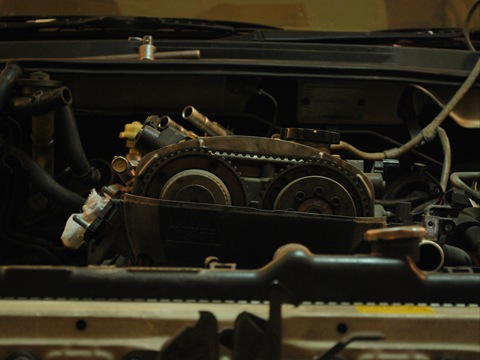
Immediately it became somehow empty ...-)
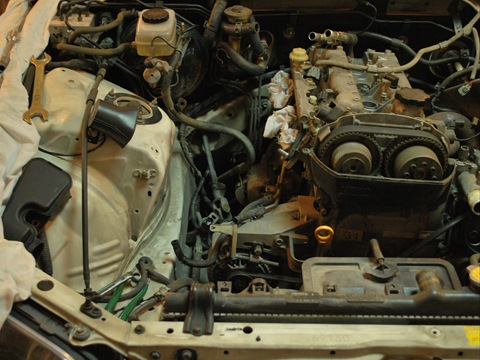
Follow the BZ, updates will be posted as material arrives from the authors' camera and the desire to describe everything that has been done -).
Five!
Good luck in your difficult undertaking of great work.
And the plafond is really nothing - smart.
ironbrew
the valve cover is the one under it, metal, the pictures will be in the next chapter,
and here we are talking about a plastic decorative cover that simply protects from dust
all gaskets for replacement, clearly, for this a full set of engine gaskets will be purchased soon
thanks for the good luck wishes -)
this cool photo
images.drive2.ru/car.jour...b0ab3fbfa0d0-original.jpg
it is also worth pointing out the subtle points.
Like this bolt is better to unscrew from the bottom, etc.
> thanks for the wishes of good luck -)
but not for that, I did this myself in winter :)
the valve cover is the one under it, metal, the pictures will be in the next chapter,
and here we are talking about a plastic decorative cover that simply protects from dust
all gaskets for replacement, clearly, for this a full set of engine gaskets will be purchased soon
thanks for the good luck wishes -)
what is it called correctly?
Valve lid
Immediately I advise you to change the intake gasket, you can immediately use a cold one! But wipe off the old one thoroughly and no chemicals!
And about "replacing everything along the way" you said that correctly - I also changed everything like that :)
Good luck
Go and multi-degree tea? ) ) ) Thanks for the invitation ) ) ). Here I will put my horse on its feet - I will definitely go - Look - they already put the engine from the Boeing there))). Don't trust them! And then "oh, we just changed the valves and the rubber bands are different there)))" - they collect the dragmobile there))) well done)))
hehehe -)
Go and multi-degree tea? ) ) ) Thanks for the invitation ) ) ). Here I will put my horse on its feet - I will definitely go - Look - they already put the engine from the Boeing there))). Don't trust them! And then "oh, we just changed the valves and the rubber bands are different there)))" - they collect the dragmobile there))) well done)))
Kolyan, and you come to us, our sales are tolerant in winter - a heat gun =) Although Andre always improves the heating effect with tea))
And do not say) As I remember the pressure hose of the hydracha changed at -15 - this is the one that is between the engine and the wall of the engine compartment - it takes it as much)). And in the rain, I often had to lie under it)
Cool Andryukha! Medal for climbing yourself! Do not forget to put the necessary marks, where everything was!
It's good when there is a major garage with lighting and a certain amount of money to replace obviously faulty elements.
And then I'm all on the street without money - it turns out sour))). In general, well done!
Well, yes, I also think about 200k,
but here it is somehow strange - I wrote in one of the posts - the intake valves were killed, it is not clear how this could be in stock
clear. I thought the altezza had a resource of 200 thousand if you screw it up. but how to screw it up
100,000 mileage
in Japan, of course,
it's not a Corolla car on the machine, but a rear-wheel drive on the mechanics, it was screwed there just like I was here)
Was this motor killed in Japan?
unclear. and what was the mileage when you took the car? and how did you go - grind on it?