Overhaul. Chapter 2. Monday. - Toyota Altezza, 2.0L, 2000
So, having not reached the garage on the weekend, we rushed there on Monday, immediately after work, or rather - not having spent 15 minutes before the end of the working day -).
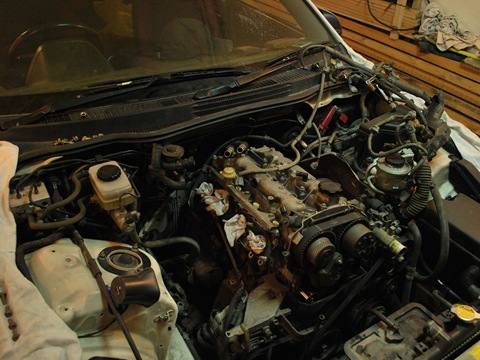
So, Monday, day two, starting position:
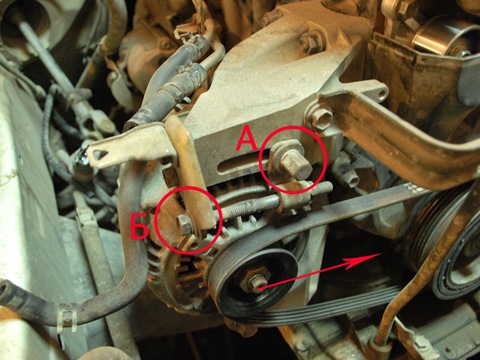
Today we need to get to the timing belt, which means, first, we will remove the attachment belts. First, we loosen the nut holding the generator in the groove (in the figure: nut A), and then we begin to unscrew the bolt (in the figure: bolt B), thereby moving the generator towards the motor (in the figure, the arrow shows the direction of movement).
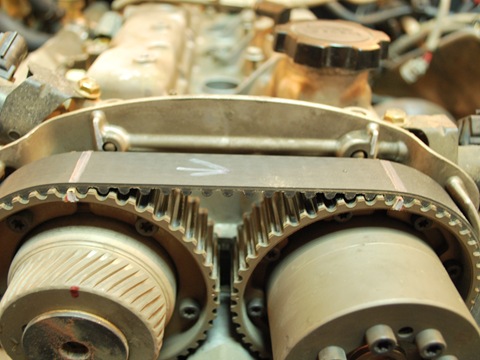
By the way, in parallel we make marks on the timing belt and put an arrow indicating the direction of rotation, since the belt is new, it was replaced less than 1000 km ago (for those who have already read my bortovik: after we discovered a relatively new timing belt and did not to change it, a fierce winter passed, which greatly affected the health of the belt, it was covered with cracks, as if cut by a razor, and was eventually replaced, but at the service station, due to lack of time, so there was no report on the replacement), and we plan to put it back on.
Now you need to loosen the second belt - the power steering belt and the air conditioner. The loosening technology is similar to that described above, except that the tensioner moves to the motor to loosen this belt, and not the attachment itself.
After we have loosened both belts, we can begin to remove the drive pulley located on the crankshaft. For this, we personally have a mega-puller. In general, the Internet is full of all sorts of barbaric methods: with the crowbar resting on the pulley, unscrewing the nut with the starter, etc., but I think that all this will not lead to good -). The motor must be disassembled carefully and with love; turn the nuts by hand, and not with pneumatic guns and wrenches. This is the engine, the heart of the car!
So, our puller is a self-made device, welded from what was at hand - a pair of iron blanks, one in the shape of a ring, the other in the shape of a cup, pins and a handle + welding and drilling. It turned out like this:
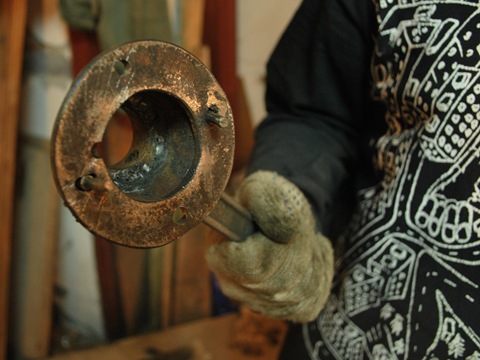

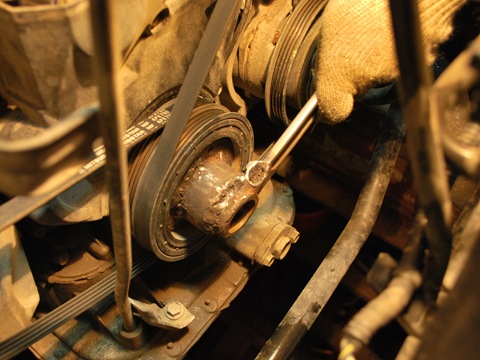
With this puller we fix the pulley itself to prevent it from rotating:
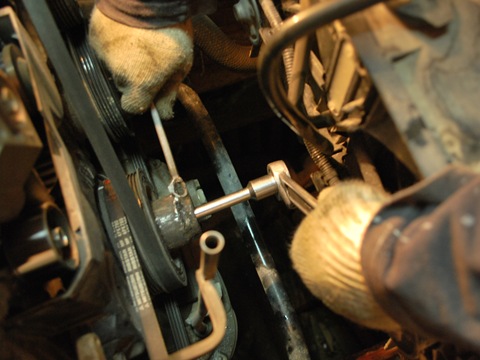
Then we insert the key into the hole on the puller and unscrew the nut:
Remove the pulley and remove the two loose belts.
Now we remove the frontal protection of the timing:
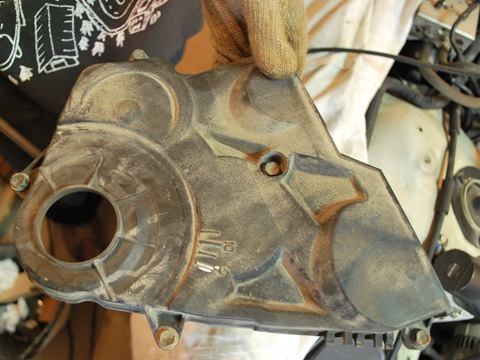
And here it is, before our eyes:
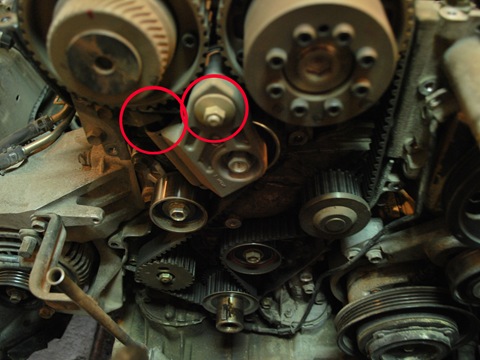
In the middle of the picture, below the camshafts, is the timing belt tensioner. The principle of its operation is as follows: in the marked place there is a pin, which, protruding from the tensioner, turns the entire mechanism on the marked nut, pressing the belt with the roller, and thereby tightening it. It's easier to understand his work on a flat diagram (sorry, I'm an artist of course ATAS):
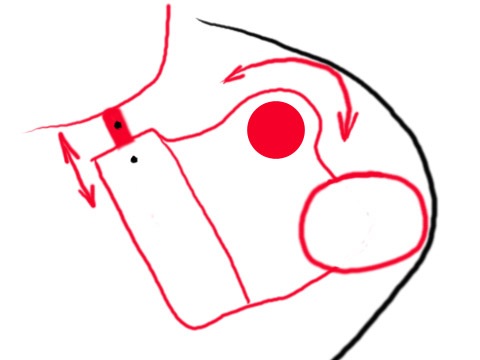
The entire tensioner is attached to one joint - the nut in the upper right corner. The tensioner can, while rotating on this connection, either tighten the belt (indicated in black in the diagram), or loosen it. The position of the tensioner is adjusted with a pin (left). The more the pin is extended, the more the tensioner is turned counterclockwise, and the more it presses on the belt, pulling it.
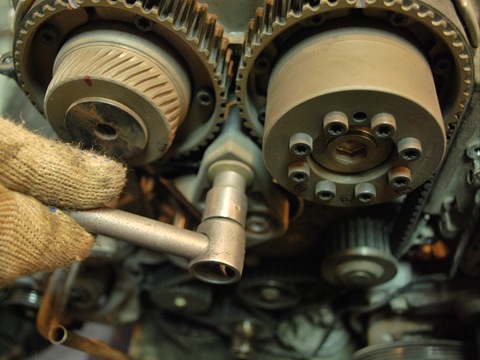
To remove the tensioner, you need to insert the wrench into the welded nut (seen in the photo above) and, attention, evenly apply force for two (!) Minutes, pretending that you are unscrewing the nut. Yes, yes, pressing the nut for two minutes is a serious task -), it doesn't spin, try moving the wall for 2 minutes -) the same thing here, not very pleasant. Of course, it is more convenient to do this by placing the key horizontally, and resting on it from above, and stand so still for 2 minutes, while your partner watches how the unhurried pin crawls back into its socket (and it crawls because we, applying force, rotate tensioner clockwise, which means we press on the pin, which is forced to crawl inward). After these ill-fated two minutes, he will crawl inside so much that the hole on its end part will align with the hole on the tensioner body (shown in the diagram with black dots), and something thin but solid can be inserted through them, which will hold the pin inside the tensioner. We used the hexagon from the kit. Then you can safely unscrew the nut and remove the tensioner itself, and then the timing belt.
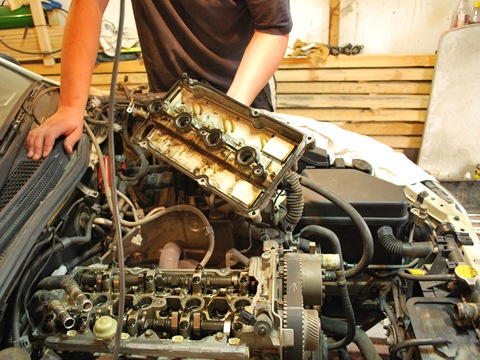
Now we unscrew the valve cover
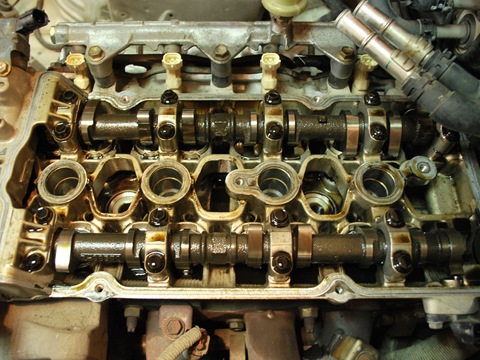
And here before us: our evil shafts -).
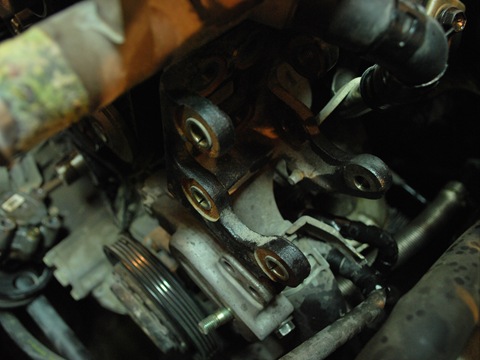
To remove the cylinder head, we also twisted the power steering pump from its bracket, pre-draining the dextron, and put it down so it would not interfere. This will give the necessary freedom of action, it will be easy to get to the nuts. Of course, you can twist your head without removing the power steering, since it is attached to the block, but everything is so cramped there that it is still better to remove it. Here is the bracket:
And here is the power steering itself, lying below.
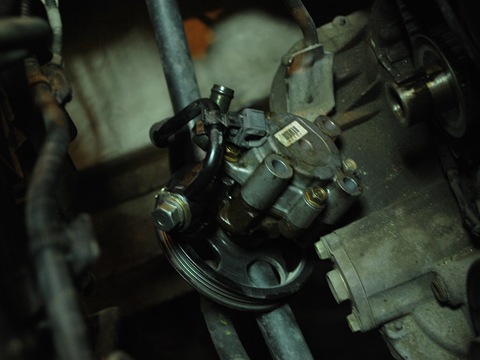
We did not disconnect it from the pipes and hoses, and then we removed it together with the beam and rail (but this, wow, a spoiler from the next chapter! -).
Thus ended the second day of collapsible.
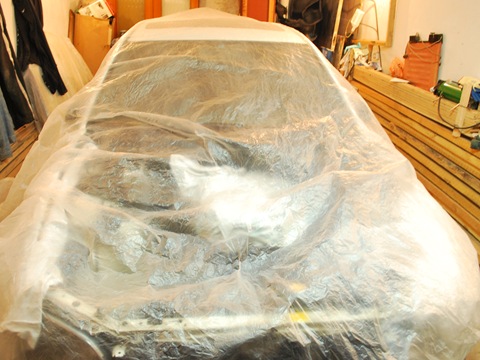
well, you see, there is an opinion that you cannot take a typewriter on mechanics in the OTC from a Yapi, like everyone there drives an automatic machine, but they buy mechanics just the same as me here -)
Eh, and Siba is hot today))
It's strange so little) well, htya depends on exploitation)
Successful completion of the work!
Yes, the capital is this thing)))
Well, we are waiting for the end, a lot of work has already been done)
By the way, I have read that there is a lot of oil, but how much mileage does it have?
wow. you need to write manuals, everything is painted, drawn. well done. good luck in the capital.