Headlight polishing and glasses painting - Toyota Cresta, 2.5L, 1997
Hello! for a long time I was going to wash the headlights inside, at first I waited when it gets warmer, then all the time it was not. and now it turned out to be a warm day and free time. but just to wash them especially, I didn't want to disassemble them, in general, my head does not rest my hands or the car, I always looked at the headlights from the chayzer 100, as many noticed, the glasses in the headlights of the chayzer are black and not chrome-plated as on stamps and crosses, which gives the chayzer a little sportiness and aggression. and so it was decided to do the same. there are a lot of reports on the disassembly of headlights on the drome and on the tourer. someone fries them in the oven, someone pours them with boiling water, and someone, like me, used a hair dryer. in general the headlights are disassembled
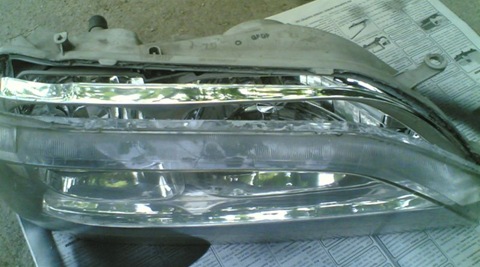 , immediately began to remove the chrome layer from the glasses
 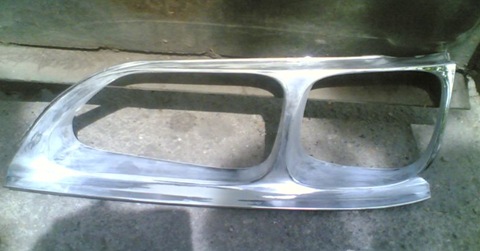 , I will say it is not easy, this coating succumbed only to sandpaper paired with a solvent. after which the whole thing was painted matt black
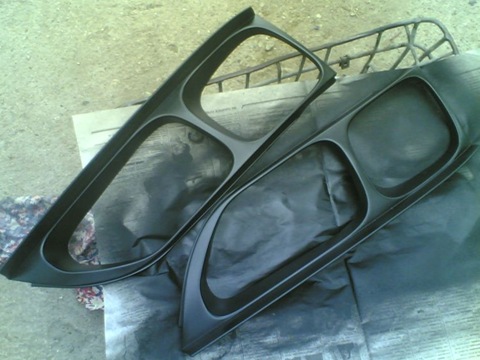 ... while the paint was drying, reflectors and glass were washed, the glass was also lightly polished. everything was going in reverse order to the old sealant
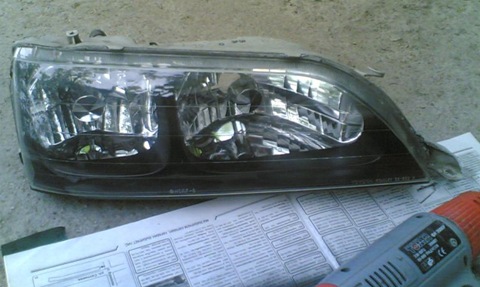 ... well, here's the result
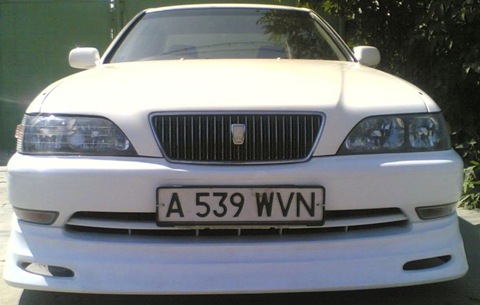
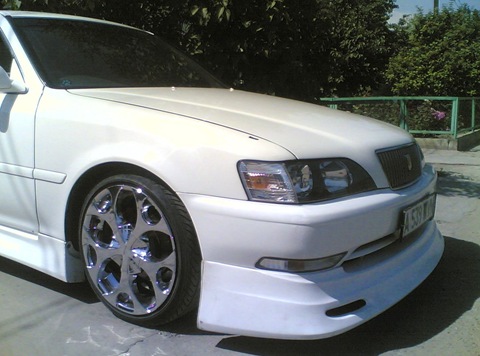 ... next turn is turning))) while I think what to do with them, I will remove the orange cap to my love.
a hair dryer, a pair of flat screwdrivers, a stronger knife, gloves. It is advisable to disassemble on a hot day, so that the sealant does not turn to stone so quickly, and it is even better to disassemble it together, first you warm up the joint of the headlight housing and the glass round, the headlight housing becomes softer and more elastic, now you can walk between the housing and the glass with a knife i.e. we insert the knife into the groove where the glass is inserted and also heat and guide the knife around the perimeter, do not throw out the sealant that sticks to the knife, when assembling, stick it back. then you start to warm up more intensively, I started to disassemble the headlights from an acute angle, you warm up the corner with a screwdriver slightly, you will notice that the glass is already moving away from the body a little, then you move on, you warm it up, you warm it up, etc., you need to warm up strongly but not until degree of melting. and most importantly patience. as soon as about 50% of the glass has moved away from the body, you can simply warm up and pull the glass away from the body by cutting the stretching sealant with a knife. and the main thing is not to rush.
and here is the report from the drome, where the headlight was pushed into the oven forums.drom.ru/toyota-mar...r-cresta/t1151055881.html
fumbled without b! brothers for more details plz! on the disassembly brush just a hairdryer and that's it?
it would have shown, the pictures have not survived. my work was 2 gig of photos. about 5000 photos ... (((
as there will be something else, either 0 - I'll post you a link or send photos
Regarding the cap, I advise you to leave it the same, disassemble the light of the turn signal and darken it with the same macar
...
The muzzle is intact, the optics are all dear ...
Previously, the headlights did not sweat, but after a big wash, such a hat appeared ...
Yes, you should try to guess!
but not a trunk, they just call it that.
in fact, there is a small tube, it is either rubber or plastic ...
but if someone touched the headlight or beat them, then they are removed for better ventilation, I also took off such an elastic band on the headlight before selling, the headlight was sweating ... and warmed up in the sun = ) or someone just took it off for themselves)
Plya again to remove the headlights ... and I'll also look at this trunk, why is it interesting ...
Well, I stuffed it in there, we can cut it out right under the hole, or in general I think of shoe bags in one to shove desiccants!
no, the foam partially allows air to pass through and should not allow moisture (dirt) to pass through, so it should be ... the foam should not be pinched there. do it yourself a gag cut from paralon and that's it ...
Duc can plug something else, and not with paralon? ..
And she all sweats only initially from the side of tumanok ...
in your case, this is your parolon, as I remember there must be three holes in the place where it sweats and take it away ... it will pass and put it back in place ...
And there are three vents with three caps on the headlamp, it is necessary to plug something (or inappropriately vice versa), when I disassembled these types of parolonki there, things spilled out, I just plugged them with a regular parol ...
Conclusion the headlamp must be strongly sealed ?!
Why didn’t even notice where he was located?
IliaMarkSib
Handsome, good luck!
I washed the headlights here too) without disassembly, now the tsuki are sweating, nifiga I can’t understand if the sealing is bad, or what ...
sweat you say? re-glue it ... when we did the gluing, we glued it on top with a soldering iron and a thick layer of black sealant ... then the sweat disappeared ...
and there is also a "trunk" on the headlamp to remove heat and moisture, the gum is in a semicircle, it must be directed down ... definitely down, checked and tested on multiple machines
thanks)
well, I don't even know from just flushing indiscriminately what could have been violated, there is such an oak sealant, if only with boiling water of soap, on the contrary, it is not screwed. I just had a glitch with one headlamp, the light bulbs did not burn, then I inserted the light bulb immediately and began to fog up. here it is only necessary to check how I don’t know
Handsome, good luck!
I washed the headlights here too) without disassembly, now the tsuki are sweating, nifiga I can’t understand if the sealing is bad, or what ...
black headlights on a white car look pretty cool =) sorry there is nothing to paint in 90)))
to the headlight from above with a small screw, when you open the hood near the wing on the headlight, see.
Just kill me where to twist to remove the repeater, visually looked - I did not see (((
I have a lot of water in the repeaters, I want to make out)
no, you unscrew the turn signal from above and push it forward, under it the headlight is attached with 2 nuts to the wing, and
you do not need to remove the bumper with 2 bolts under the hood
Tell me how the lights are removed and the headlights themselves?))) Do I need to remove the bumper?