Overhaul. Chapter 3. Autopsy. - Toyota Altezza, 2.0L, 2000
Let's return to our rams, or rather to our oxen (that is, Valam!).
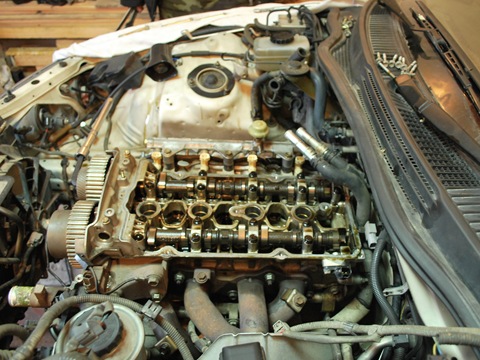
We will shoot them. The front covers must be removed first to access the inner nuts. The tightening torque on the shafts is very, very large (I forgot to read the brochure), so the longer the keys you use, the easier it will be for you to unwind. The cover is unscrewed according to the following principle: one person tries to unscrew the nut at the front with a hexagon, and the other holds the shaft with a key in the middle. Extension cords are naturally needed.
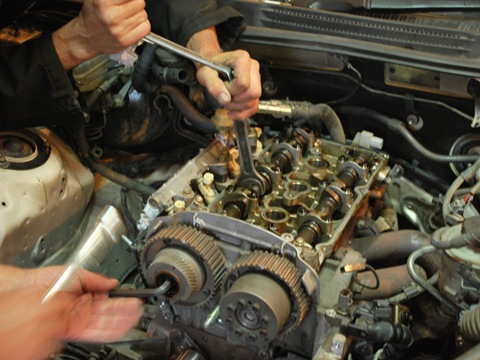
The moment on the shafts is such that the 14th hexagon simply could not withstand the loads. Here he is, he was cut off all the edges:
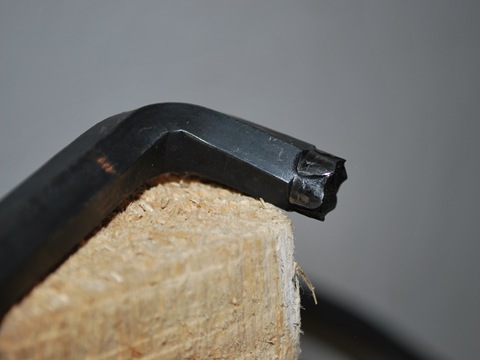
Shitty hexagon, in general -). It was too late to go to the store, so I had to apply engineering thought and assemble a hexagon from a contracted bolt of 14 (its head was just used as a hexagon), i.e. bolt with two cleverly tightened nuts. First, you screw them both onto the bolt, and then you twist them in different directions so that they are pressed against each other, then the friction force will allow the bolt to be twisted with the head and used as an adapter, but of course it is better to know in advance which nuts have to be turned and buy the necessary tools in advance. Perhaps in the last chapter I will describe a list of all the necessary tools.
Finally, they spun the shafts, removed the VVTI couplings and removed the gears:
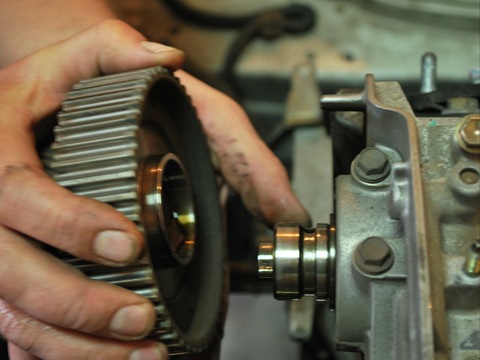
This photo clearly shows why you need to remove the gears - under them are the nuts that hold the front part of the cylinder head cover, which also needs to be dismantled in order to remove the shafts.
Now we begin to unscrew the camshaft bearing caps that were held by the shafts. This should be done gradually, from edge to middle, so that the shaft does not "play". But Max twisted them so that the shaft played even with such a cunning approach -), with a slight movement of professional fingers, we still returned it to its original position and dismantled it.
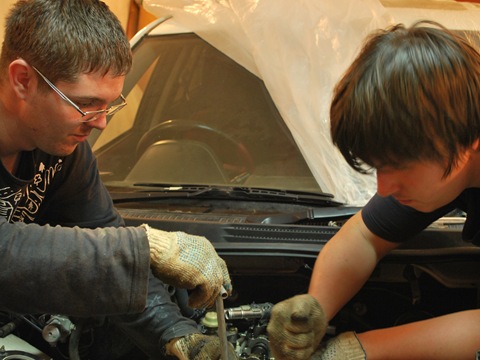
Here it is, the front of the cylinder head cover:
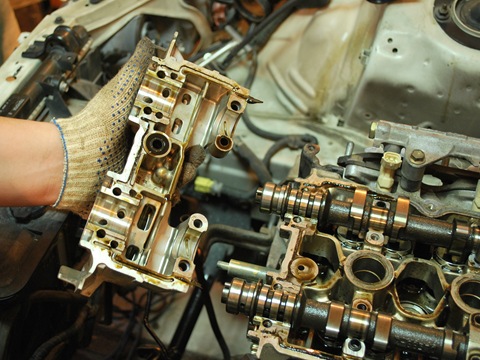
Tore off the bearing cap bolts, and now you can remove them and the shafts:
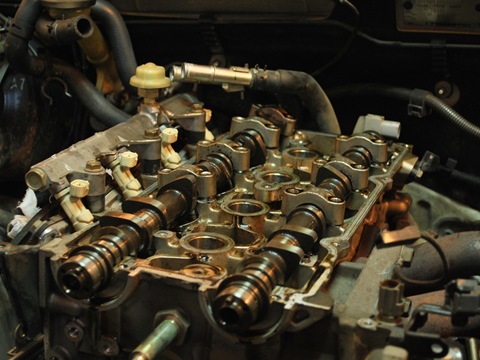
By the way, the exhaust manifold, which we still haven't removed, is also attached to the head! This is in order to remove it, we unscrewed the power steering, because otherwise there is no room for maneuver when unscrewing the nuts, but in the process of consideration, we come to the conclusion that it will be more convenient to remove the head straight with the collector, so we decide to unscrew the collector from the pants. Trousers are a transitional part of the exhaust, when the pipes become no longer 4 (as in the manifold), but not 1 (as in the further route).
Unfortunately, I don't have a photo of the connection of the collector with the pants, they forgot to do it. I will attach them later, when we collect everything back. There is nothing complicated there, the 3 bolts that connect these two parts are easily accessible from under the car, however, not without the help of two extension cords. You need to see the collector from below and it will immediately become clear which 3 bolts need to be turned. These bolts probably boiled very much, the temperatures there are not childish, so you will need to apply wd40 first, and then sweat a little, we unscrewed one bolt with great difficulty, but, nevertheless, did not rip it off, although anyway, just in case, these nuts were bought new, and we will use them when assembling.
In addition to the three bolts connecting the two elements of the exhaust route, it is also necessary to unscrew one bolt of the bracket with which this connection is attached to the block, and which will prevent the head assembly from being removed with the manifold. This bracket is made so that the load on the release does not lead to loosening of the connection. So we unscrew the pants from the collector, and tie them with something to the box so that they do not sag -).
So, back to the shafts, here we shoot them:
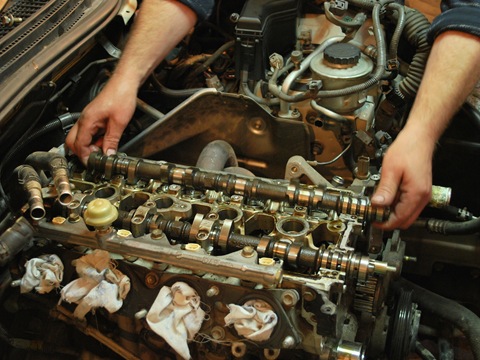
removed:
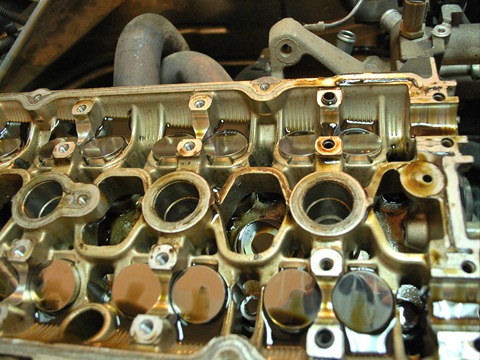
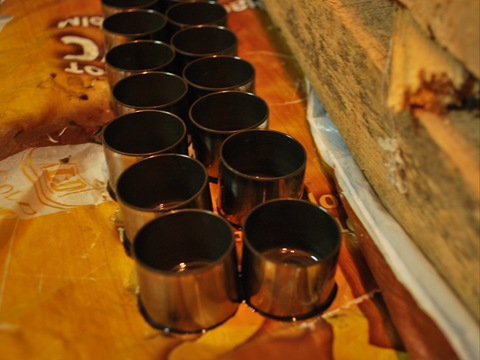
The shiny things are the valve lifters, they are hit by the cams on the shafts, and they, pushing down, cause the valves to open the intake or exhaust holes.
Now, with a sly head with a 12-sided bat, we unscrew the head bolts.
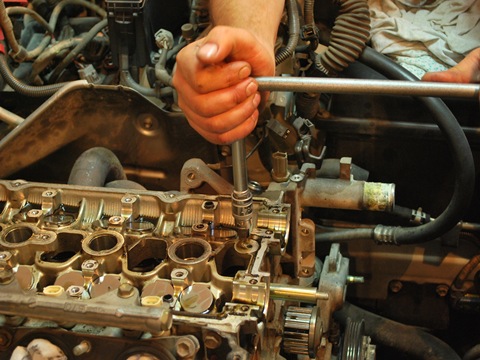
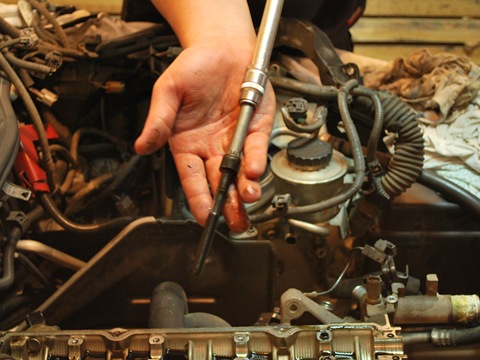
These are how long these cunning bolts are:
Now we need to remove our head. Behind the head, between the 4 cylinder and the engine shield, there is one very dastardly clamp holding the cooling tube. We did not manage to remove it up to this point - there is no place to turn around with pliers, so here either some short pliers are needed, or tricky ones with sponges curled to one side, or we need to act as we did. One man perches an eagle on the engine and raises his head, and the second briskly removes this evil clamp, and takes a head, which, in principle, is not heavy, but still impressive with a manifold. Here it is assembled:
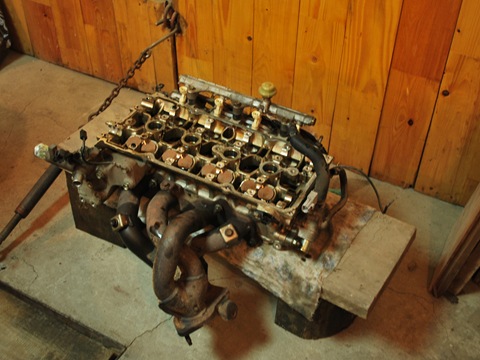
The exhaust manifold, also called a spider, is all tied into a knot, this is done so that all 4 pipes are equal in length. There is a whole science with this exhaust in fact, because when the exhaust valves are opened, back pressure is created, which prevents the exhaust gases from pushing out, therefore the entire exhaust is a very important element in the operation of the engine, and it is all calculated up and down so as not to choke the engine.
And here the block opened to our eyes, here oil was burning strongly on the 4 cylinder:
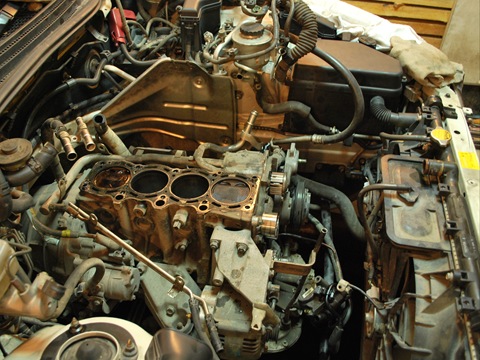
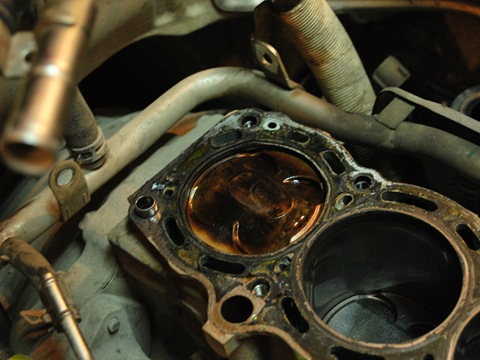
But the walls of the cylinder are ideal, as it turns out upon examination - honing (special matting of surfaces, which creates many, many small scratches in which oil will remain so that the piston can slide freely in the cylinder, and not wedge) is still in excellent condition. The general wear of the cylinder, as it turns out later when using the head, nutrimeter and micrometer, is 0.05 mm, and the piston is 0.01 mm, and this is simply insignificant for an engine that has passed 100 thousand. The first repair size for this Toyota engine, which, by the way, would require cylinder bore and purchase of new pistons and rings, this time of repair size, starts from the moment when the output is 0.5 mm, and here 0.05 is 10 times less! I think it's not even worth talking about the fact that the 3c is really a very reliable motor, even legendary in some way. Judging by experience, without a capital, he is on average able to pass 200 thousand, but this particular instance was not lucky with the Japanese owner -). Nothing, but lucky with the Russian -).
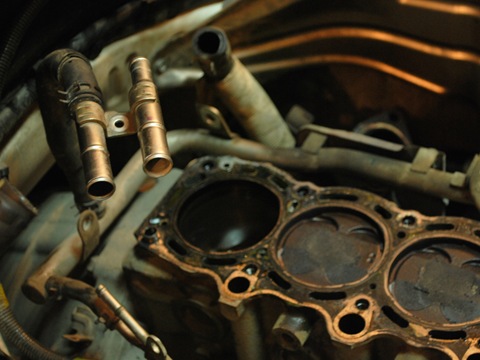
This, by the way, is the tube for separate cooling of the 4 cylinder, they must be cleaned, this is the most vulnerable spot in the Altezza 3c - the 4 cylinder has the nastiest cooling (hello Subaru). After all, antifreeze goes sequentially through the cylinders - first into the first, then into the second, it is not surprising that when it comes to the fourth, it is already hot and cannot cool anything, so there is a separate supply through special hoses.
As a lyrical digression, I propose to look at the pictures above - such a small motor, in a healthy engine compartment. if you think about it - 4 cans of beer, and they disperse one and a half tons of metal to 180, without hesitation -).
We pour kerosene on the head, this is the most convenient way to check whether the valves are alive or not. If it has leaked overnight, it means no, not alive. Kerosene is used, because, firstly, it has excellent penetrating ability, and secondly, it will not evaporate overnight, without letting you understand what happened - it leaked inside or evaporated -).
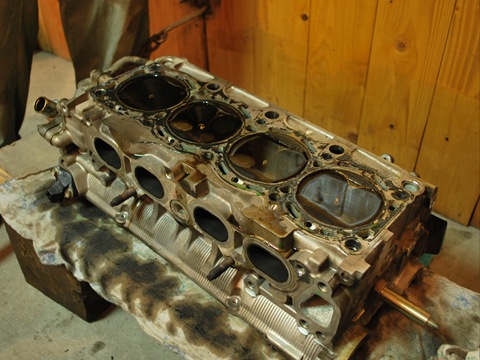
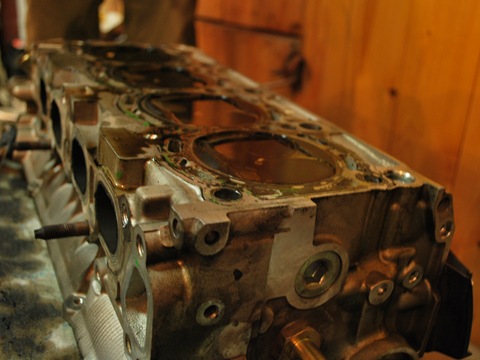
As it turns out later, it flows everywhere, all 8 intake and 2 exhaust ones are exhausted (just 4 cylinder, where there was compression 4). What needs to be done with the motor so that the intake grinds off, I cannot answer, there is also cold air, the exhaust should be worse, but no. But the good news is that the valves are not burnt out, and that their seats are intact, which means that we have to wipe this head off from carbon deposits, and not buy a new one -).
First you need to dry out and remove the valves. Today we only remove the pushers, and put them in the same order as they were on the motor, because it is extremely important to put them back in the same order, they have already got used to it and got used to it.
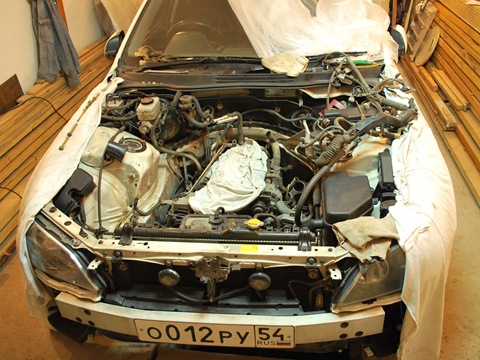
For today this is the end, they wrapped up the block, wrapped up the car, and went home, wrapped up in blankets ourselves.
Well ... as always - Max is to blame for all the troubles ... But what am I? =))) what can I say ... write ischo =)
Nishtyak guys! It turns out very informative! I'm waiting further with the head in more detail the most difficult place for me in the engine ...)
but in vain, when I cleaned my intake, I also wrote a small report.
It turned out to be a very useful thing.
there you can just hang a link,
I'm not doing this anymore out of documentary interest, but so, graphomaniac -)
But in vain, on the forums (for example, the Alteza Club) there were more connoisseurs of this information
ironbrew
why new?
Compare the length of the old and the new. The old ones are already elongated, because the bolts pressing the head to the block are tightened to the yield point.
Cage
I do not know about Toyota, but on Audi, in any manual, it is said to change the cylinder head bolts to new ones after removing it! As I understand it, they can burst upon re-tightening, or later in the process. They are not expensive to save money ...
I'll look in the book today, what Toyota says about the bolts,
thanks for the info!
Really not even to order? I suppose this repair is not for half an hour, is it possible to wait for new bolts? Does it just make sense to take risks over such a trifle? It's a master's business, of course ...
When I capitalized on the barrel of my head, I acted strictly according to the instructions, and pulled everything with the right moments and changed everything that was supposed to change. The flight is normal for the 3rd year already, and I am calm that everything was done correctly.
Inexpensive, but hard-to-find, like any rare goodies - you will find fick.
I also have 3S, and I opened it identically - the bolts were left by my relatives.
I do not know about Toyota, but on Audi, in any manual, it is said to change the cylinder head bolts to new ones after removing it! As I understand it, they can burst upon re-tightening, or later in the process. They are not expensive to save money ...
Super story - instructions and great pictures. Write and take photos again.
Happy renovation
m0dem
Well, what else could be the development of intake valves? there are no high temperatures. and the filter could have been removed for a couple of rides ...
Hmm, well, Andryukha's 10 valves flew out, and mine - all 16, when the engine was opened.
Dofig factors.
Well, what else could be the development of intake valves? there are no high temperatures. and the filter could have been removed for a couple of rides ...
Motor - stock, no achkoes, Step =)
All mirrors are homogeneous, even the IV pot, despite the heavier soiling.
can the intake valves be killed ala nulevik? how are things going with the top of the cylinder mirrors?
I ordered today for 2500 from the manufacturer Reinz - I trust this company. And it also happens that there is no choice for a 20-year-old car), only the kit remained, only a duplicate)
of course take over,
especially since my relay race is stalled
Thank you for the praise, I will say in advance that we have already finished the repairs a long time ago, and have already finished the running-in, and on top of that we went to dalnyak to Altai, but the description on d2 has not moved beyond chapter 3, alas - (
but about a set of gaskets - this is the only option, because some gaskets can be obtained separately - it is simply impossible
there are also cases when the gaskets in the kit are for some reason worse in quality than those that can be bought separately (this is true mainly for laying under the head), so what to learn
And I'll take the baton from you! )))
Do you mind? ).
Expect a similar report from me soon).
Andrey, Maxim! Excellent, competent and interesting report! Nice, competent photos with the right angles and clear explanations! Keep it up! ))) Guys - good luck in your difficult, but very exciting repair! I will immediately correct my mistake - I will order a full set of internal combustion engine gaskets (albeit expensive), and not parts!
you guys give figase!
Andryukh Max - publish the ManualFor Teapots - will be in demand unambiguously - everything is cool ... it really seems that everything is easy, simple and fast))))
good luck!
Yasnenko, you're lucky). Tomorrow I will take the second dinacle, and a couple of micrometers. I think about the inner gauge for now).
But thanks anyway )
Hi Andrew! I have a few questions? Will you answer?
1. Tell me, how much did you take with the internal gauge?
2. Did you take one internal gauge or for the connecting rod head also took an internal gauge, which is from 6 mm? Or didn't you measure the connecting rod head?
3. Did you use one micrometer or two? What do you think, if you take a micrometer with a limit of 50-100 mm and take a set of precise measures for it so that you can substitute and measure diameters less than 50 mm - will it be useful?
4. What special tool was needed? Well, there are some tricky keys under an asterisk, etc.?
Thanks in advance! )
hexagons - unscrew the pallet
well, the torque wrench by itself
Hello Kolya
1. I took the nutrimeter for free from Korefan from the Avtovaz-nsk rembaza -)
2. did not measure, the inserts were perfect, only one scratch - that's why they changed
3. we had a lot of everyone, for every taste and color, in general I think that your version has a right to exist, if the measures are really accurate
4.the stars were in the head, yes, long hexagons were also needed (they took 18 centimeters long)
Hi Andrew! I have a few questions? Will you answer?
1. Tell me, how much did you take with the internal gauge?
2. Did you take one internal gauge or for the connecting rod head also took an internal gauge, which is from 6 mm? Or didn't you measure the connecting rod head?
3. Did you use one micrometer or two? What do you think, if you take a micrometer with a limit of 50-100 mm and take a set of precise measures for it so that you can substitute and measure diameters less than 50 mm - will it be useful?
4. What special tool was needed? Well, there are some tricky keys under an asterisk, etc.?
Thanks in advance! )
go crazy!
mine came from yapi, the same garbage 1 in1!
in auk the mileage was 28 thousand!
after NG I take it to the capital, God forbid, that everything would be done without boring, although I foolishly already bought a repair piston :)
thanks -)
yes, we didn’t bore it, the engine, ideally, not counting consumables such as rings and liners
great report! I understand that you did not have to bore and left it as it is? by changing only the caps, rings, gaskets and so on for the capital?