How I covered the interior with carbon - Toyota Corolla, 1.3 L, 1993
Everyone has long known that carbon is sooo cool and that any real sports car should be dressed in it from head to toe. Cho - worse chtol? - I thought, especially after I watched the experiments of friends and acquaintances on this topic.
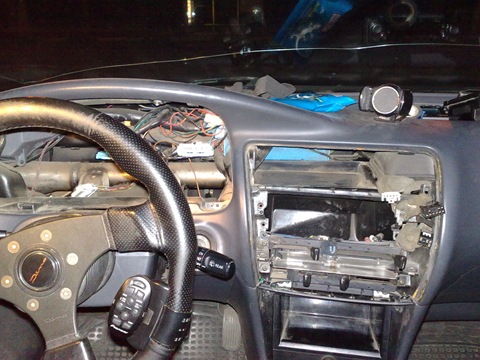
It has also been known for a long time that the factory color of the AE101 interior plastic is rather gloomy, therefore, a running meter of 3M Di-Noc 3D Carbon carbon film was purchased (such a piece pulled at 2,700 rubles), the same one that, for example, is covered with this famous verse: www.drive2. ru / cars / subaru… i / impreza_wrx_sti / 2lpr / 2 / Stocks of materials and tools were replenished with a hairdryer, 800 sandpaper and white spirit, well, all sorts of little things like concentration knives and the like. It took 2 pm to disassemble the cabin. I decided to refine the following details: door handle edging, 2 pieces, triangles of mirrors in the doors - 2 pieces, the upper part of the center console, the dashboard frame, two windshield pillars and an ashtray. I must say right away that there was enough film with a margin, despite the fact that I wasted it quite uneconomically.
The motto of the event is WARM AND PULL, with some skills this film works wonders, for example. In the first photo - the beginning of the tight-fitting of a complex podium (here is this comrade shonelann ), and in the second - what came of it:
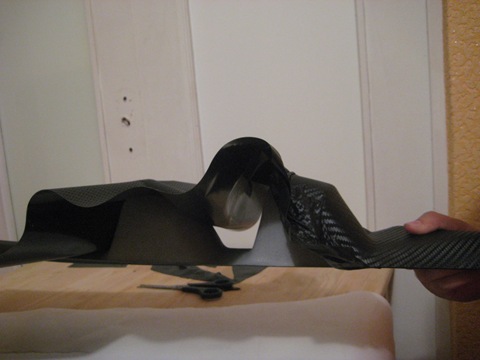
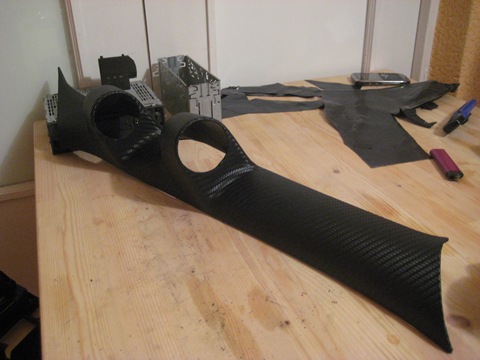
Here is a photo of the parts and tools with which they were carbonated:
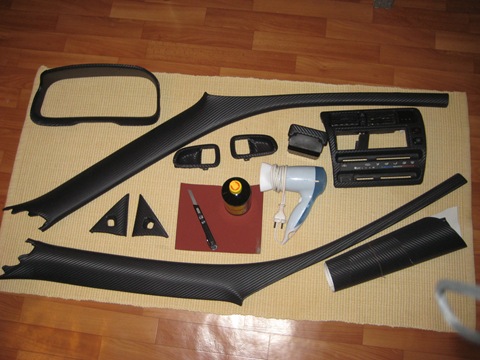
The process is simple: the part is sanded, degreased, a whole piece of film is cut out with a decent margin, peeled off from the substrate and applied. after that, the film is heated with a hairdryer, it becomes very plastic, it remains only to pull the edges and bend them by gluing. of course, there were enough difficulties, somewhere, for example, such details as the window for the clock in the central frame, it was very difficult and it turned out not perfect (
This is my favorite detail, covered in a single piece, only 1 joint:
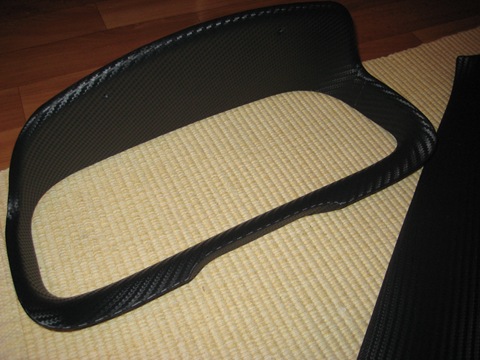
In the process, I had to travel for a week with such a salon, except that the tidy was in place)) Collecting it, by the way, is a tough thing, in particular, the central deflectors of the stove, the houses of cards rest because of their fragility in comparison with the fastening system of all the valves there! All elements of the center console were thoroughly rustled with Bitoplast during assembly - now they do not emit a squeak, they used to moan atsko on the bumps.
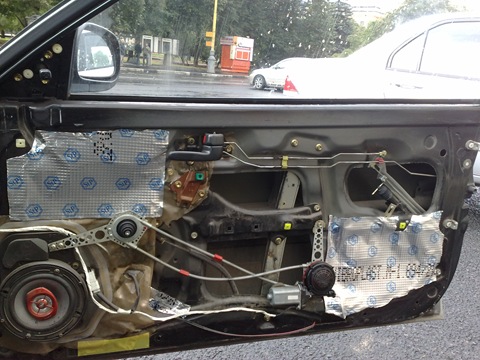
At the same time, the doors were slightly noisy, since I disassembled - a layer of vibroplast and bitoplast on top of it. It seems like the door dynamics began to play early
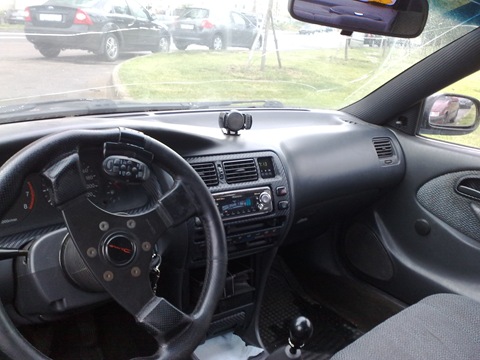
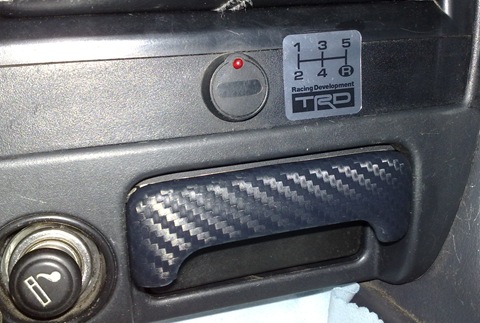
Well, the final photos of the results of the labors, sorry for the dirty interior) Did the
collective farm turn out or not? I like it!
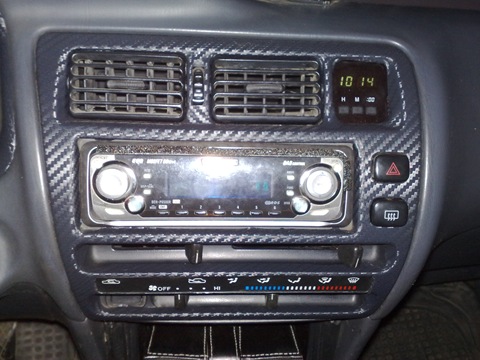
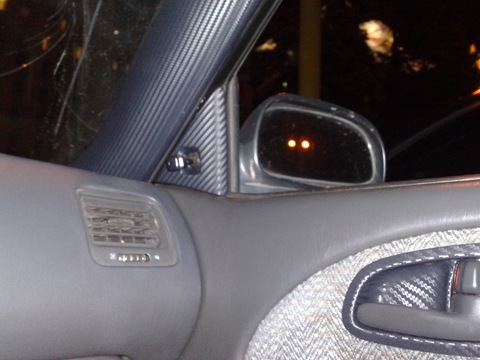
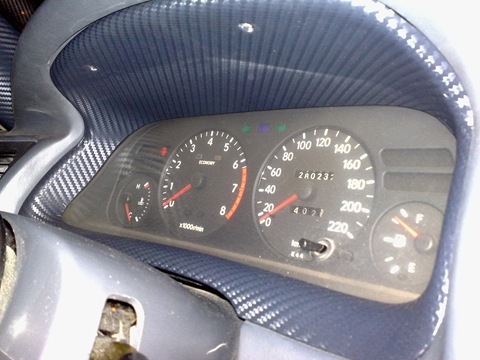
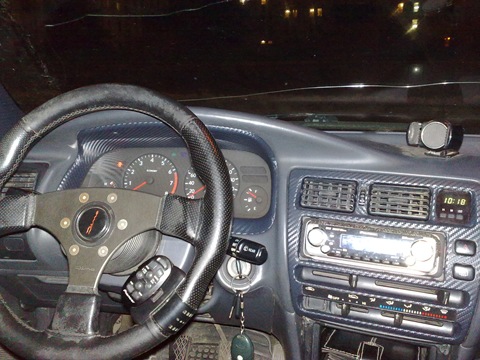 Price tag: 3 000 ₽
yeah, well done! and I'm a fine fellow) you need to complete the current and also lay out the report. Yesterday, by the way, I again removed the front door trim and sawed off the podium - I began to get up much better, but still not completely ...
I understand) this is really such a muddied pancake) but I can't look at such jamb, I need everything to be perfect) I will finish this topic.
Well, in my case, everything is not so critical as to overcome my laziness and go through this hell a second time))
Clearly, I have it stretched in the center console and on the inserts on the doors, I think to remove this all again, heat it up and from the back side treat these places with super glue so that they do not leave, it might work.
Senks! I swam from the sun around the clock on the console a little - it came off and stretched a little, but it's almost imperceptible, so I scored. Although kanesh should have thought about it - where tension and gluing were done hot - it was to be expected that upon reheating the film would tend to return to its original state. He just folded the edges and glued the non-reverse surface of the part.
looks fine) do you have the film around the edges of the film nowhere peel off after standing in the sun? And how did you secure the edges of the film from the back?
One must think)
Gray should be more interesting, otherwise everyone has black right now, boring.
I hope the above will help me! Only I ordered a gray film, but I think the quality of pasting depends on the color in the last place :)
Thank you) Right now, all the jambs that have come out, such as slightly departed corners, etc. eliminated - the eye rejoices!
Thanks. Not skinning is also normal. I glued the center console like that, because if something went wrong, it would be disfigured, and it’s not easy to find another one, it seems like nothing falls off. Bottle - white spirit for degreasing.
it turned out great! but if you do not sand? and another question for where all the tools are snapped, is it worth the bank?
the beauty! I also want, but not carbon fiber, but JDM. It is the small details and the difficulties with them that confuse