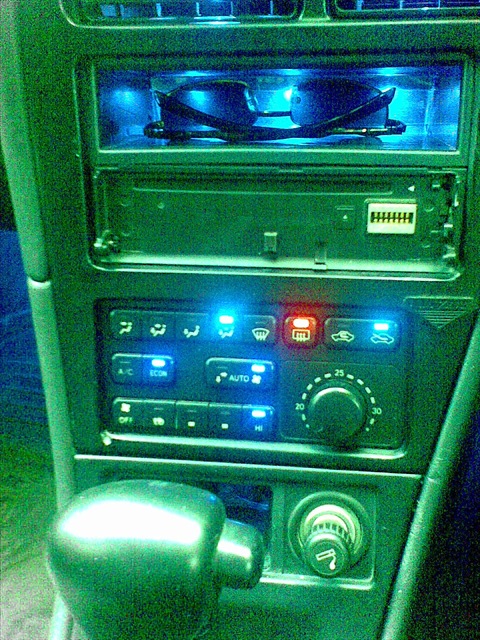
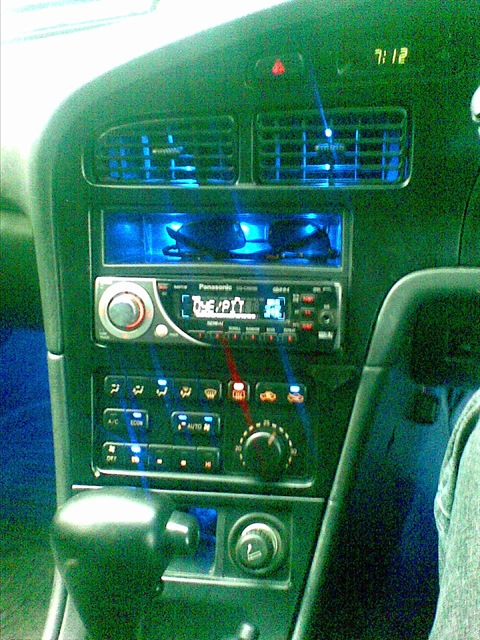
climate control lighting - Toyota Carina ED, 2.0L, 1994

I did not like the native climate control lighting. Well, nifiga is not visible during the day. Well, last weekend I climbed to remove the panel - one bolt of the radio tape recorder rang. Chet thought there was nothing to do. I decided to solder the LEDs in the climate. At the same time, it turned out that both backlight bulbs burned out there. What else struck me was that one LED was soldered incorrectly - the polarity was confused. And for some reason all of them are covered with red lacquer. In general, it was undertaken to replace the green with blue, in the color of the rest of the backlight, and orange with red. it took 14 blue and 2 red LEDs. Usual 3 millimeter at 3 volts. There were no white LEDs on sale, so for now I replaced the bulbs, the same as they were. It took a little over an hour. The tracks there are weak and some have moved away from the soldering iron - they had to be restored.


tell me what kind of bulbs I used? and are they sold everywhere? my hands are itching to change all the bulbs too))) I ask a specialist for advice! if I may say so
in climates, the usual 3 mm LEDs. I wrote above. And they should probably be sold in any store of radio components
well, yes, only with a soldering iron. You solder it, you remember where the plus and minus were (you can evaporate and check with a battery or two for one and a half volts). It is better not to be guided by the picture inside the LED. It turned out for me that the native LEDs and those that I bought differed exactly the opposite in terms of the internal pattern. Well, then you just fold the new ones into the shape of the old ones and solder them. There is nothing particularly complicated, but it is better to take a soldering iron no more than 25W, tk. the tracks are thin and old. A powerful soldering iron can easily damage them. I even managed to damage a couple of tracks with a 25-watt one
those that are in the climate, there are already circuits counted for the fact that the diodes will be three-volt (there the diodes are originally just standing, only green). And where I already did the backlight myself, I turned them on through 1kΩ resistances. Everything is still working. In the climate, however, the steam went out, but I think I messed up there with soldering and it just went away. It will be necessary to disassemble, but re-solder
In the auto network 12 -14 V ... You put the diodes on 3V ... do not burn out? How long have they been working?
the most ordinary climates go without any resistors. On the extreme, you can disassemble, turn on and check the turned on LED with a tester :)) From the tips: the soldering iron will not have very high power and try not to overheat the tracks, since they will go away if overheated (I damaged two of them, which I have now apparently went out ). Then another thing. Make sure the setting is correct (+/-). Those that I put on the internal drawing (or whatever you call it, were in the opposite direction). I just took two batteries (to make 3 volts), dropped one diode, and remembered how it was soldered, and found out where the plus is fed to it, then I performed the same procedure on the donor so as not to be mistaken. And then it would be somehow offensive to re-solder everything back. In the doors and in the automatic transmission buttons, I also changed it to blue in the future). But already in the key illumination and the cigarette lighter illumination had to be put through the resistance, tk. there is already 12V supplied
Thank you, that is, you can safely buy 3 volts in the store and put it on? I want blue ... I found a 12v 3mm with a built-in resistor on the Internet ... I read a lot of everything, but so far your feedback is the most convincing ... I just want to rewire the old greens into blue ones and that's it. ...