Install the Parking brake cover. Part 2 (masterclass)
Beginning in part 1
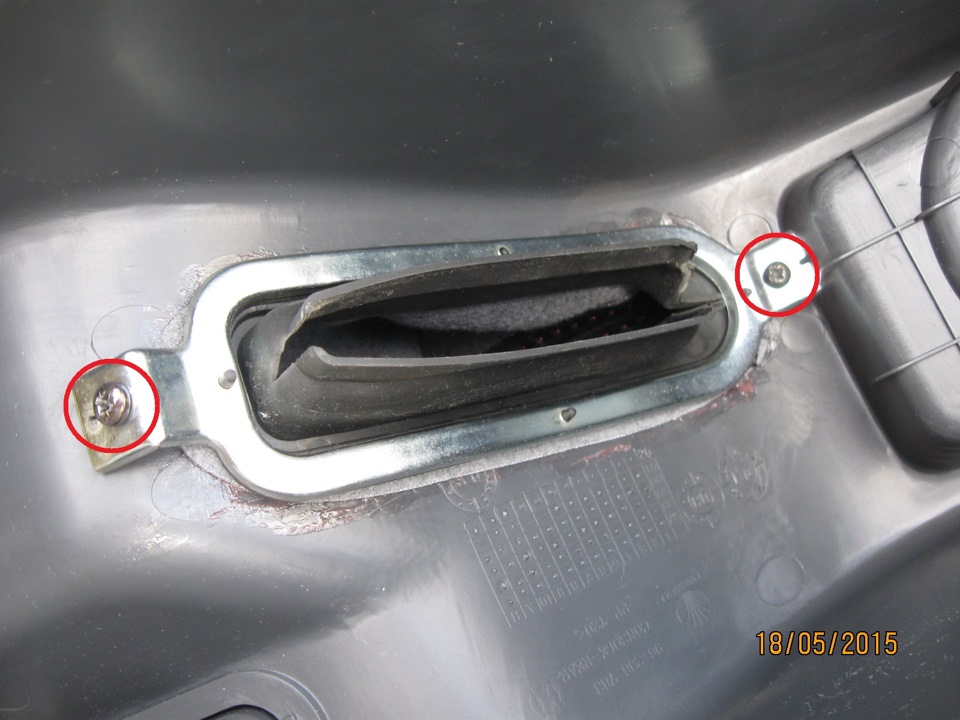
23. Turn the tunnel the handbrake, Unscrew 2 screws, and remove the rubber boot together with frame :
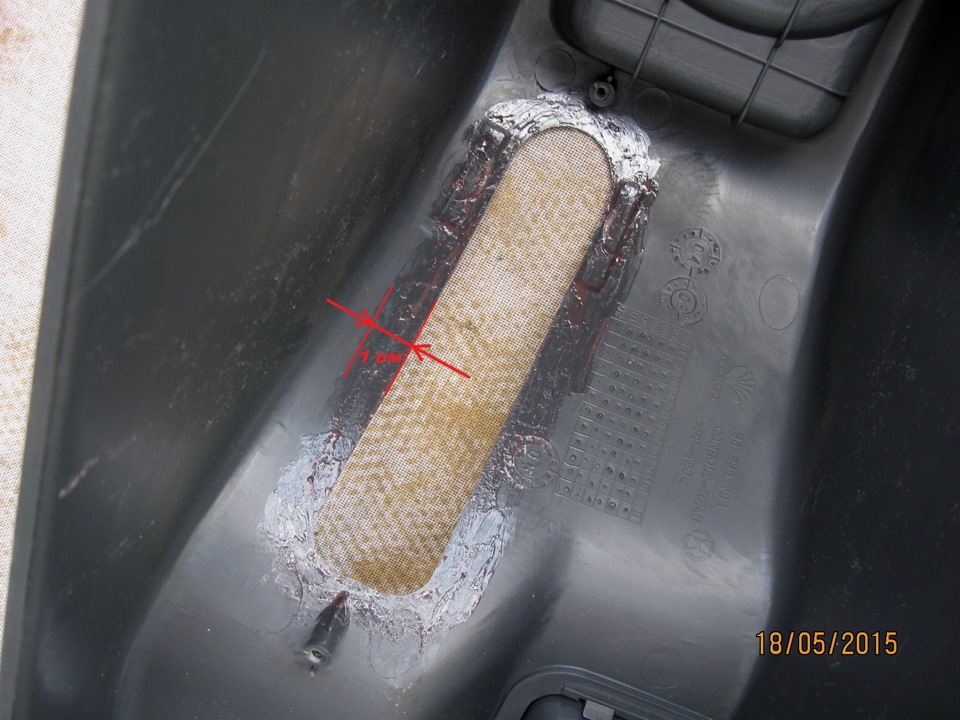
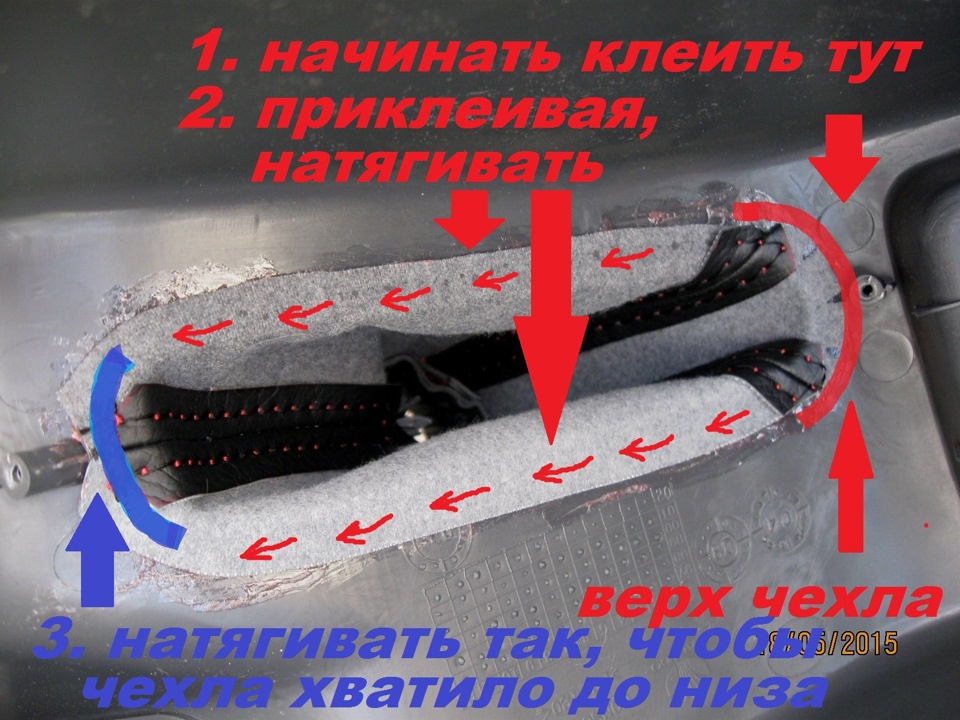
24. Spread around the hole of the adhesive, of a width of 1 cm :
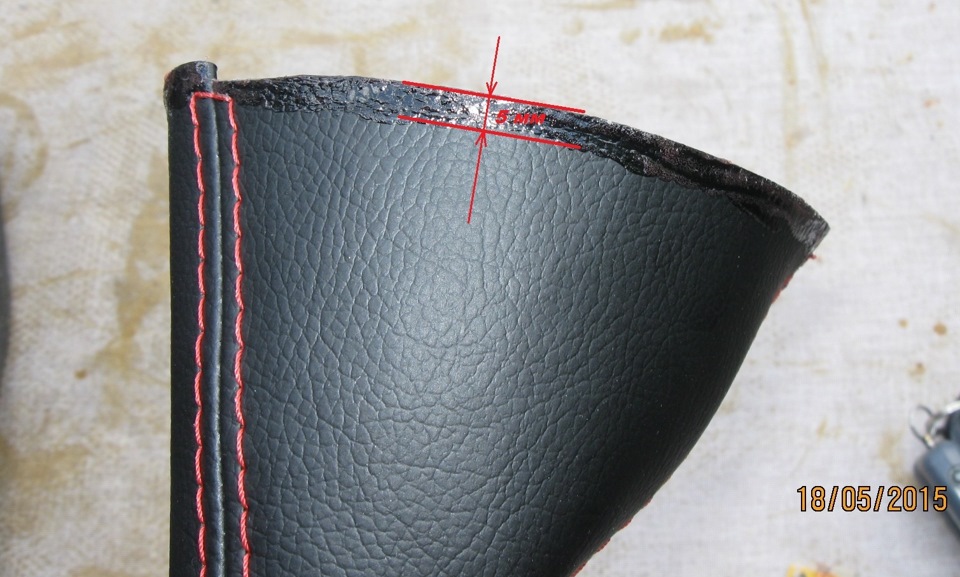
25. Smear a strip of glue on the base of the front of the case, a width of 5 mm :
26. After 5 minutes, glue the cover along the perimeter, the width of the contact 1 cm For the winding up case under the inverted tunnel, and starting from the top (curved) part of the case, gradually glue :
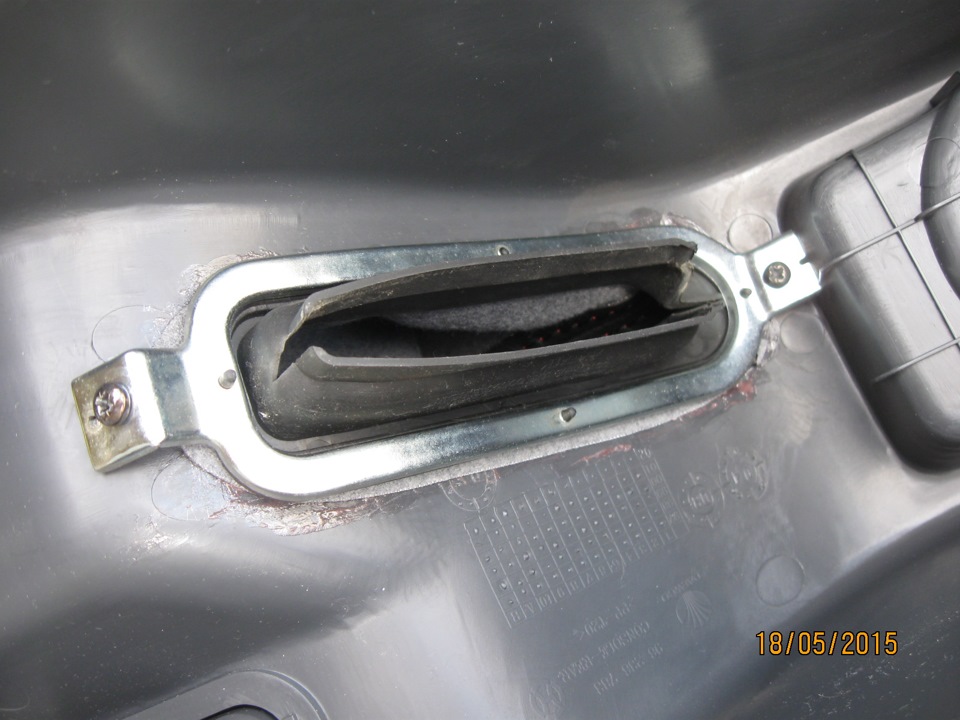
27. Fasten the rubber boot with frame :
28. Raise the handbrake.
29. If the handle of the handbrake tightened, then put a thick plastic package, suitable size :
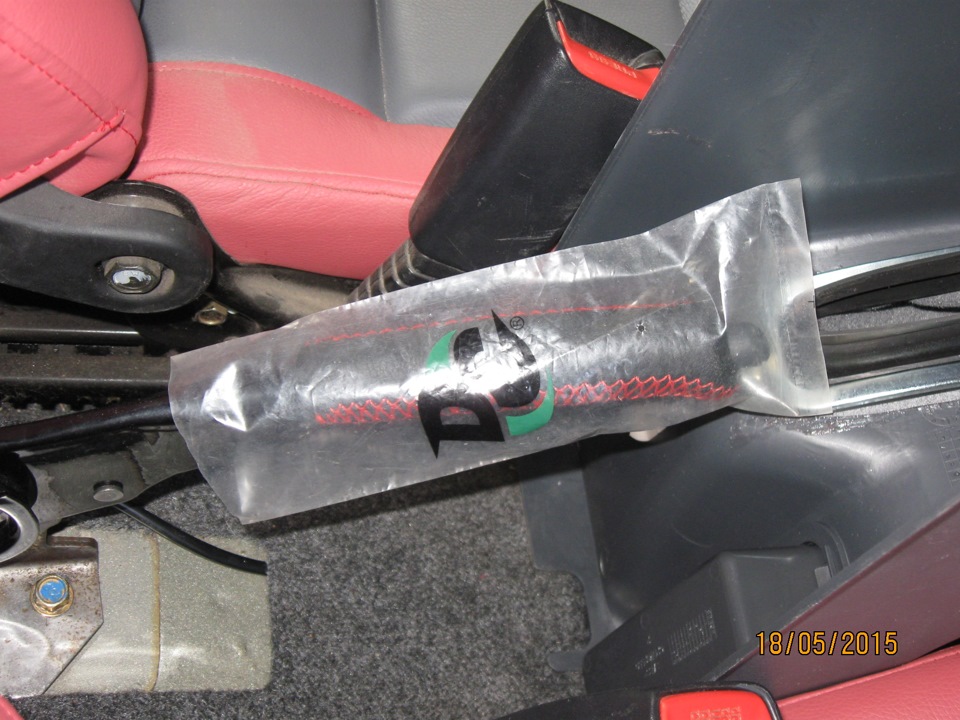
30. Set the tunnel in place, putting a cover on the handle of the handbrake.
31. Extend the front o-ring of the pouch across the handle until the ring is completely off the handle by a metal rygar the handbrake. Remove the cellophane package.
32. Recoverable adjustment lift the handbrake, turning the nut on the stock cable :
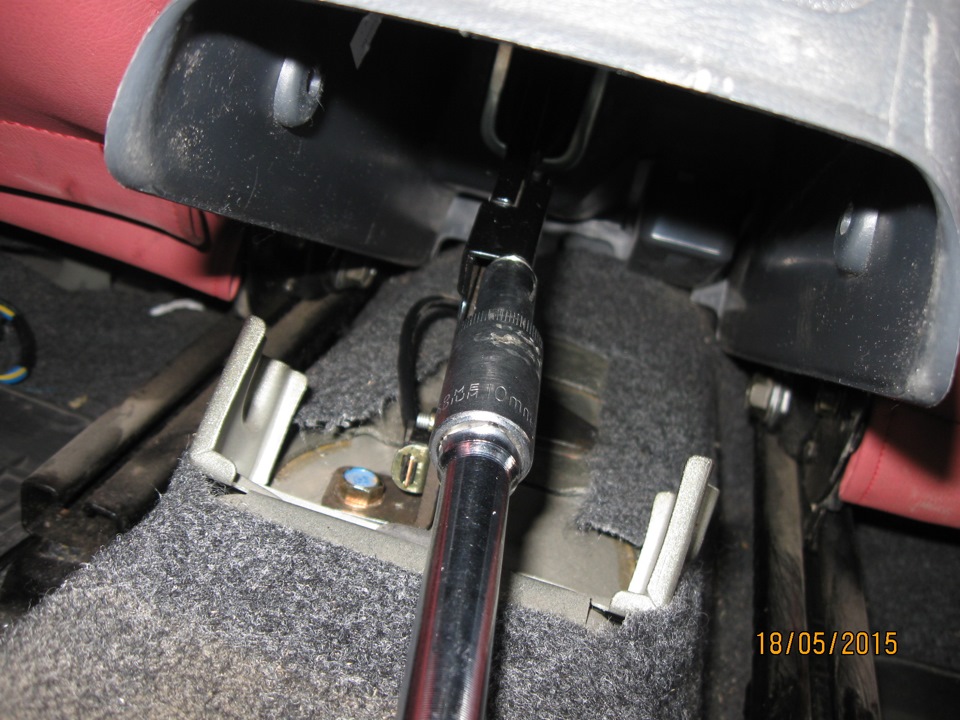
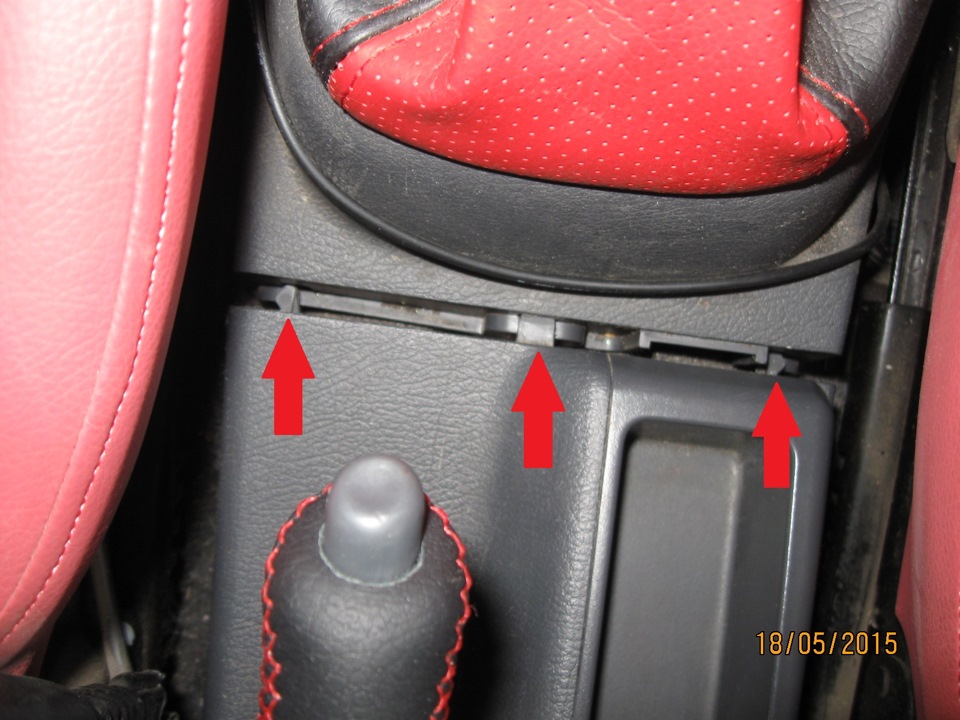
33. The factory front rails of the tunnel in place :
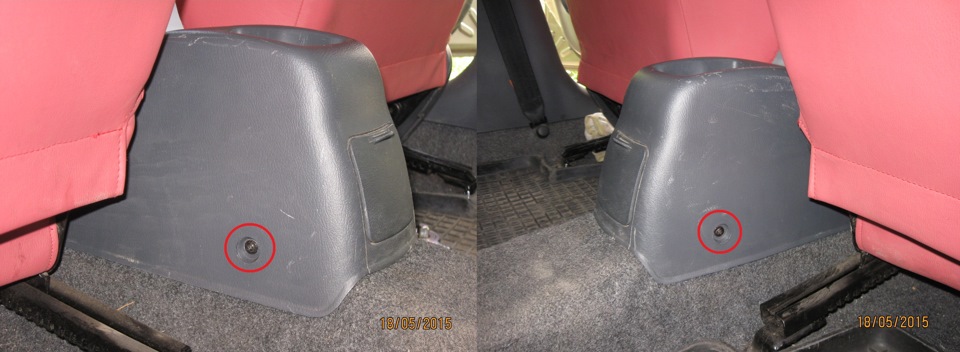
34. Fasten the 2 screws in place :
35. Slightly stretch the o-ring on the handbrake, as long as enough length of the case.
36. Do a finger recess in the cover under the handbrake :
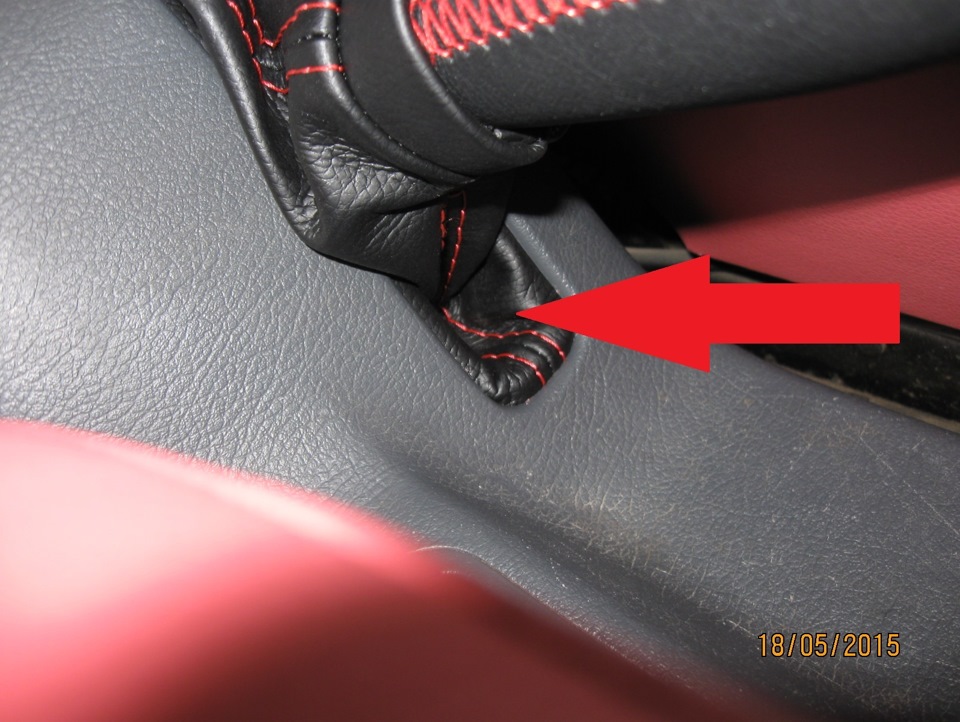
37. Fasten in place the front passenger seat if it was taken, and adjust their position.
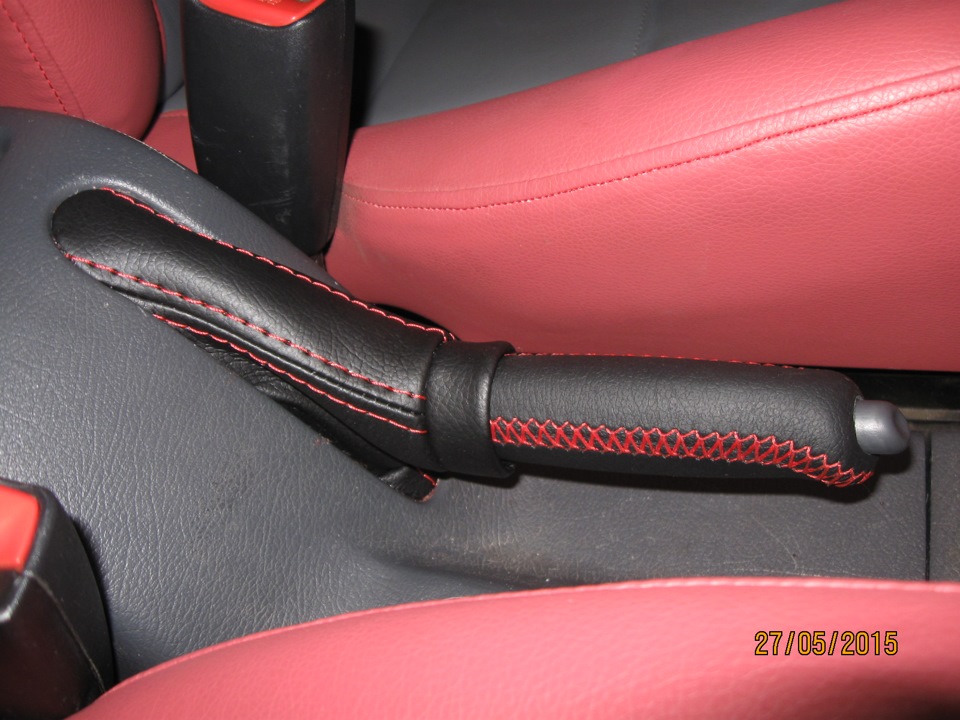
It should look like this :
The Contacts in my Group vk.com/club59714188 the first song in the Audio (Alen OFF — Here I Am). I kind of programm to play a couple of hours.
Don't know how You do with musical ability, but write manuals excellent! Father bow for the right makings!
Thank you !
My father was a journalist and writer. I something passed.
But I always wanted to be a musician ).
That's what I like in Your manuals, so this is a super detailed description of the process with quality in terms of clarity of photos! Good Master, VERY nice to work on such manuals!
Tried to ) 6 Hours no lunch, edited. I wanted a theme, and there are pictures not got ((
Thank you !
Usually, on the arms of CAT, I do seam to 5 mm on the outer circle (upper part) and the bottom part is adjusted according to the circumstances, to the number of stitches on both parts was the same. Bottom left stitch — 4.75 mm.
But it turned out that in this case — on straight joints — you need stitches the same (5 mm), and the curves near the buttons — the bottom stitch I did about 4 mm.
Remade 1 time. Didn't think of ). The cigar drew )
Well done, thorough approach to business.
how do you step do bridging the seam and decorative stitching step the same?
It's very simple )
I learned at Sberbank of Russia, and at the post office. With the price of a case 65 UAH. the cost of sending small parcels — about 100 UAH.
kompozitor
Yeah, me too. I don't know of any way to send to Russia and get money from there in our national currency.
Yes, everything is simple. You can send UkrPoshta. And the money to get yourself a WebMoney, throw rubles and the Private output of the hryvnia, Commission of about 1.5 per cent (VM+exchanger).
Yeah, me too. I don't know of any way to send to Russia and get money from there in our national currency.
Thank you !
I myself like ). And this is not often the case. Too high I the bar lifted ))
Strange, I replied yesterday to this message.
I'll try again.
Glued with red glue. It seems Tapicerki called. But in any polychloroprene (Time, Boterm, Airitaly, 88)
Remember summer +35, decided to put a cover of the handbrake, first tried on without removing the console, when I had to remove and disassemble do not need anything, then I will do the instructions, epat as I prorabotala then at the time of collection, the heat, the face fills then nothing happens, the mats had a lot Nacu I climbed back🙈 Then I can not say that everything was in its place, and this time I remembered
 Full size