Hauling the Handbrake handle. Part 1 (workshop)
Long wanted to master the constriction of the brake and to come up with a cover (boot) on it. Besides, I was often persuaded to make these elements of the interior.
Recently, looked in the Lacetti, and saw the factory case. Thought Lanos is not much worse, but something even better, so, too, has the right to that part yet ).
We will need :
— Phillips screwdriver
the key with a head on "12"
with a globe or cap key on "10"
— a little polychloroprene adhesive (such as "Time", or "88")
silver or black marker
— a large needle
ATTENTION !
If you have a tapered seat, or installed expensive covers to avoid damage, it is advisable to Unscrew the front passenger seat and move it back (towards the rear seat). The fact that the tunnel floor is removed easily, but installing it may damage the padding (covers), sharp corners plastic.
1. Move the front seats forward and Unscrew the 2 screws :
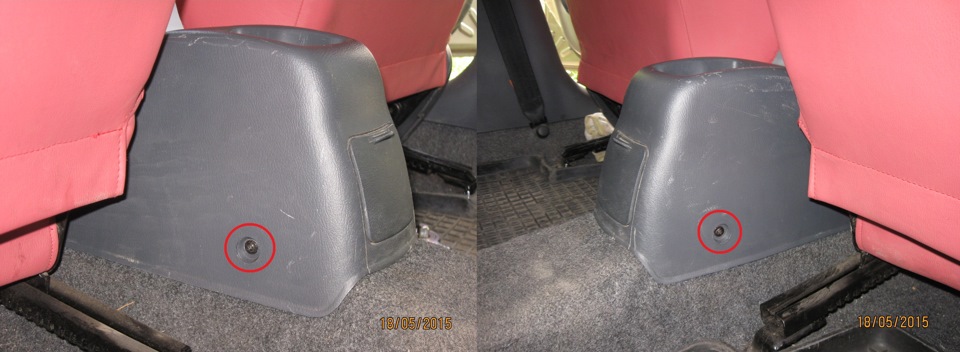
2. Tighten the e-brake (raise).
ATTENTION !
If the handbrake is well adjusted and lifted less than 15 cm, then raise the rear edge of the tunnel, measure tape a length of stock adjustment, record the reading, and turn off 1-2 cm nut the adjustment, a key on "10" :
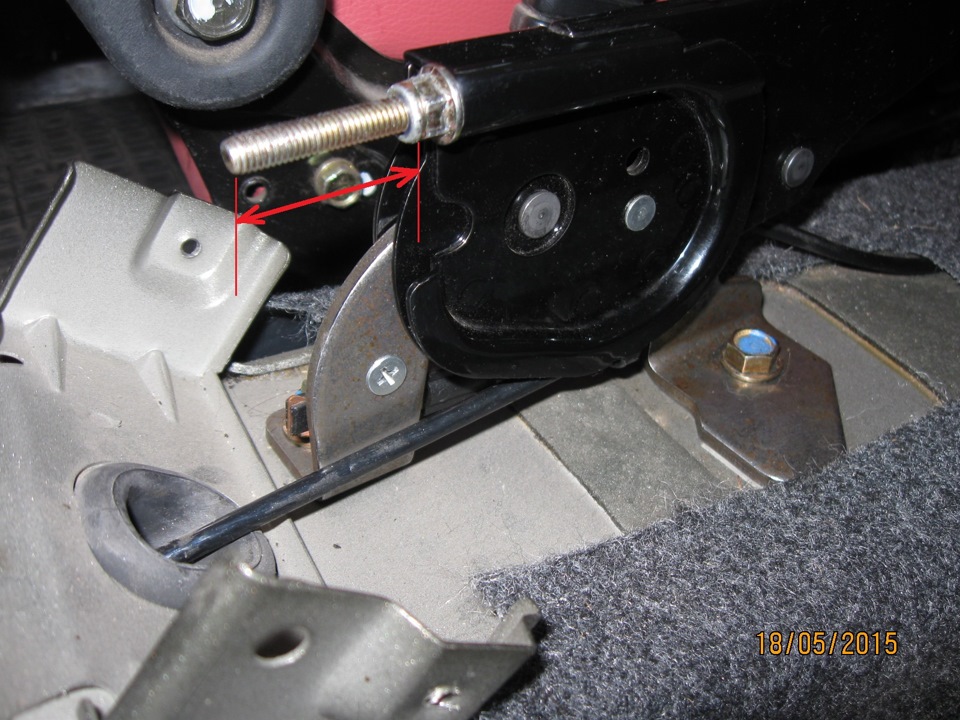
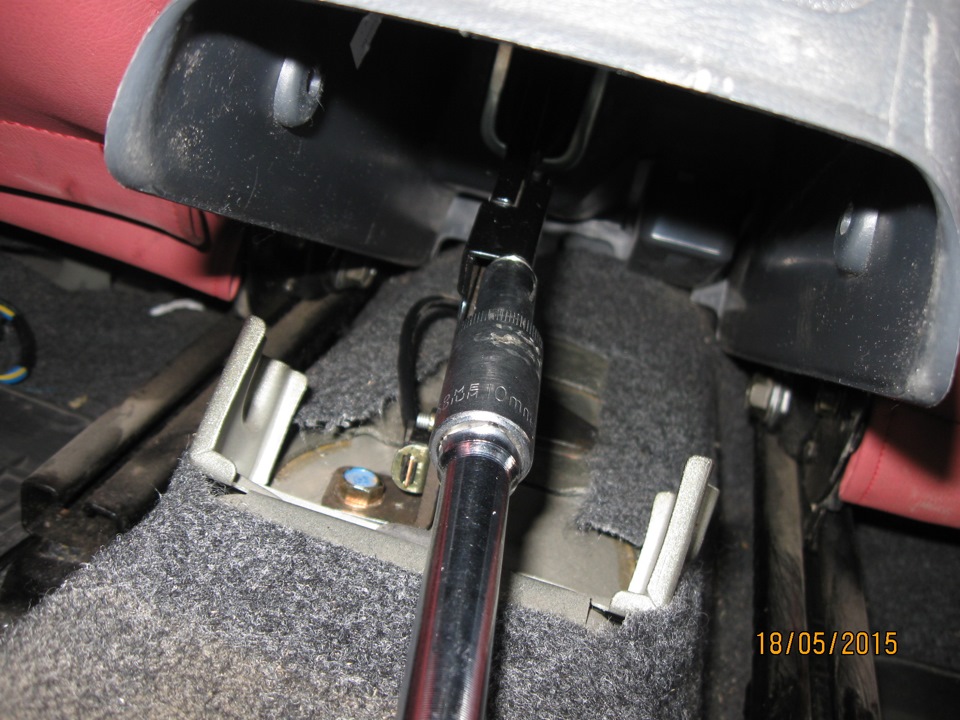
3. Drop the backs of the front seats in the back seat.
4. Slightly pull back on the tunnel on the back, bringing out of engagement of the front retainers
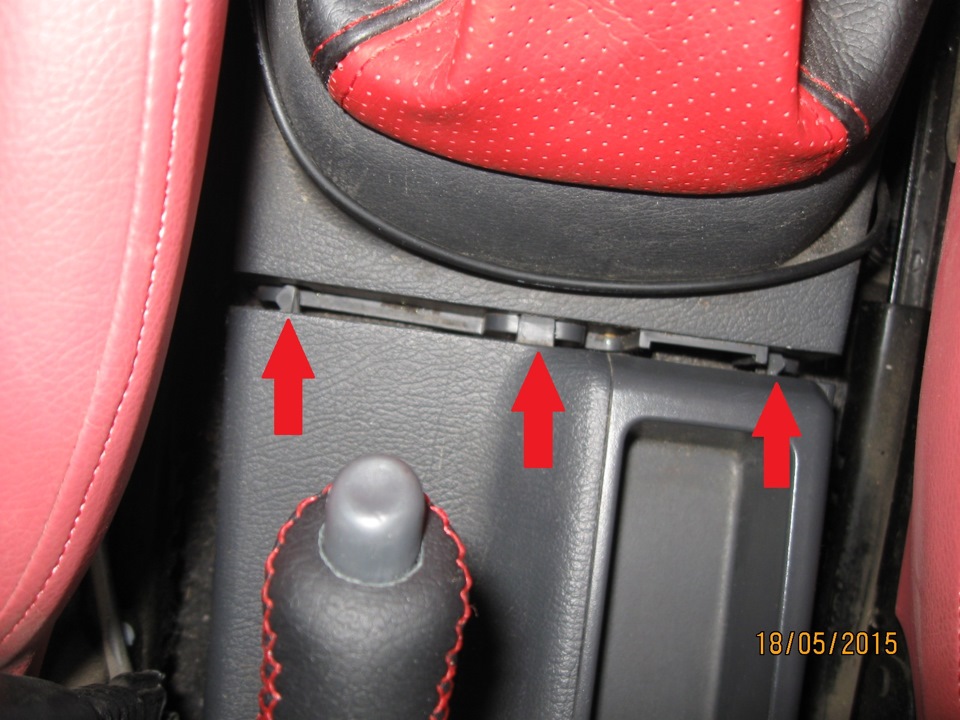
and raise the rear part of the tunnel, removing it from the raised handbrake.
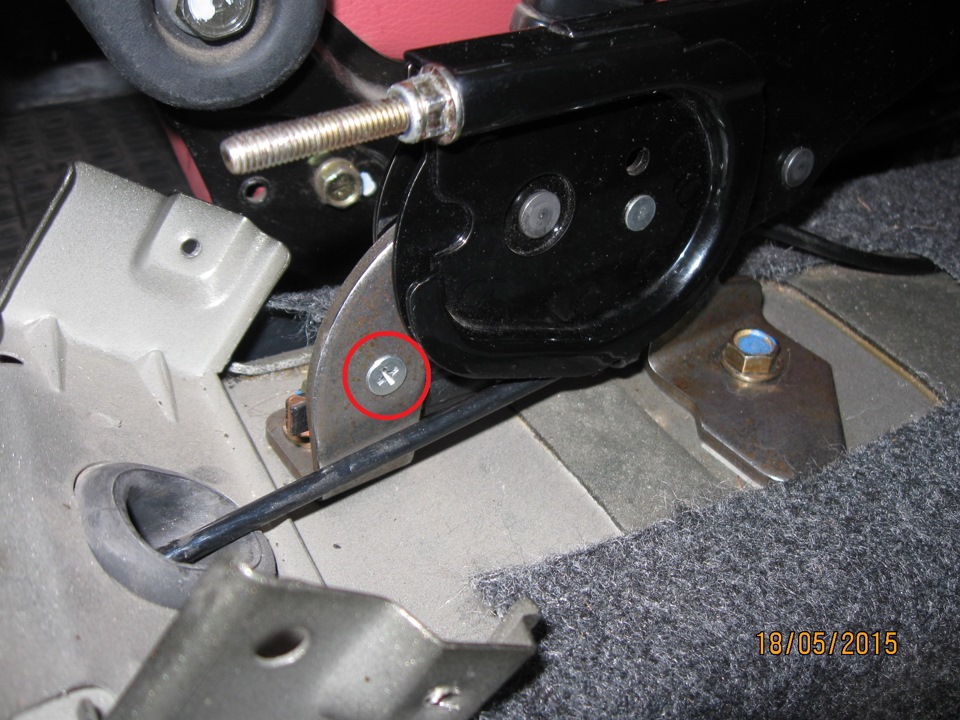
5. With a screwdriver Unscrew the screw of the sensor button Parking brake, and attach it to the side :
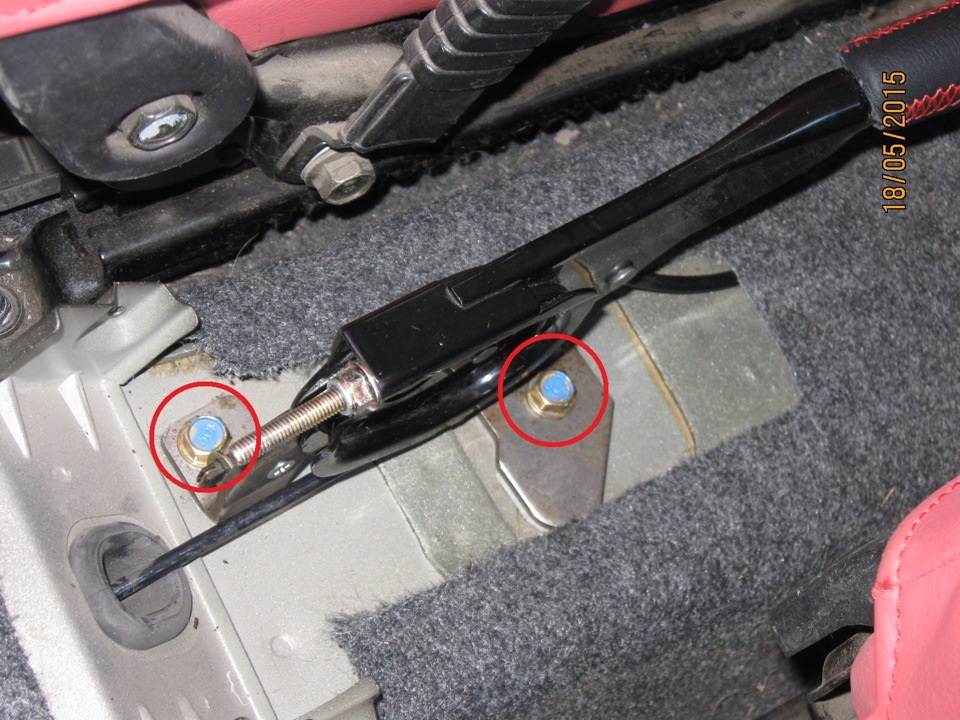
6. Unscrew the head on "12" — 2 bolts mounting the handbrake to the floor :
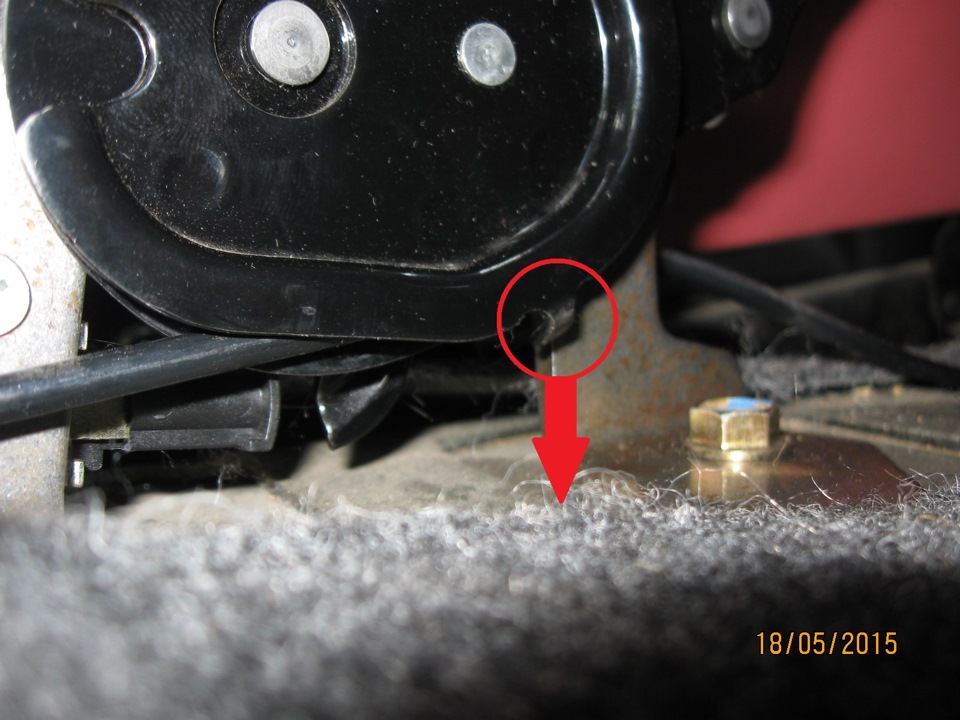
7. Tilting the handbrake on the left side, a pliers and slightly bent the cable clamp and Parking brake :
ATTENTION !
This latch is necessary in order that the rope is not jumped from his seat to the side. Don't forget to bend it back !
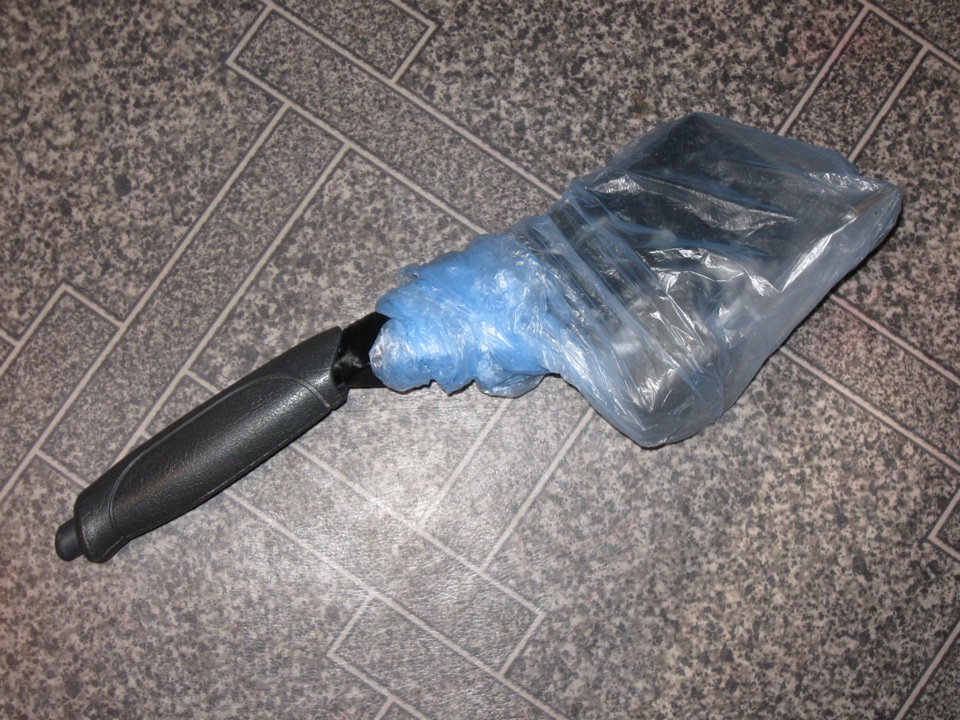
8. Pulling the handbrake, wipe it from dust, and to further the work not spacecats grease — winding the mechanism a poly bag. Fix the package with tape (or duct tape) :
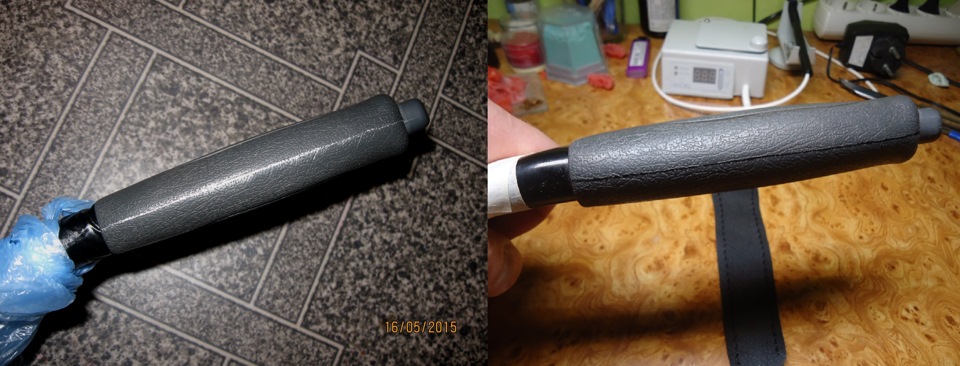
9. Degrease the handle with rubbing alcohol, dry completely, and technological lines of junction of the two matrix we draw lines silver (or black) marker, top and bottom. Wait until completely dry line marker :
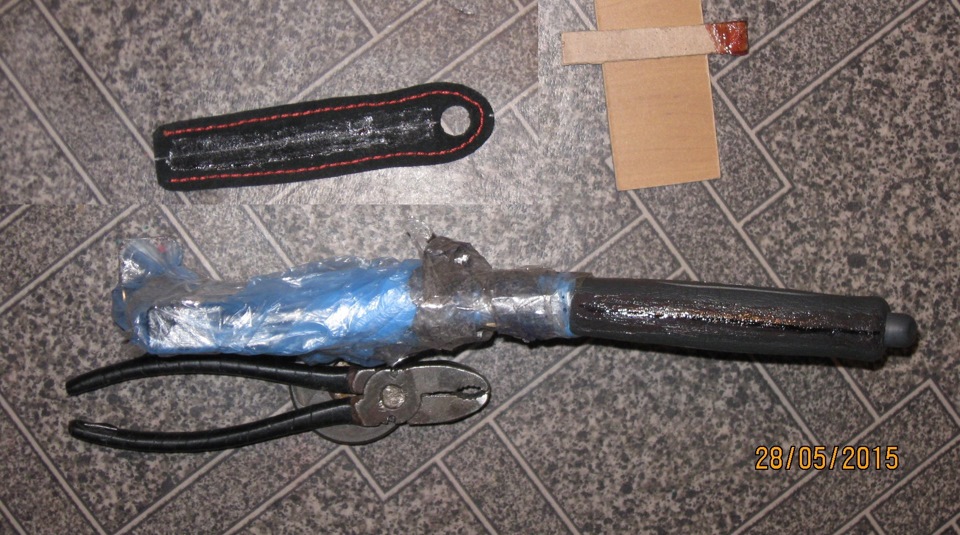
10. Apply glue to the underside of the top of the skin, not reaching 1 cm to the edges, and at the appropriate place on the handle. Wait 5 min until the glue dries to a sticky tape. Use a brush is not necessary. The best results are obtained — the adhesive strip Ditsky, size 1 x 7 cm (or just as strips of plastic, thick cardboard, etc.), stretching the glue as spatula :
ATTENTION !
If the skin is perforated, the adhesive should be applied very thin layer (or skin, and on the handle).
11. Put the skin on the button and holding a finger on the skin near the button — pull the skin in the beginning (on the curve). At the same time — watch, that round hole for the button — not stretched, forming a slit.
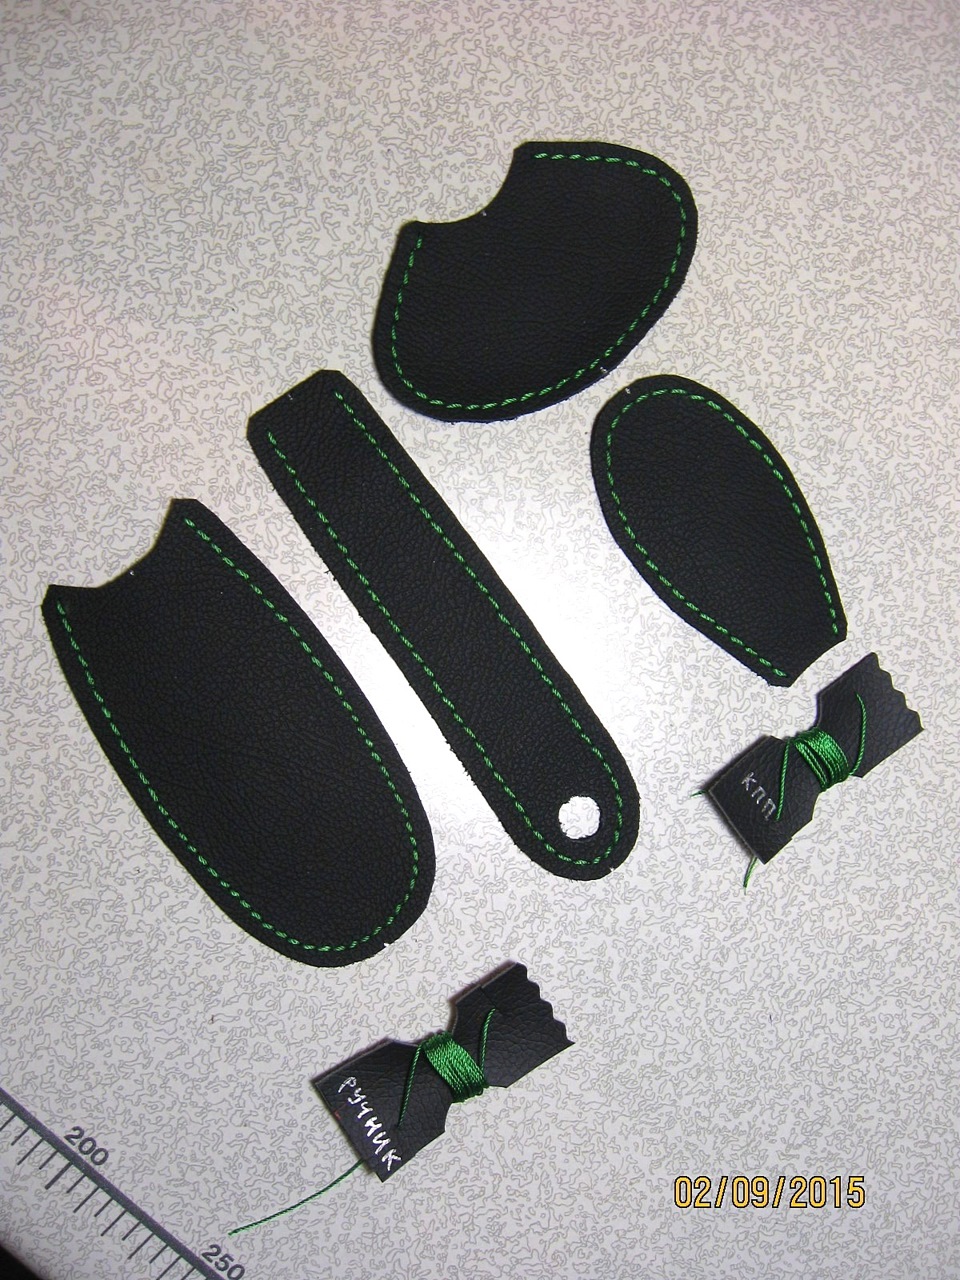
d-cd.net/2208192s-960.jpg width=960 height=720 itemprop=contentUrl>
Then — slightly pulling, just glued to the handle, making sure the stripes match the markup of the skin and the handle. A reference point can serve as the decorative grooves on the sides of the handle.
12. Apply glue to the underside of the lower part of the skin, not reaching 1 cm to the edges, and at the appropriate place on the handle. Wait 5 min.
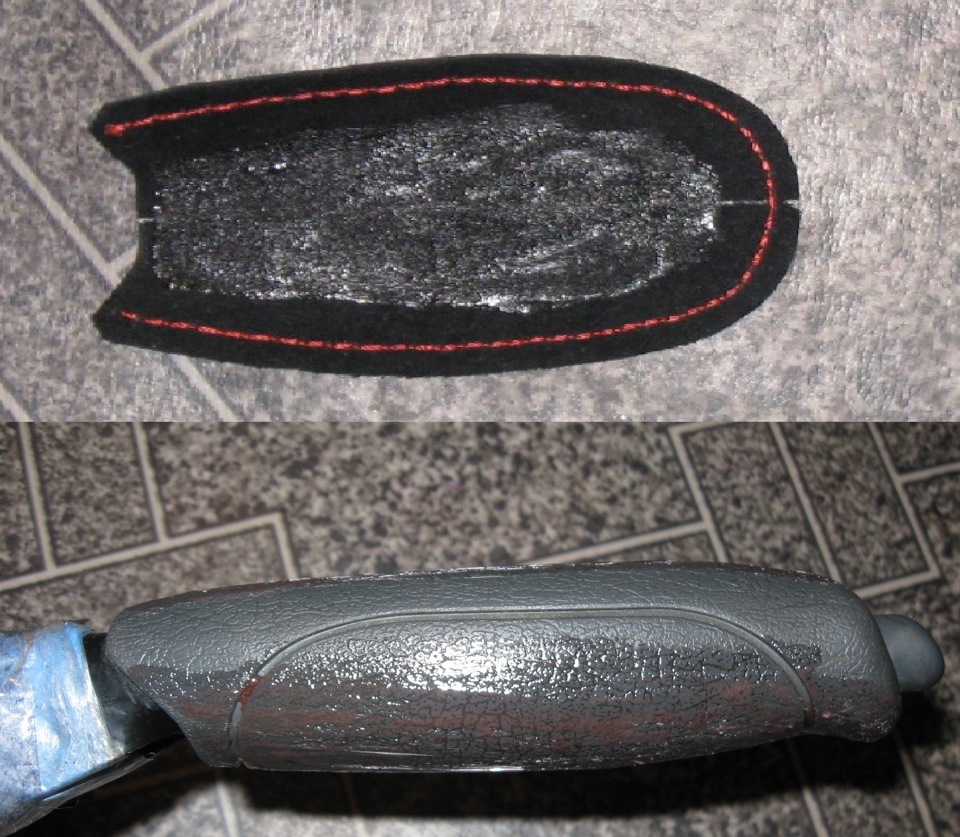
13. Apply the front part of the bottom of the skin tag the upper part (near the buttons) and adhere to the striped markings marker — slightly pulled in the length, sticking to the handle only in the area of the strips of the marker. Then, pulling the bottom skin to the sides — glue, as close to the junction with the upper skin. The bottom of the handle near the button is hollow. Therefore, particularly strongly pulled to the side near the buttons :
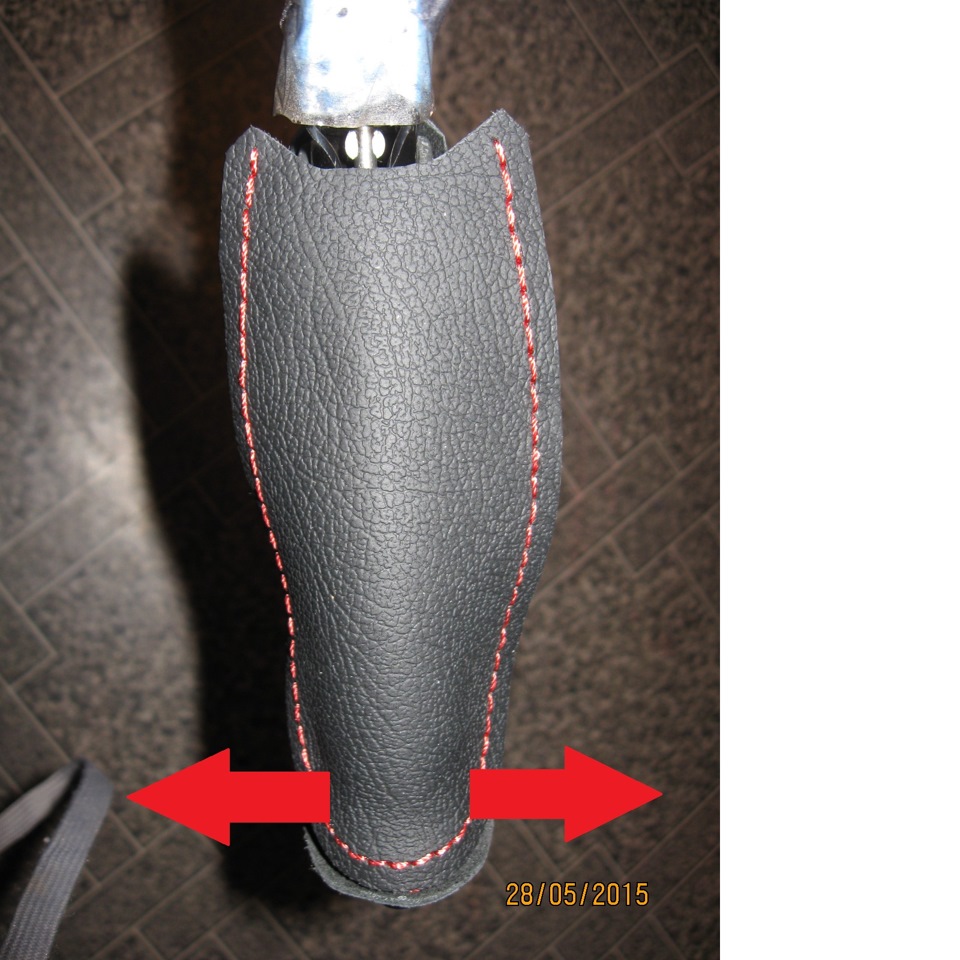
Between the lower and upper parts of the skin should be a gap of about 2 mm. This gap will now be drawn with a thread.
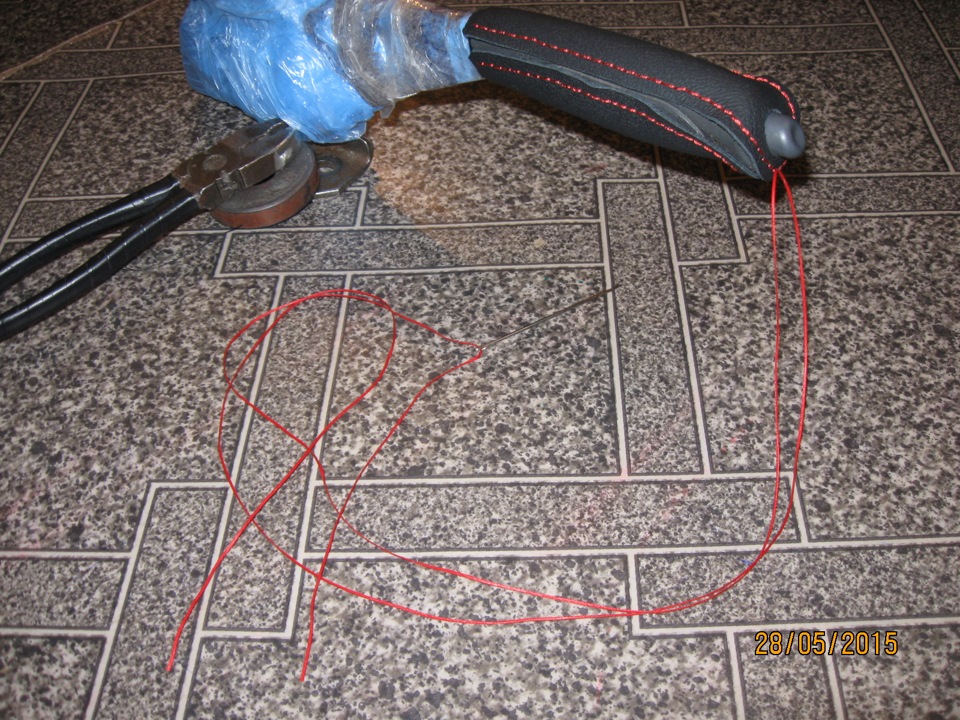
14. Now the most interesting one. Gypsy take a needle, insert the thread, and is threaded under stitch the top, right of the label.
Extend the string to its center. That is, on both sides of the stitch, should hang half a thread. One end of the thread will be stringing one side from the labels, and one another :
16. Threaded needle under the stitch, in front of which the label of the lower skin (2).
17. Threading the needle under a stitch of the top, left of the label (3) :
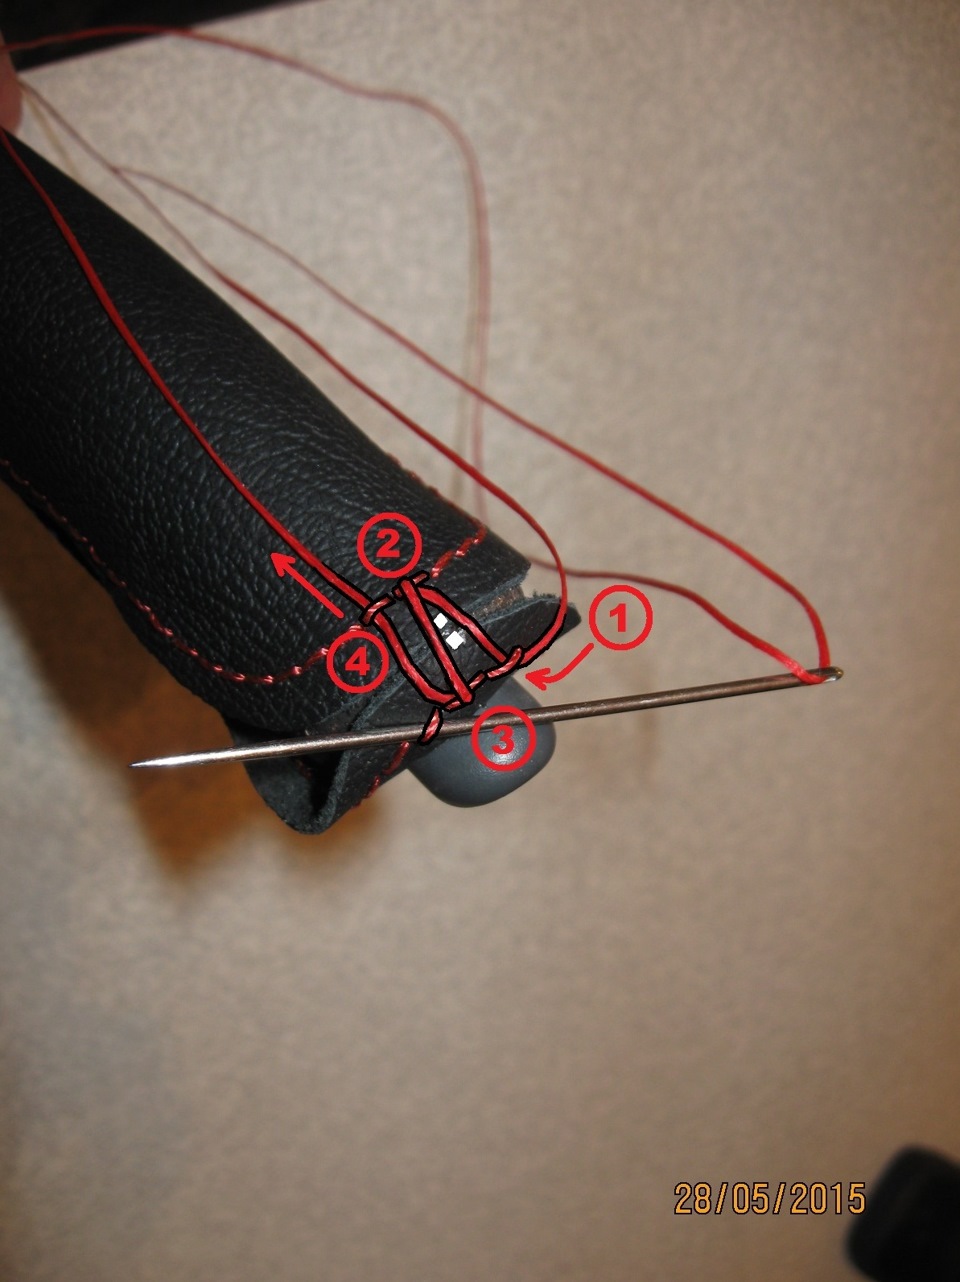
The principle is clear. So lace to the end. The needle must always pass under the thread from right to left.
ATTENTION !
Do not just tighten the thread ! Because pull one stitch. First you need to run it from both sides.
Carefully use boot fully under the needle thread.
18. The same thing we do with the other hand. But the handle need to deploy to stringing again from right to left :
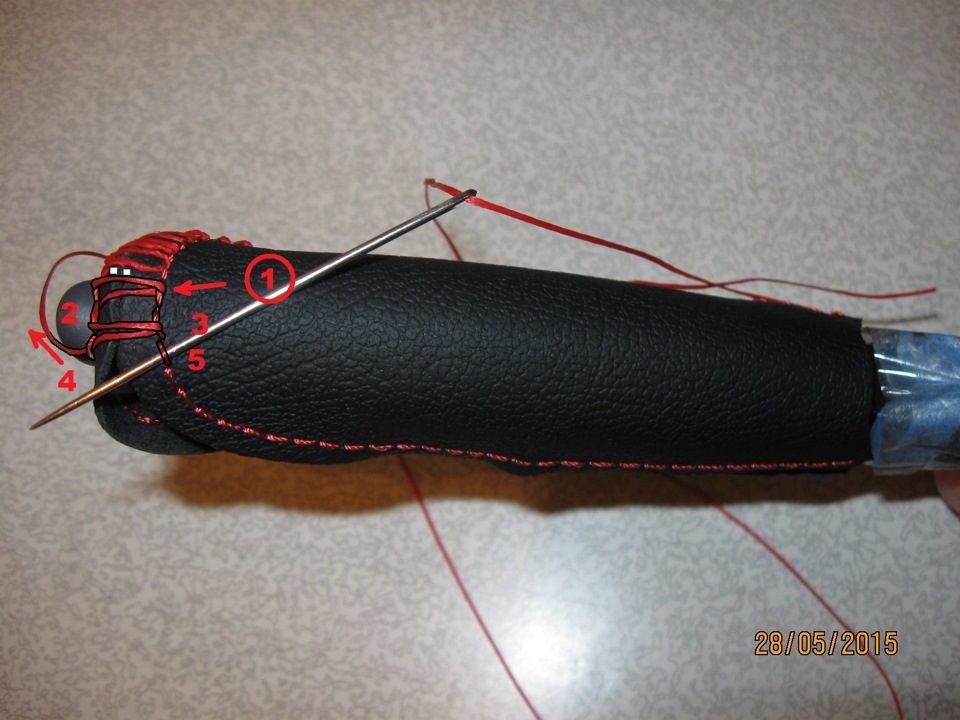
19. When both sides are strung, you need to start to slightly tighten them. Again, from the labels in the other direction. Is delayed the same needle, but at the other end (where the ear). To pry turns the top of the thread, and gently pull them.
Thus, gradually pulled thread from the labels to the bottom of the handle, 3-5 stages until both parts of the skin will not converge.
ATTENTION !
In the beginning, it will seem that everything is crooked, slanted, and generally turns out some garbage ). So it should be ! Leather ploska, and the handle is spherical. Therefore, only evenly and gradually pulling the thread slightly — leather will take the shape of a pen.

ATTENTION !
If while tightening noticed that somewhere accidentally stabbed the thread, the need to dissolve this far, and continue careful.
The thread is very strong, and the skin too, so if you need to, at the last stage, the thread can be pulled quite strongly. But at the same time, avoid slipping the needle under the thread, as it may damage the micro-fiber threads.
ATTENTION !
When you feel that everything is fine already tightened, check the uniformity of the width of the ornamental seam along the entire length. Where there remains a gap between the parts of the skin, still need to pull the thread and where the thread is pulled too skin — slacken.
20. When all the stretch, in the end, each side — fasten thread, making 4-5 stitches piercing the skin.
21. Melt every scrap of thread, a lighter, and press the finger, extinguishing it.
22. Set the handbrake in place, in reverse order.
ATTENTION !
Don't forget to bend into place locking the lock !
Continued in part 2, starting with "30"
I then another a couple of pictures to replace. In the process, not fotkal the taping of the handle.
I saw your topic in the Border. And actually, I reviewed almost all the threads where this was done.
Pen tried to twist, but I have very well glued. Just the lever is not pulled at 180 )). But, fortunately, it turned out that it is completely unscrewed. As far as I remember, I have Three vases, there is generally everything was welded and riveted (.
Done that in detail. But why not just remove to make itself the object of restringing-the plastic handle? Because it is easily contracted, if you scroll left-right.
Probably Yes. However, I don't know if it sew sewing machine. But for the decorative seams of the type of tree must be suitable.
For stitching — polyester Polyart 10. For the coupler, in this case waxed (but can be polyester).
Thank you !
By the way, I was in Volga, 88 year. The class went. And in Volgograd, too, of course ). All of the museums around. Loved it !
Thank you ).
I mean, where is the foam glued need ? For obessolivanija ? Best foam glue red glue. It is for the foam. Sold in stores upholstery fabrics, on tap, or in cans (Bterm Tapicerki).
Andrew, nice report, and you had cases when it was necessary to glue the foam, if so what glue worked.
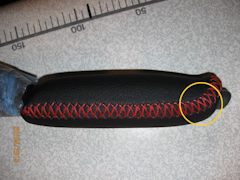
Most likely we are talking about these places, from two sides (photo).
There should be more while gluing to try to pull the skin of both parts so that the gap was minimal. It's hard, but possible. In the process of the screed continue to push parts of the skin to each other.
Seemed to be, and not simply the skin in these places to make it wider ? And here and there. Leather flat, and the handle in these places, round, so the skin should also be round. This is only possible stretch of the imagination.
I did it, so it's possible.
Please pay special attention to the words in paragraph 13 ("especially strong pull to the side next to the button")
 Full size