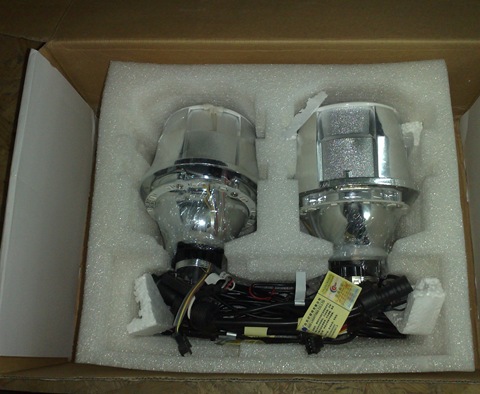
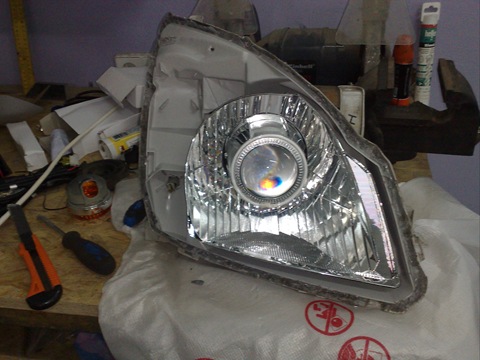
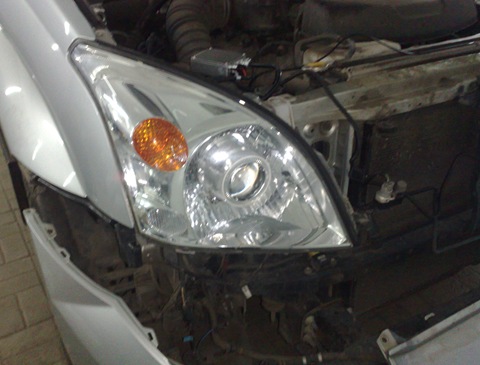
Installing Bi-Xenon Lenses - Toyota Land Cruiser Prado, 4.0L, 2005

I decided to improve the regular light, ordered bi-xenon lenses. I put it myself.

 Mileage: 83,000 km
The thing definitely shines better than the states. Manual corrector from reflector.
her. the first generation, on the contrary, is small ...
bihalogen.ru/e107_images/custom/nadia_2.jpg
bihalogen.ru/e107_images/custom/ollo5.jpg
the first generation I would not even put in foglights, this lens fits only into the headlight of the pradika, in general, quite large
:))) There are 4 generations of lenses) The first are the smallest) In the second they were enlarged)
This is similar to the second) the lens is large and the shape of the mask is appropriate
I shot twice while at first just pouring out the water, then drying it with a hair dryer! once dried without removing for about 3 hours. that is, I mastered this operation. at the last wash, he stupidly hung the headlight with a plastic bag and told the washer that if the headlight fogged up, she would dry it herself sexually. as a result - not a drop of moisture. it turns out that there is no particular alternative - you need to try to glue it again, but no - change it!
I do not recommend disassembling for this, thermal silicone is not suitable for this at all, the headlights have been altered more than once, according to your descriptions, there is definitely an increased humidity in the volume of the headlight itself, it is necessary to remove it from there. and everything will be ok, but as the most radical method, then lie down and temporarily glue a bag of silica gel, then definitely not when you will not sweat. And do not disassemble the headlight for this it will not be better.
the theme is! half a year after the xenon headlight began to sweat. I explained everything to the installers, they rode for two days - the effect of 0. I calculated that the headlight does not sweat from rain and puddles, but sweats immediately after washing. I walked along the seam with silicone, then with a thermal gun - 0. I want to disassemble, but I don't know what exactly to glue?
Hello! 1st who disassembled the headlights? 2. It is necessary to remove the rubber seals on the base of the headlight. 3. Heat the glass with an industrial hair dryer, about 50 degrees, on all surfaces, this will allow the vapors to escape from the headlight. 4.Around the perimeter of the headlamp junction, check the quality of the sealer, if it is not satisfactory, apply a sealant, preferably high-quality (transparent silicone is suitable), but I repeat only the brand one and with a neutral composition. 6 One weak point remains, this is the base seals, they must be treated with black silicone so it looks it's better. Everything should work out! if not write
Danya, my friend, answer an important question: how did you stick the headlight together, does it sweat, or else I have a problem with 200!
Greetings, it turned out great! If it's not difficult, discard a photo of the process with a description! I will be very grateful!
[email protected]
There are decent photos of the process! I'm interested in posting, and I will describe, this is not my first experience