ESP8266. The first switch
Hello
Having dealt with all sorts of exams, finally I have got hands to the things with which I have long wanted to play. It is Wi-Fi module for Arduino. Why did that was problematic?
Even 2 years ago, when I started to delve into the subject of microcontrollers, Wi-Fi shield for Arduino was worth$ 50. Totally inhumane price at the fact that the router can be found for 15 bucks. It is on this perverted people with firmware for TP-Link and others. Even I used the computer in order to connect the Arduino to the network, and blinked the led
But it's not, too cumbersome, expensive and inefficient. And finally, in the last year there was a solution that able to change the entire Internet of things — ESP8266. Overall this is a hellish invention of Chinese factories, which at first even the sane documentation was not. Now theme this device develops forces enthusiasts, we already have the first tools for development, new library and much more.
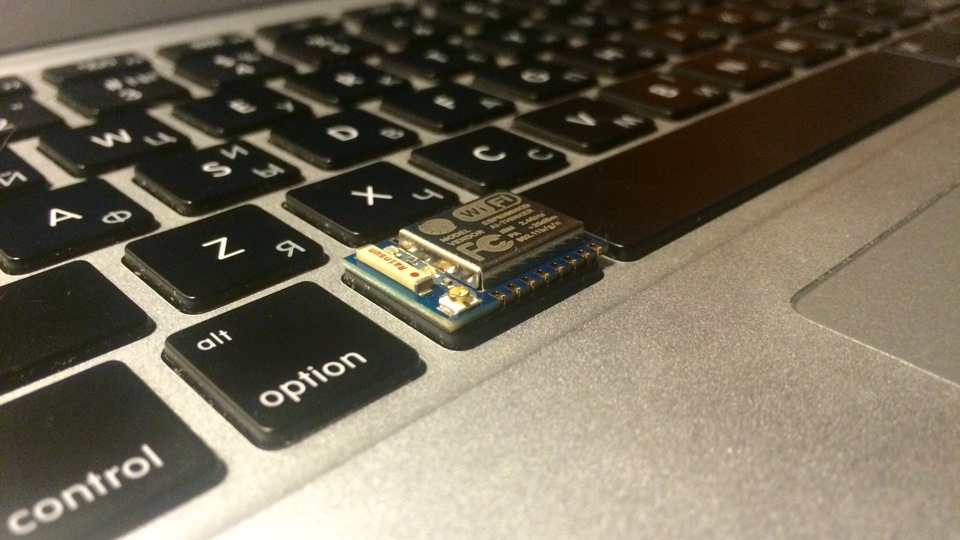 ESP8266-07. Rate size, does not entirely fit on the keyboard button
Well, let's start with the fact that this controller has about 15 buildings, different quantity of the output legs and Pinout.
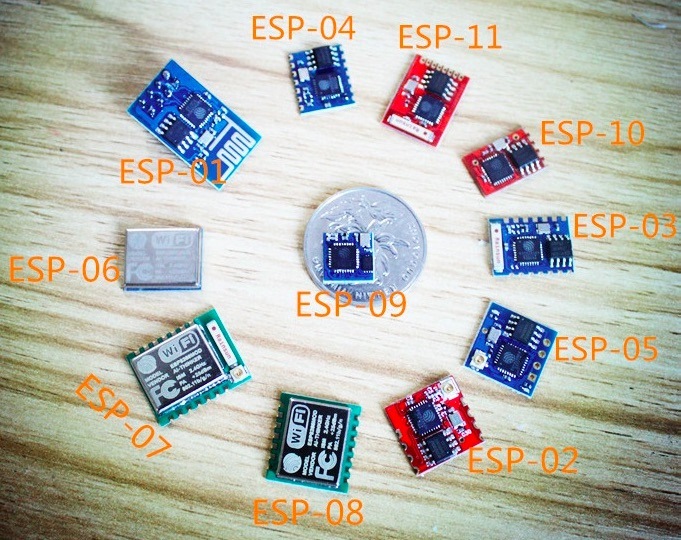
Photo taken here, there you can read about the differences of each module. At my disposal were the modules 01 and 07. First I took the ease of connection for the first tests, it is easiest to attach to the breadboard. The second is for small size, easy soldering at any fee, optional ceramic antenna. Actually, the best part of this device — the price. In Ukraine, I found them at 3.5 us dollar thing, and in China and$ 2 to find.
And that price looks even more impressive considering that the controller is able to:
is a complete device, it has about 15 I/O ports(depending on model), by default, operates at a frequency of 80 MHz, which can reach up to 160МГц, the chip has about 80 KB of SRAM, DRAM, and ~35Кб high-speed IRAM. And of course Wi-Fi.
— the controller can work as a UART-WiFi bridge, i.e. allows to enter a variety of Arduino, AVR and STM microcontrollers in the network at a fairly simple Protocol
— he can also operate as access point, that is, to distribute themselves around a Wi-Fi point. Connect to it, for example, you can fully control the device without access to the network. Similar is implemented in the popular quadrocopter Parrot Ar.Drone
Impressed? Also so wanted? So let's connect! :)
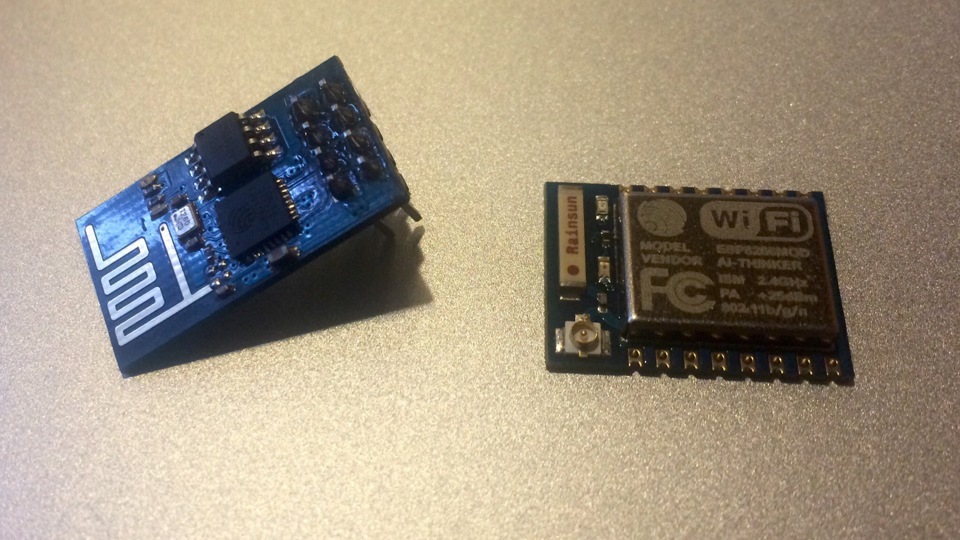 My initial set
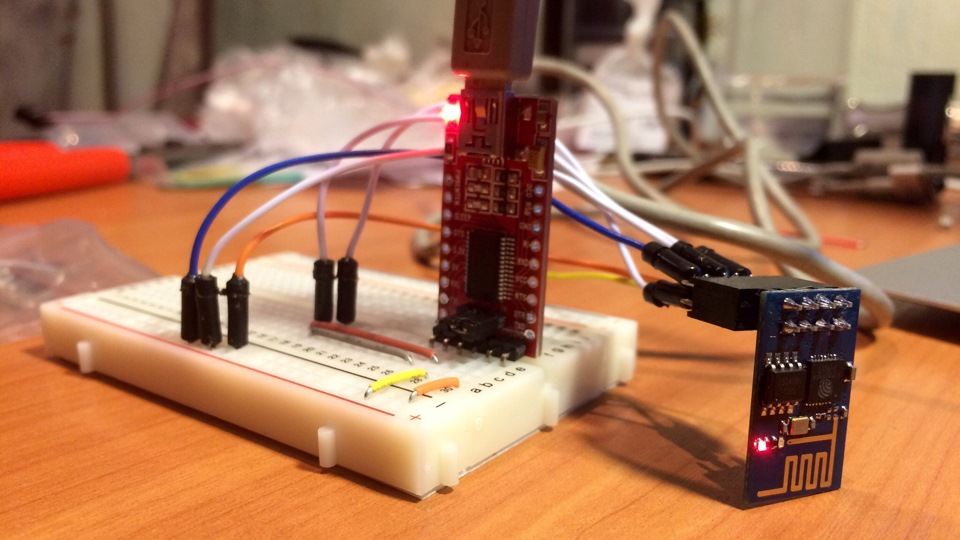 And the first connection
The scheme of the first connection is quite simple, but in the future will use a more complex version, which is better protected from interference. For unlock we need USB-TTL Converter having a supply 3.3 V. If your version is at 5V, then you need the stabilizer and the scheme is slightly more complicated. If a USB-TTL you don't have in hand, but there is the same Arduino, then you can do it. But there can be pitfalls, so this option will not describe
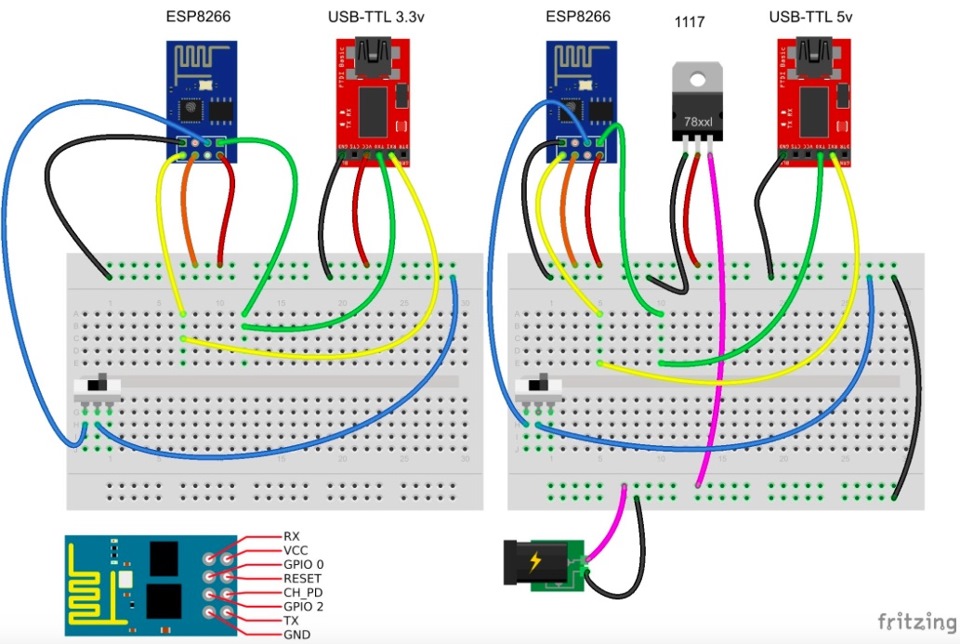 The left diagram for the Converter at 3.3 V, right side — 5V Pinout of module 01 at the bottom
As you know, the controller doesn't tolerate the food more than 3.6 V, so that it is necessary to be careful and recheck twice. Collect the simple circuit on the breadboard and connect the power. ESP8266 must include a red led and a couple of times to blink blue, and you will need a Wi-Fi network with the name "ESP_XXXX" or "AI-THINKER_AXXXXC"
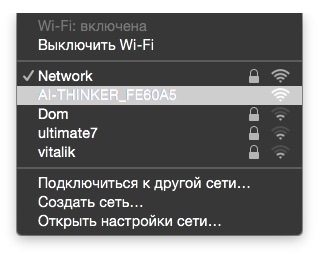
If so, then you can proceed to the next step, namely communication with ESP8266 via serial port. The network has a full terminal, I use CoolTerm. Can use any on your taste, but the program must meet the following requirement: each command that you send from the computer to the serial port must end with a CR+LF. For a start, installed the correct driver for your USB-TTL adapter, what would he adequately perceived by the system.
Then there is one Chinese trick.
Connecting to the serial port will have little pokoldovat in connection with the diversity of firmware for ESP8266, can be connected at different speeds. The desired speed can be determined by simple enumeration of three options: 9600, 57600 and 115200. How to iterate over? Connect the terminal program to your virtual serial port exposed to the following settings: 9600 8N1, and then switch off CH_PD (chip enable) from power supply (USB-TTL, however, remains connected to the USB) and turn on again (i.e. just cringe CH_PD).
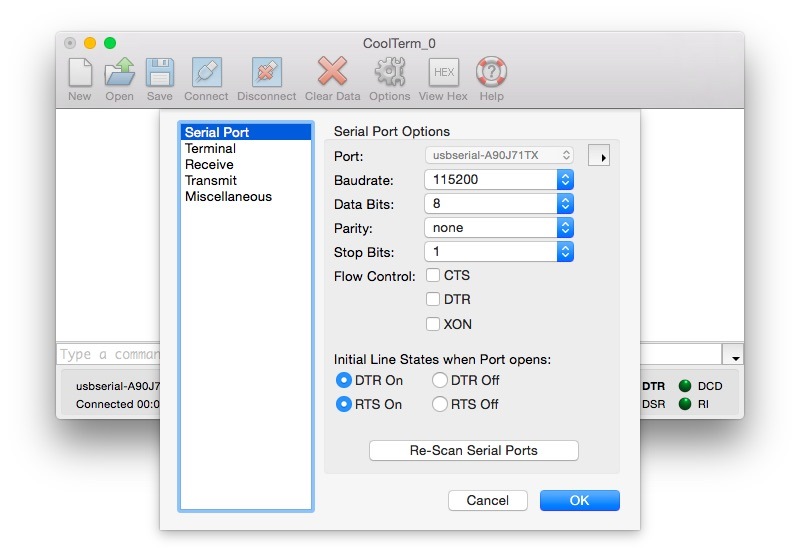 My port settings
Further, the terminal send the command "AT" (without the quotes). In response it should return "OK". Well, then you can check the version of your firmware with the command "AT+GMR". I have firmware AT 0.21, which you can find the following commands
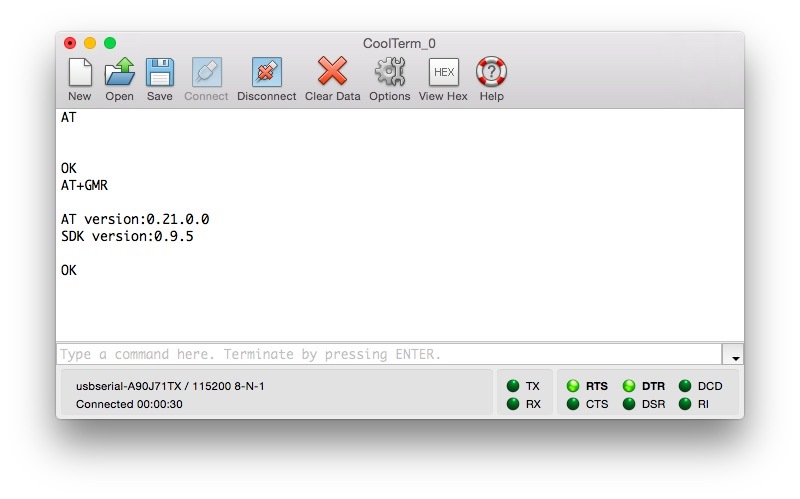 The correct answers to the team. At the wrong speed in the terminal — garbage
For starters, I think that's enough, you got something new — I will write more.
How in your opinion, what is most interesting: use ESP8266 as a net controller, or as a bridge to AVR?
MGOOK
Specific topics not yet just the first connection. In the car — hardly, the main theme will be sending different data to the cloud. I have connected with this summer internship, again a little later
I agree there are a lot of options. You can even make a display of vehicle status (temperature, alarm status, etc.). And to always know what the car next.
Specific topics not yet just the first connection. In the car — hardly, the main theme will be sending different data to the cloud. I have connected with this summer internship, again a little later
Interesting topic! Where do you plan to send? To manage or control a car from your phone...
Yes I am in Ukraine took on Ali is full of them, but did not want to wait
Here's an example ru.aliexpress.com/item/Fr...-1pc-lot/32364729570.html
As a pure controller is quite flawed, much more applications as the bridge for MK.
I have been reading, but it still looks promising. First, a home network deployed at 5 GHz, while the ESP work on 2.4. Secondly, they have the speed to restrict to b or g, the default for n work.
Useful thing. use for more than a year. Shove them wherever possible. there are all sorts Ethernet Schild and WiFi brige for scrap... But didn't think that I can visit to read about this...
I don't know what I read but was very interesting. Still one article — the same, but the language of normal user. What purpose I did not understand))
Yes, a little here, but useful tell need that you can stick to diagnosis the car, I will!
alterego2013
I'm such a module is turned into a Wi-Fi access point and put in the car. The car has Bluetooth headset Parrot.
On ESP8266 is powered if the ignition is on.
On the phone put Lliama — the program for automation of actions. Set up 2 events:
— when bodies are connected to ESP8266 TD, to turn on BT;
— when the bodies are disconnected from TD ESP8266, turn off BT;
Now, when I sit in the car, Bluetooth on the phone turns on the machine and the phone is coupled with a headset. Get out of the car — the Bluetooth on the phone off the machine.
PS the WiFi on phone on all the time.
if you have a phone on Android, this can be done using tasker for free
Cool solution, but I understand when the ignition is off the cap is cut down too. I would still have done the definition of being in the car on bluetooth beacons, they can be in full Avtonom set, without connection to the onboard network of the car. The batteries will be enough for the year.
Because personally, I have just exactly the opposite situation: bluetooth is always enabled, but Wi-Fi — no.
I'm such a module is turned into a Wi-Fi access point and put in the car. The car has Bluetooth headset Parrot.
On ESP8266 is powered if the ignition is on.
On the phone put Lliama — the program for automation of actions. Set up 2 events:
— when bodies are connected to ESP8266 TD, to turn on BT;
— when the bodies are disconnected from TD ESP8266, turn off BT;
Now, when I sit in the car, Bluetooth on the phone turns on the machine and the phone is coupled with a headset. Get out of the car — the Bluetooth on the phone off the machine.
PS the WiFi on phone on all the time.