Redesigned the dashboard - Toyota Celica, 2.0 L, 1992

Native illumination did not suit well…
I wanted to make an optitron. but it didn’t quite work out what was intended ...
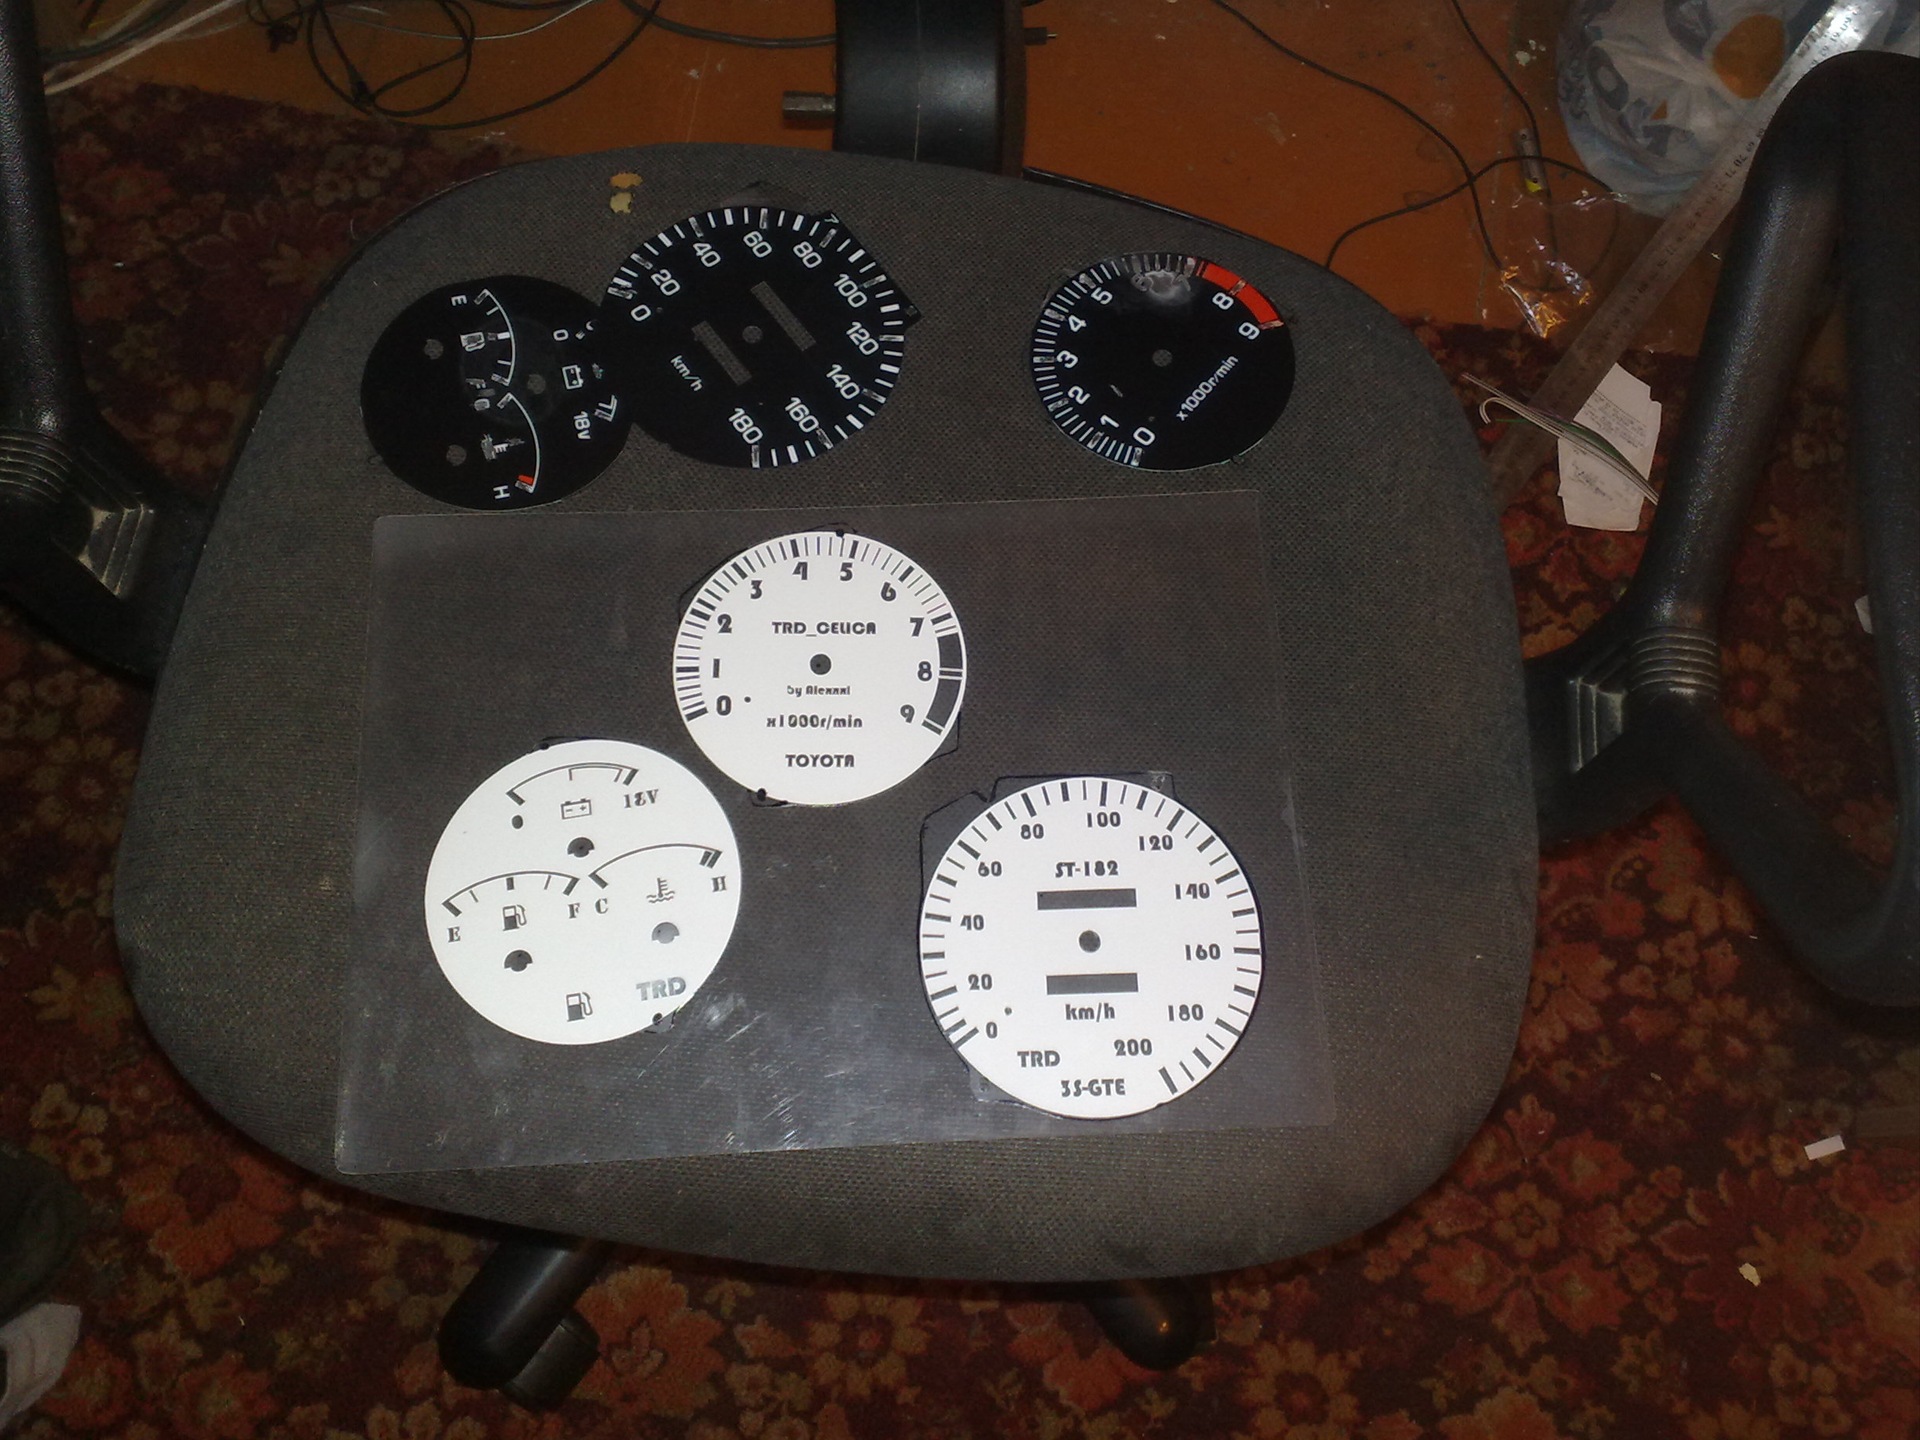
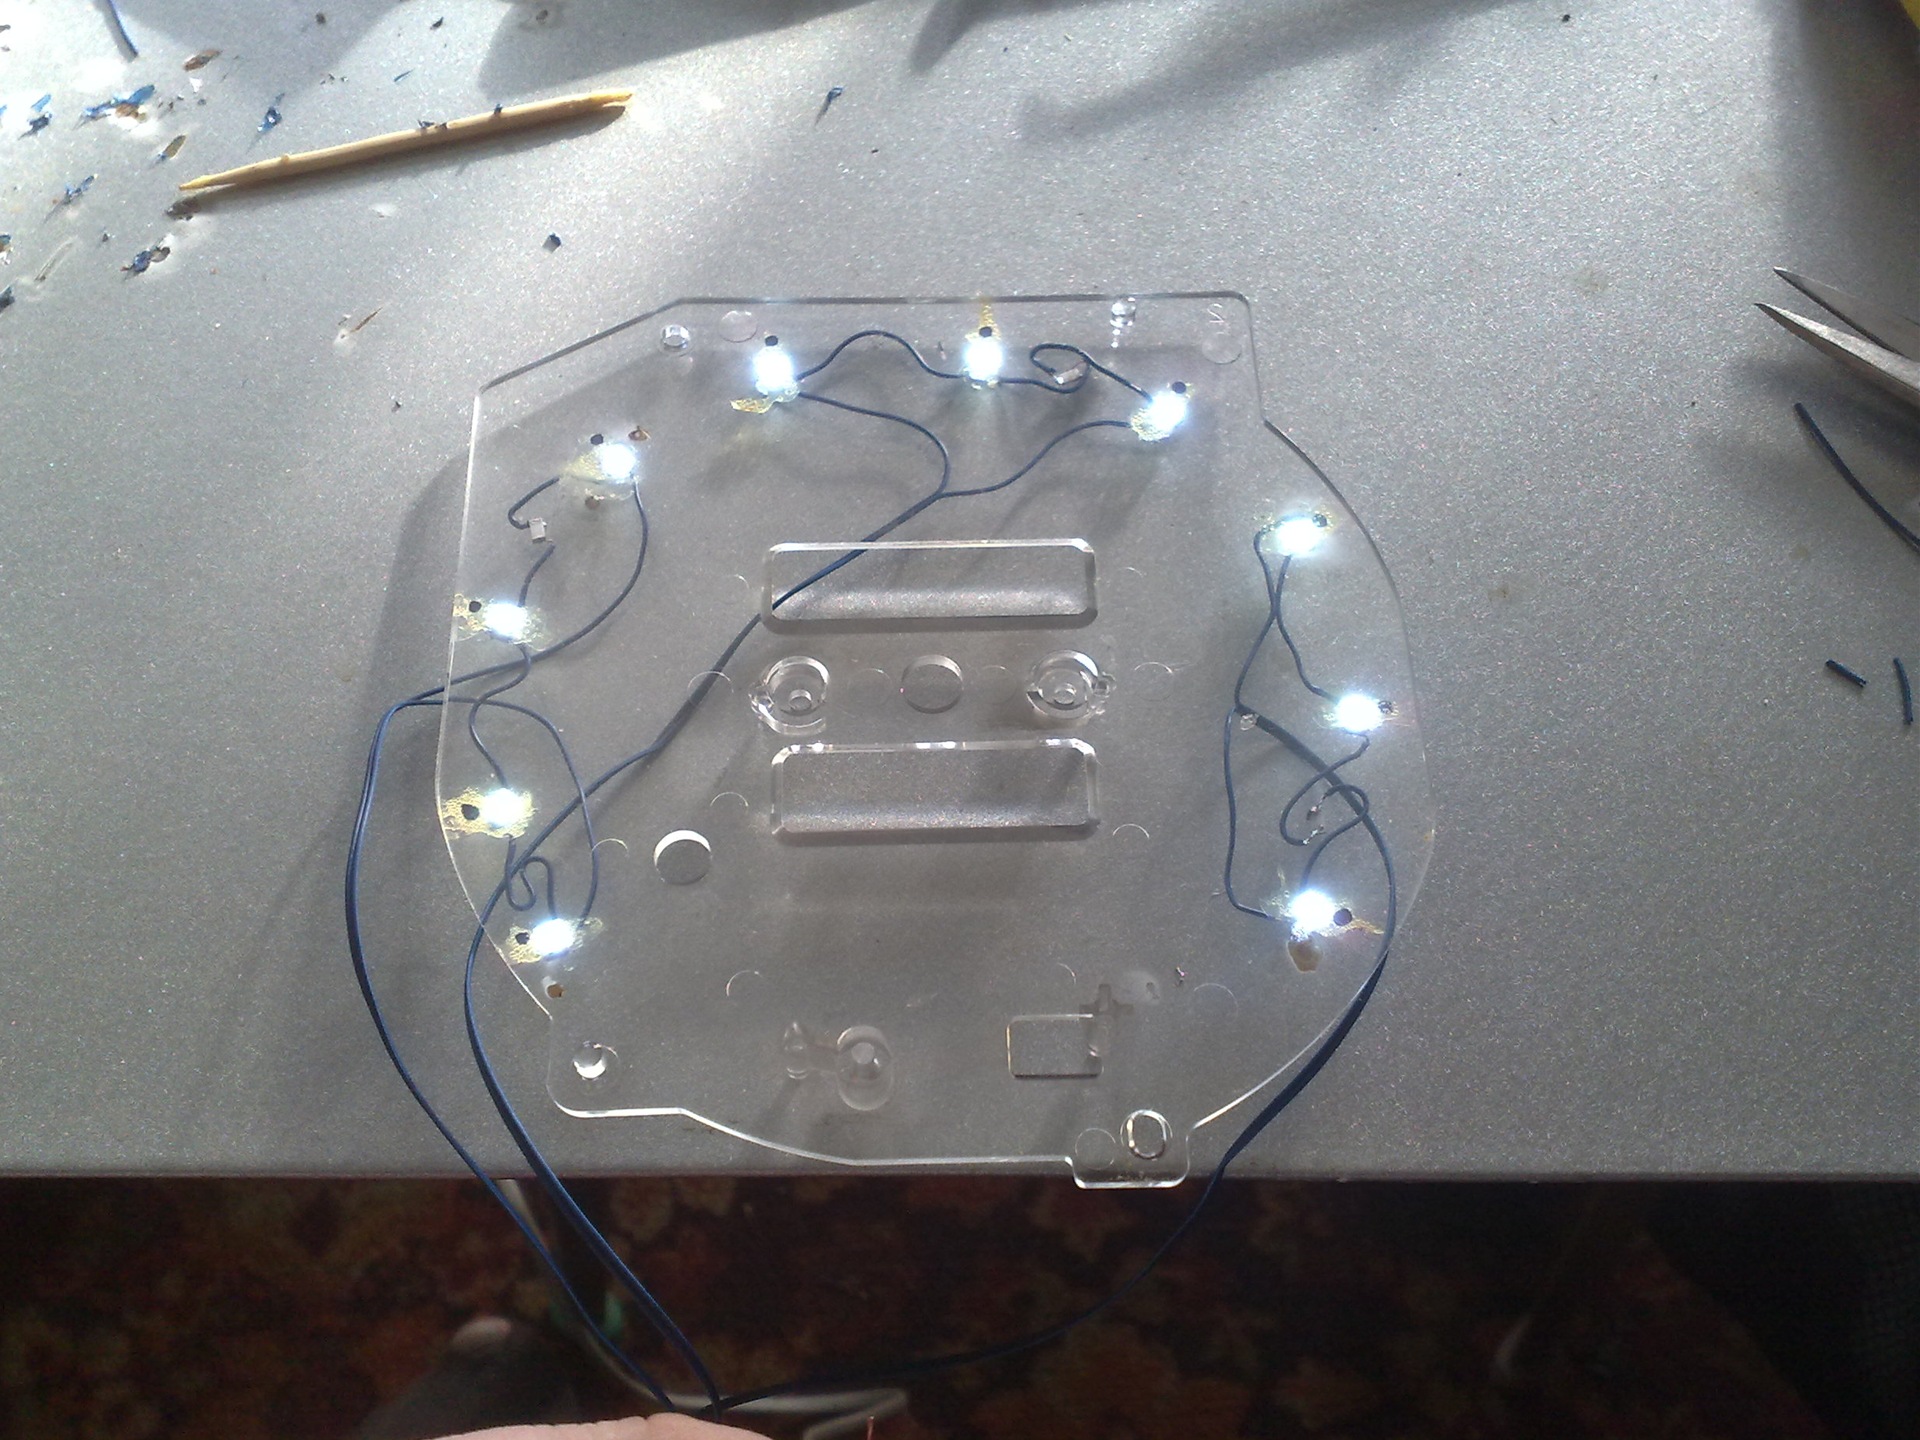
in general, speaking ... removed the instrument panel completely ... removed the old light bulbs, inside the shield I placed many, many, many SMD diodes, made new scales
(the plotter and corels rule) and put everything back together ...
until the question of instrument arrows. they will change, and so will the color scheme of the dashboard.
updated link to layout - h yadi.sk/d/clFt67tYdDzkT
 Price tag: 800 ₽
yes of course I can ... give soap)))
but at the expense of coolness. well, not quite. was not satisfied. in the near future I will stir up a friend of the scale. the light ones themselves will remain the same. but I will replace the scales a little. already ordered ...
Do you already have a photo of the new device? And how did you do it on plastic, did you order it from advertisers?
right now they look different. this view looked too kolkhoz. made black back ... but with a luminous substrate ... it turned out very well. I'll post pictures later ...
layouts remained, give me mail - I will send ...
finally it turned out well!) young man!) but can you also throw it off? as a sample, at least use it to)
1) sent. like this layout ... (if it wasn't, let me know, I'll rummage more)
2) as I wrote, I changed it from white in the end to black ... the white dial is not readable in the dark, you turn on the backlight and everything merges. so only black ...
3) backing ... lominat, transparent ... you cut out the scales themselves on black, matte, oracal (in any advertising office)
As for the panel disassembly ...
Do you have left or right hand drive? these are two big differences ... with the left hand drive (and without climate control) a cable is used, which must be cleverly unhooked. With praym everything is simpler, everything is electronic, and in the case of the left one + climate control in mine is the same ...
and then everything is simple (right-hand drive, climate)
1) two bolts on the visor, looking down at 45. so lower the steering wheel below the chop to crawl up ...
2) 1/2 bolt at the bottom left under the steering column, and also 1/2 on the right, the right bolts are closed with a plug on the latch (below the ignition switch)
3) when you unscrew the lower bolts, you can remove the plastic mask that goes above the steering column, just be careful on the right when you remove it from the ignition switch,. she walks tightly but is removed, nothing keeps her there ...
4) when you took it off, you will see under it more bolts on the left and right (and + two more top ones that we unscrewed in step 1) ... these bolts hold the plastic visor and the stove module itself (knobs of the twist). if you have a prul, then there are no problems, it sits on ala-spring latches ... take it straight from the inside with your hands and slowly pull on yourself ... the latches will spring and it will come out ... but if the left hand drive, then there is still a moment when the cable from the regulator unhooked ... alas, I don’t know ... never climbed with left-handed people.
5) removed the visor, on the left, the stove control chips. I have a climate, I have two like them. we unhook and the casing (along with the entire control of the stove) goes to the side ...
6) the shield itself ... it is held by 4 bolts at the edges, you will see. you unscrew them and the flap is almost free ... here again ... if there is almost no problem ... you pull the flap towards you on the braid only allows ... then you put your hand behind it (on the left) and feel the first long chip ... unhook, then the second and third ... all ... the flap in your hands ... how to make out further there everything is visible and so. there is almost everything else on the latches ...
But if you have a LEFT steering wheel ... then hello again ... the speedometer cable ... it is mechanical and also needs to be unscrewed ... I'm not sure, but I think I read that for convenience it is unscrewed from the checkpoint (I can confused with a stove cable) ...
well, something like this)))
it turned out great. if it's not difficult for me, too, please throw off the sketch. and on what paper to print? if possible in more detail ... and another request ... when you change again, explain step by step how to disassemble the panel, preferably in a photo ... I will be very grateful. I can't make out, I'm afraid to break off the temperature controller. Thank you. here's the soap [email protected]
all hands do not reach to unsubscribe and make new photos. and to unsubscribe in
general so ... the
white scale - it turns out poorly readable ... you have to make a black one!
we only cut the same layout on a black oracle.
the substrate is made in the same way ... + a white sheet of paper lays down under the scale ...
+ I painted some elements with colored varnish ... it will be seen in the photo. it turns out much better!
Glad to see ...
Yes, everything remains, well, you just need to look ...
Give me mail or some other contacts. Let's write ...