I replaced the climate backlight lamps, otherwise they got it already - Toyota 4Runner, 3.4 l., 2001

While global "repairs" are not to be done, I'm doing garbage. Namely. Two of the three backlight diodes of the climate control unit "sour". And the third one worked in the strobe mode. At night, just a hanger behind the wheel was. Having nothing to do today, I replaced the diodes in the backlight with new ones.
Everything is done very simply. Maybe someone will come in handy.
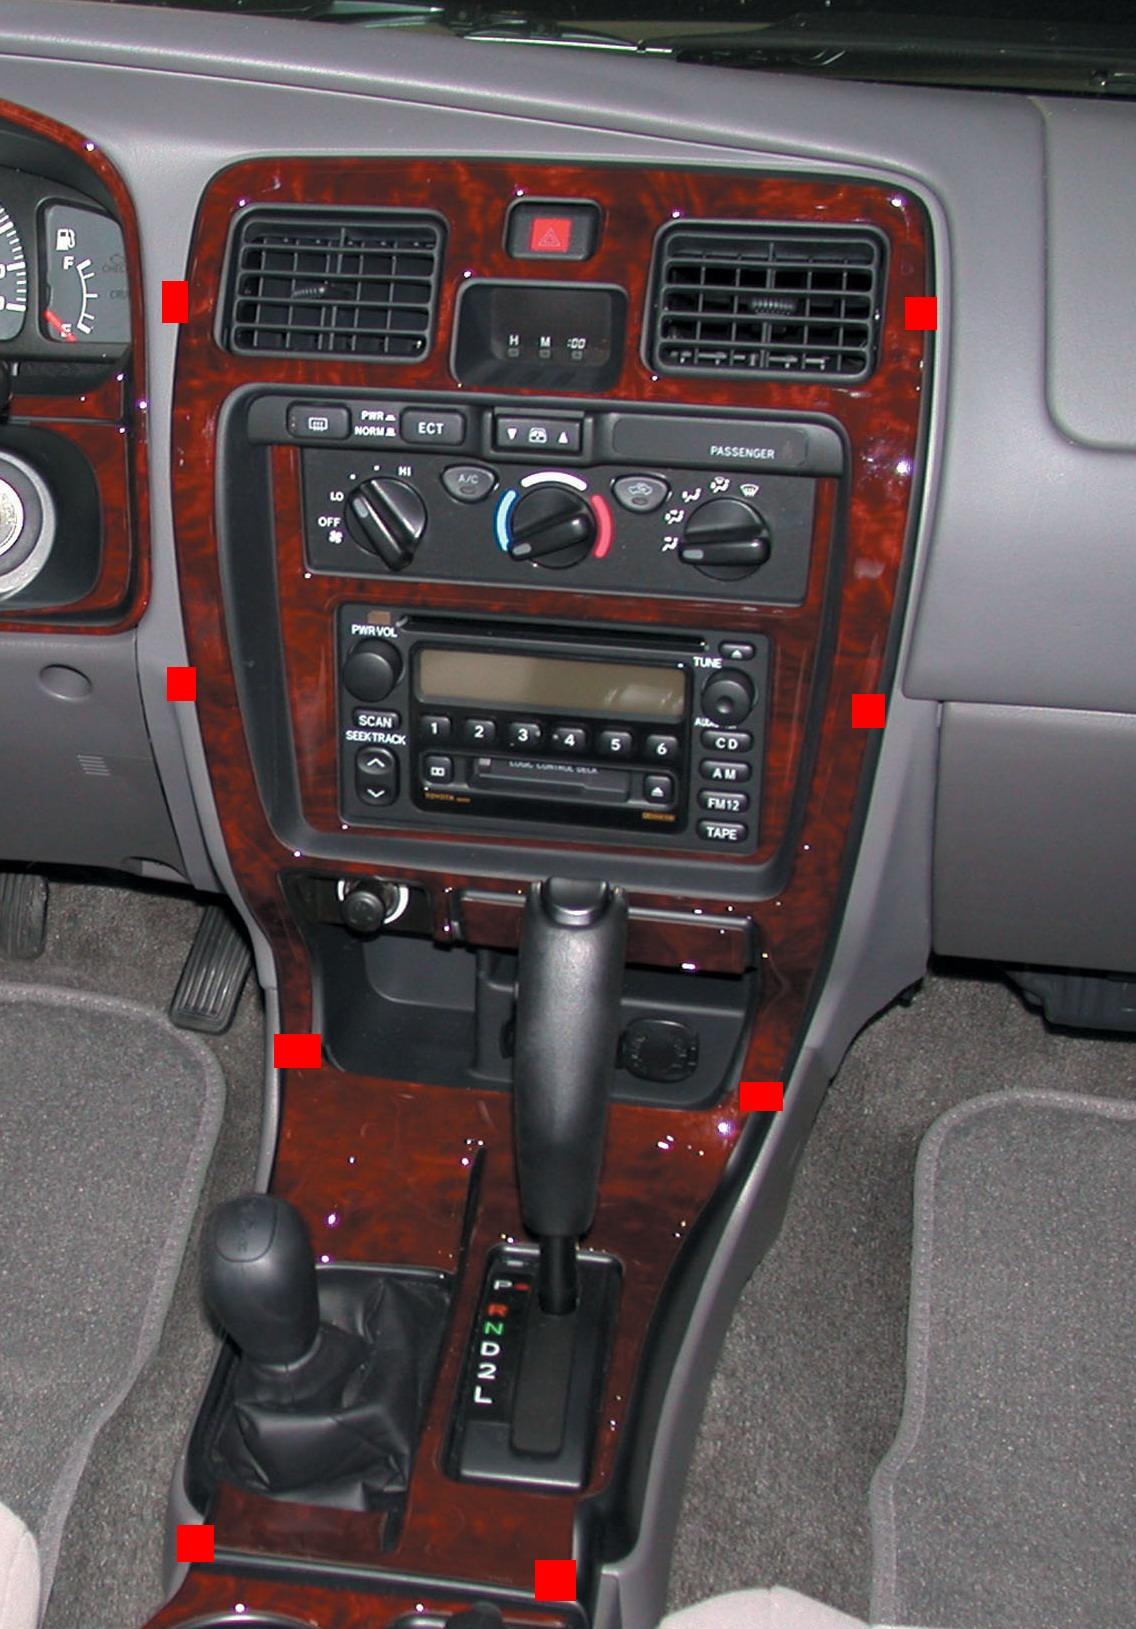
1- gently pry the cover in order to remove it. It is supported by 4 landing clips that must be snapped out. Fake it with a thin screwdriver near the places indicated by the red squares in the figure (upper and below them in the photo).
2- in order to bend the cover, it must be released from below where it is connected to the cover on the gearbox and RK selector tunnel. to do this, first we pry the cover on the tunnel (near the red squares in the figure, those that are the most extreme to the back row), raise it a little, and that's all, drag the central cover up a little and it snaps out.
3-well, then everything is simple. disconnect the wiring harness from the passenger belt display, from the clock, from the emergency gang and raising the rear window. all 4 connections go in one bundle.
Now you can lower the cover almost down. It is not necessary to remove it at all, so you can not disconnect anything further.
4- remove the "climate" cover, under which we see the necessary bulbs.
5-unscrew the 3 screws and take out the climate unit from the console
6- disconnect the two wiring harnesses from the unit.
7- we disassemble the unit itself, otherwise we will not get to the "bulbs". Unscrews three small screws and pull the case out of the grooves.
8-we unscrew the "sleeve" of diodes from the board
9- we take out the actual diodes. On the family, by the way, there is a resistor on one leg. Do not pay attention) I put the usual ones without resistors in their place, everything is fine. Progress after all)
10- insert new diodes, clamp the ends, screw in.
11- I do not recommend immediately assembling to death. Snap the case, plug in one of the cables disconnected in step 6 (you need one that is power / control, that is, the flat one, which is on the right). Turn the ignition key, check that everything works, and only then collect everything to death in the reverse order.
Everything takes 30-40 minutes, if you take your time.
For perverts on sale there are lamps of all colors of the rainbow) You can replace them, then also in the dashboard, you will have some kind of red backlight thread))