Making a sub - Toyota Avensis, 1.8 liter, 2001
The reason for the works listed below was the useless sound of regular music and, most importantly, constantly itching hands.
After modernizing the front acoustics, the question arose about installing a subwoofer in the trunk. The installation of a finished box subwoofer was not even considered (read above - the hands are scratching), so the choice fell on the installation of the steals type with a phase inverter. The goal is to fit the sub into the large luggage space of the Broom as naturally and competently as possible. Initially, I will make a reservation: work on acoustics in general, as well as work with fiberglass, foam and carpet was carried out for the first time, everything was done entirely and completely by those very hands in the evenings, sometimes it was supported sometimes by three cans of your favorite beer)))
So, the ingredients:
1. Hertz subwoofer ES 250 - (I recommend, I'm quite happy with the result). Price - 3000 r.
2. Fiberglass - I got enough for free, so I
'll lower the price 3. Epoxy resin ED-20 - in the process I tried polyester, it is much easier and faster to work with, but most of the work was done with epoxy. 1200 p. for 5 kilos + hardener
3. Noise insulation - STP, 4 sheets. Price 1000 r.
4. Wooden panel for the front. Price - 600 rubles, enough for a sub and a podium for the amplifier (more on that later)
5. Carpet. Price - 240 rubles. per piece 1500 mm * 2000 mm. It was possible to take less, but for the harmony of colors I decided to sheathe the wheel arches of the trunk.
6. Related products - glues and other wires. I did not conduct an exact calculation of the price, but approximately 1,500 rubles.
Actually, the process:
1. First of all, we disassemble the trunk together with the rear seats (for subsequent pasting with sound insulation)
2. Next, the sound insulation of the right trunk niche. The goals of this operation, I think, is not worth explaining, I will only argue that the process is MANDATORY. Both the trunk niche and the arch along with the inner part of the wing were pasted over.
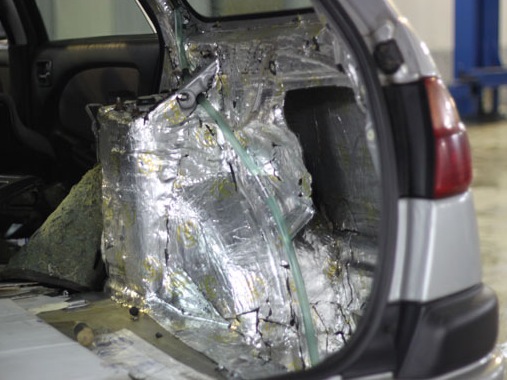
3. We glue the inner surface of the wing with tape in the place where the sub will be molded. The operation is extremely important because then this structure must be somehow pulled out of the car. In my case, everything went fine, the body came off along with the tape, the trunk parts remained in place.
4. Next - the most interesting - sculpting the shape of the rear wall of the sub. Here I recommend using a hair dryer - it makes it easier to set the required shape. Fiberglass was cut into pieces of 10-15 cm in width, overlapped. For 1 run, you can put 2 layers of fiber. It is important that no air bubbles remain between the layers, otherwise the system will then ring. I diluted the epoxy with the maximum amount of hardener and minimum doses, it dried in 4 hours. As a result, I got an excellent shape, completely repeating the inner shape of the rear wing. Great, fits snugly, does not vibrate.
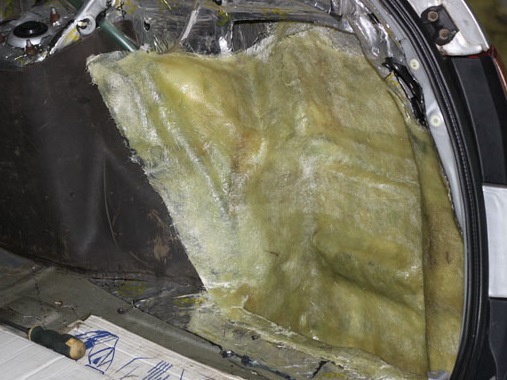
5. After 5 layers of fiberglass and their complete drying, take out the form, cut off the excess and, placing the form on a horizontal surface at the required height, mold the side walls. The process is the same, the number of layers is invariable - 5 pieces.
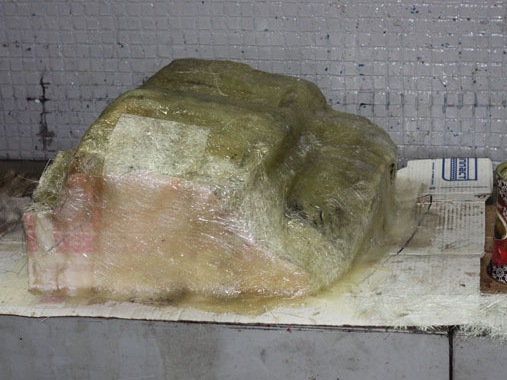
6. If your hands have not stopped itching yet (although those who worked with fiberglass will understand that this is unrealistic, because after processing it you start to scratch against any protruding interior item), then cut off the excess again and prepare to install the front panel of the case. An MDF panel is ideal here, in my case a regular wooden panel was used, but still I am satisfied with the result: there are no rattles. The process is quite simple - we cut out the necessary piece according to the template and glue it with the already mastered method using fiberglass and epoxy. The number of layers is unshakable.
7. The case seems to be ready, but it is necessary to check if it matches the parameters. First of all, volume. For my type of installation (closed case with a phasic), according to the documentation, a volume of 28 liters is required. It's time to check. With square cases, everything is clear - the basics of the school geometry course are unforgotten (Irina Sergeevna, perhaps geometry is also applicable in life)))). But my form is quite complex. The way out is water: just pour the maximum possible amount of water into the body, simultaneously measuring its amount. I got an impressive 29 liters. Well, very good ...
8. I pasted the inner surface of the case with self-adhesive paralon (sorry, I don’t know what it’s called correctly - black paralon, somewhere 3-4 mm thick on a self-adhesive base). I don't presume to assert the obtained effect, but the aesthetic effect is amazing)))
9. Not necessarily, but kickass, how beautiful: the outer surface of the case was covered with black anti-gravel - aesthetics, damn it))). Along the way, I cut the port under the contacts of the sub, the fasteners are self-tapping screws + sealant (we don't want hiss through unwanted slots)
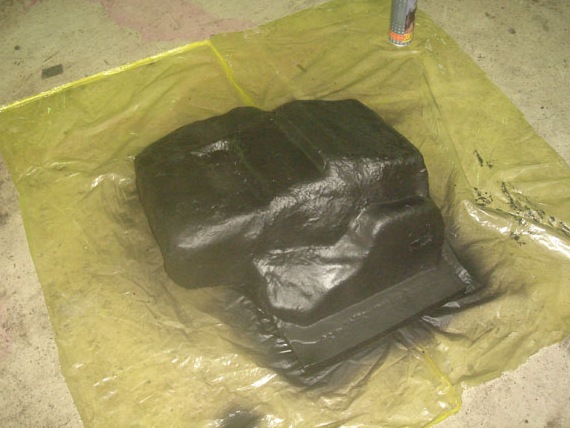
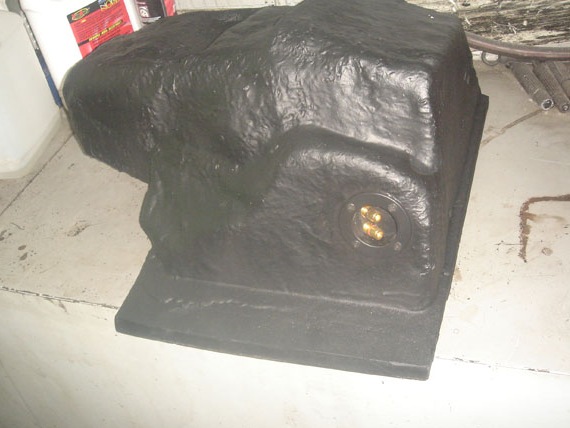
10. Is the whole structure still free to install, and most importantly is removed from the car? Well, let's continue. My upper body wall did not reach the lower edge of the glass lining about 5 cm. Plus, there was an irresistible desire to combine the sub's body with a corner of the trunk lining (it will be visible in the photo). And yet, geometrically rectangular, without perversion, the front panel infringed on pride. Well, let's be perverted, the well-known Macroflex polyurethane foam will help in this. Also, he secured a ring around the sub, which theoretically will protect the latter from the harmful effects of humanoid. The result is the rounded shape of the top panel, the neat corner between the front panel and the rear paneling, and satisfied pride ...
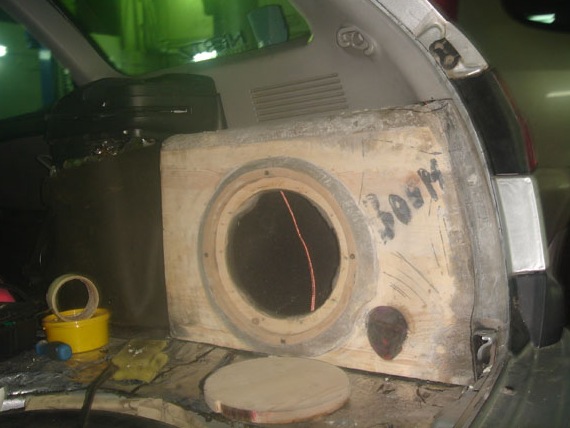 ... Let's go further
 11. The result is close, and the desire to contemplate it made me work until 5 am. I have never regretted it ... We cut out the necessary piece of carpet and fix it on the sub's body with special glue. The properties of the carpet allow it to be pulled in unimaginable shapes, so the body was fitted as accurately as possible, with all the edges folded, in short, the result is very pleased.
After installing the finished sub and assembling the right side of the trunk, I was incredibly happy with the result obtained - this also applies to the installation quality and sound quality
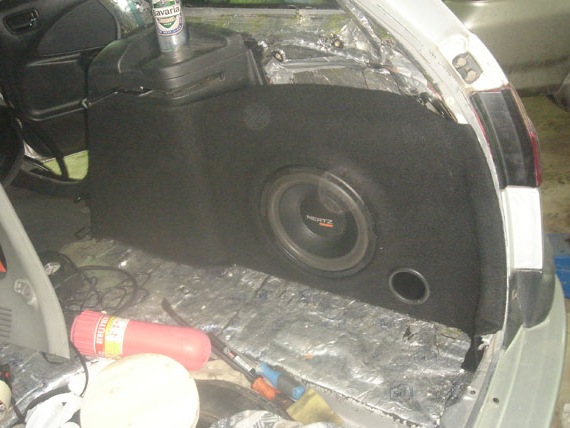 , a bonus can of your favorite beer))))
Further plans - manufacturing in the left niche of the case for the amplifier
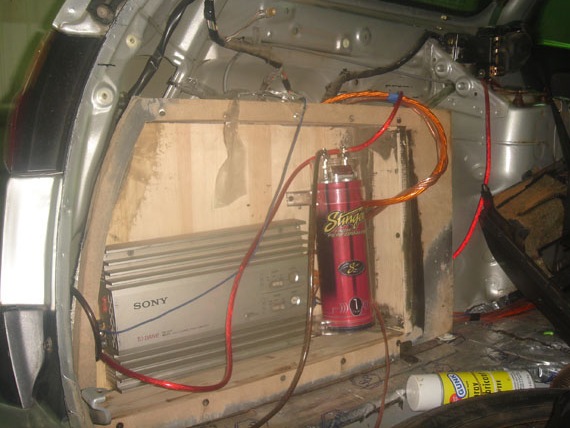 ...
...PS Sorry for the quality of some photos - it's time to change the camera, as well as for the lack of some moments of the process. If you have any questions, I'll be happy to accomplish your goal.
Price tag: 6 400 ₽ Mileage: 205 000 km