Removing and washing front seat covers — Toyota Will VS, 1.8 liter, 2002
We remove the seat. It is secured with 4 bolts. you will need a key or head for 14.
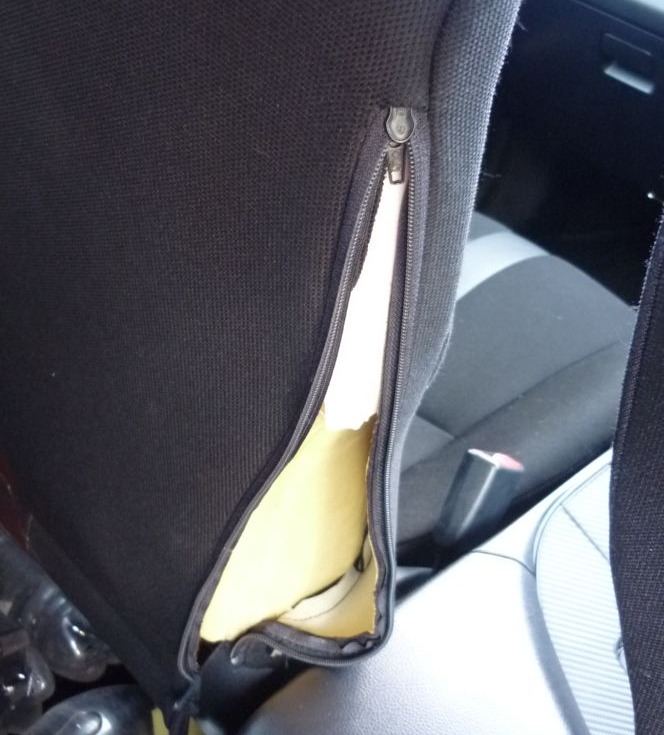
We unfasten 2 zippers on the cover on the sides of the seat back
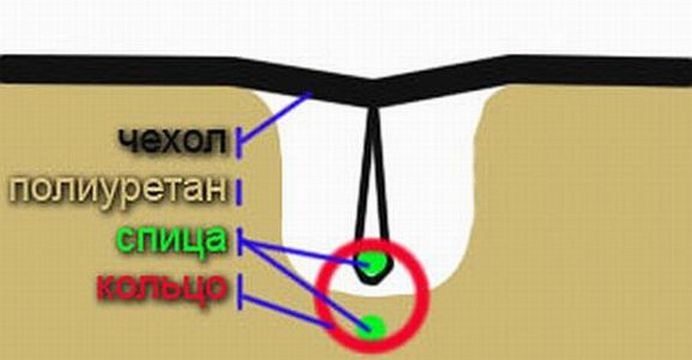
Next, it is necessary with the help of pliers, but it is better to use thin-nose pliers, unclenching the wire rings (marked in red in the figures and photos), unhook the knitting needles inserted into the covers from the knitting needles integrated into the polyurethane base.
the front and back of the back cover are fixed to each other with the help of spokes and rings. Also, the pillow cover is fixed to the seat frame from below with the help of plastic clips sewn into the cover (marked in yellow in the figures and photos). To unhook them from the frame, you will have to partially unscrew the plastic casings on the sides of the seat. You will need a small Phillips screwdriver.
The wheel for adjusting the height of the driver's seat cushion is removed by removing the metal bracket-stopper.
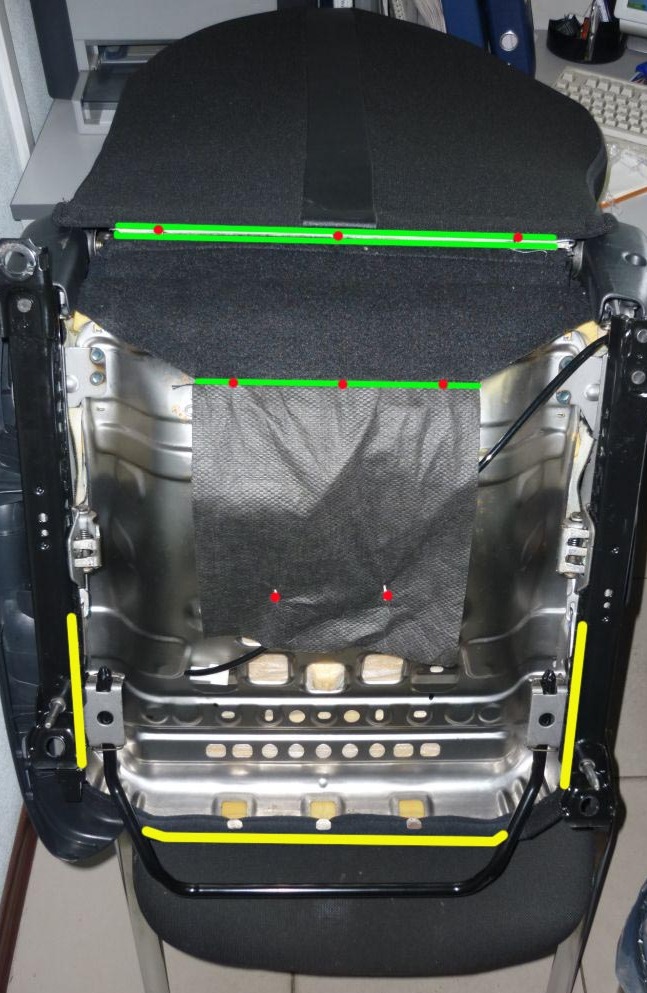
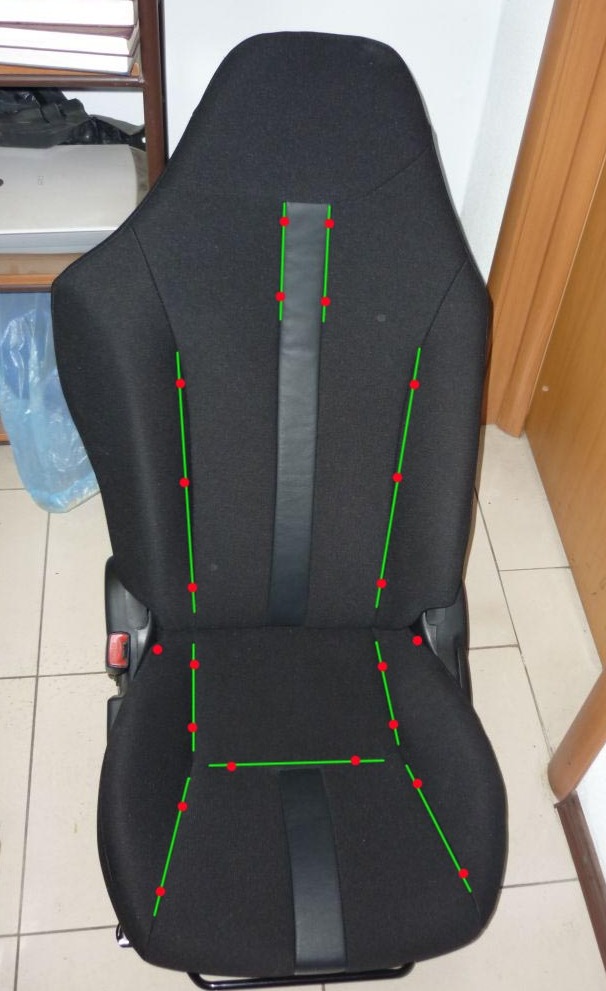
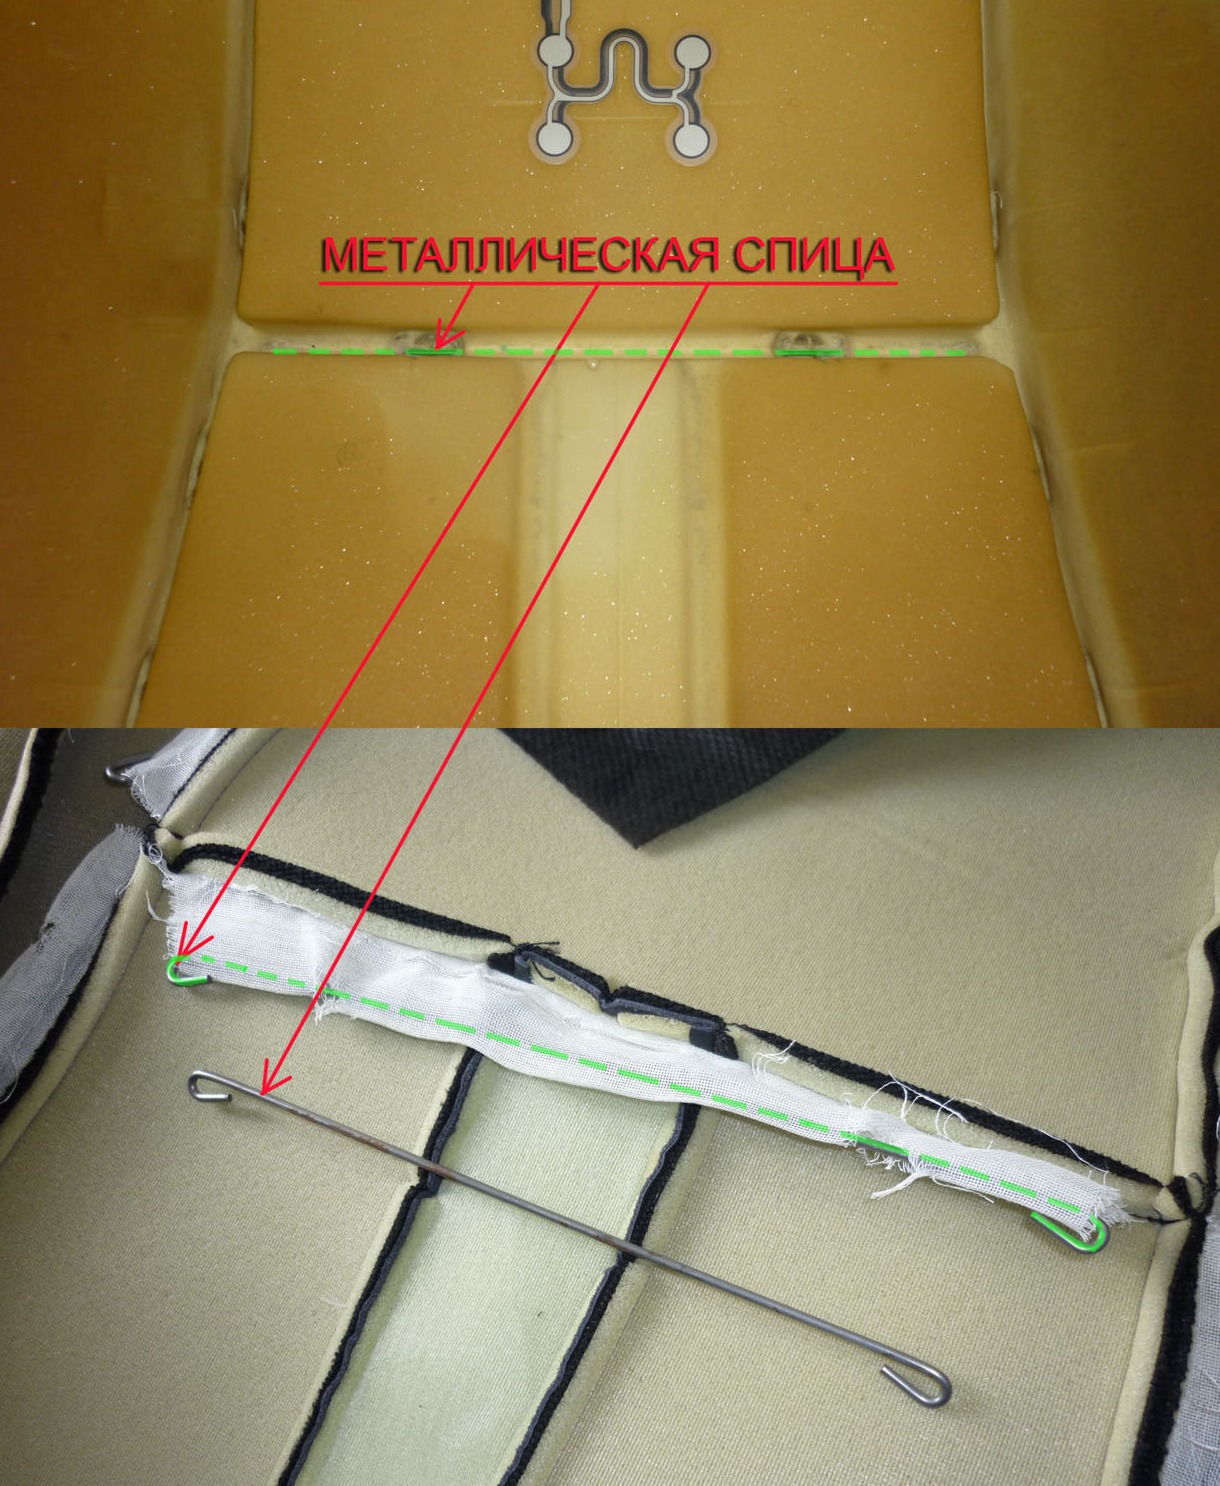
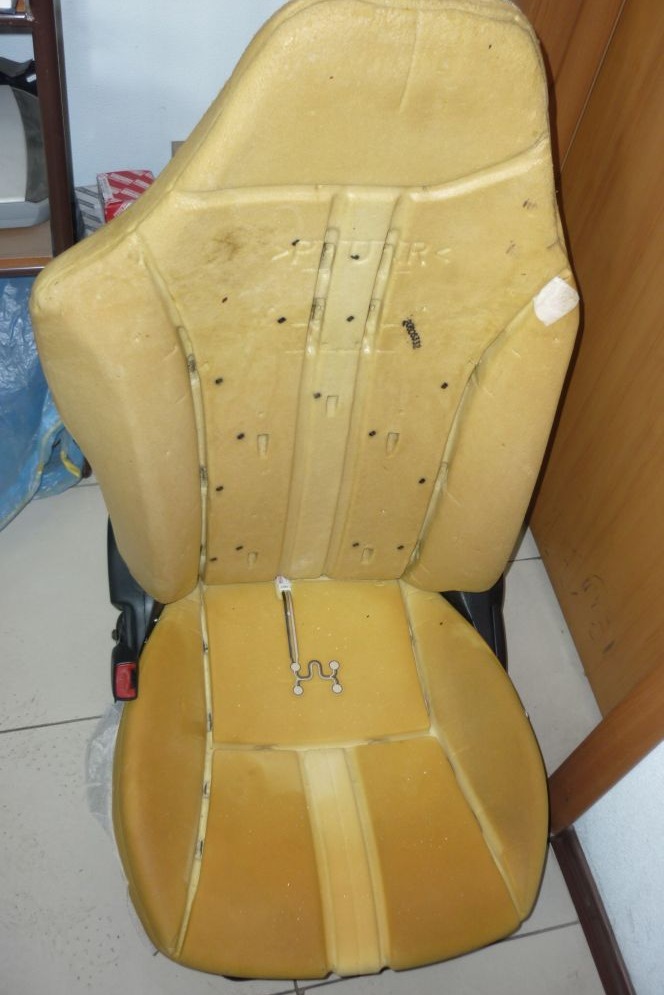
In principle, nothing complicated (collecting back may be more difficult)
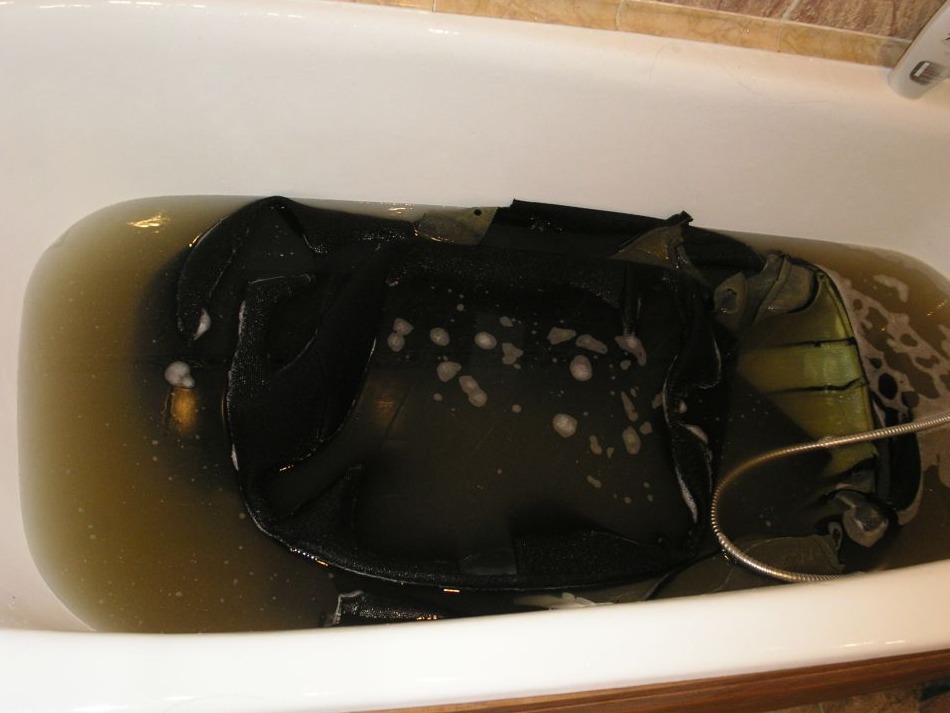
Next, wash the covers. A lot of dust has accumulated in them, but it is washed off easily. I do not recommend washing in the washing machine. Firstly, plastic long parts are sewn into the covers, which we would not want to damage, and the strips-inserts on the covers that are in contact with the rider are made of real leather.
We dry covers
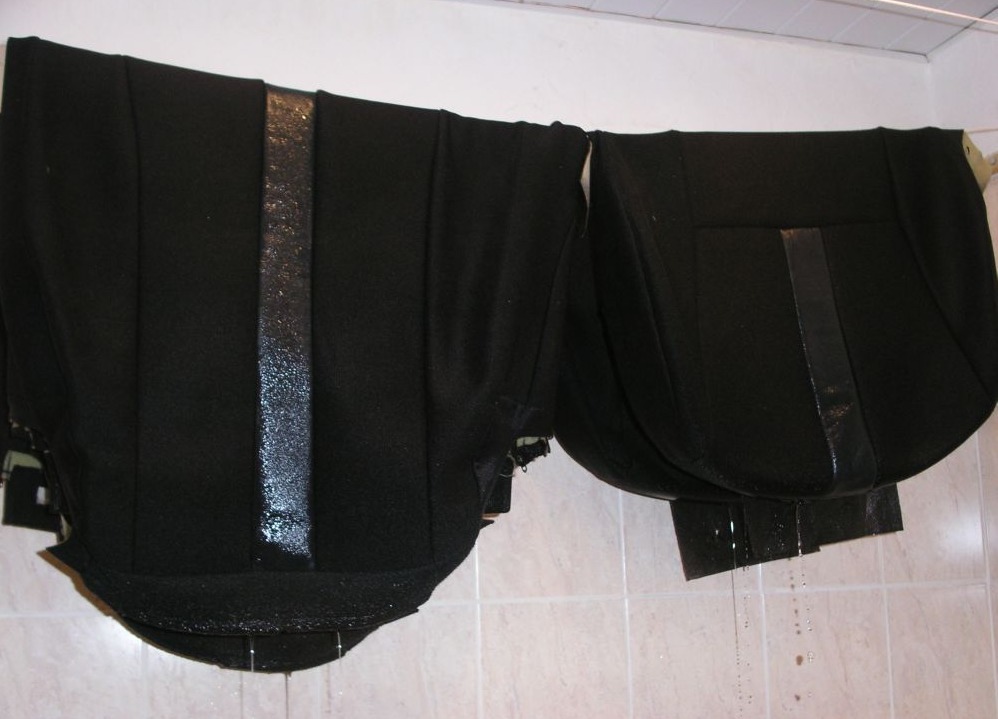
and collect.
Removal and installation of seats and covers took me 3 hours.
Good luck.
Issue price: 0 ₽ Mileage: 66.750 kmDima, as always, everything is very detailed!
Thanks for the report... after a long stop for repairs and painting, I think I will also need to wash =)
PS five-pointed after 12=)
It's funny) I took off and washed my ass in the back seat ... it seems like nothing complicated, but a lot of rings pissed me off)
I see you do not live in peace! I also don’t like the cleanliness of the front ones, so I’ll be discharged from the hospital, they’ll give me a vacation and I’ll take care of it. Thanks for the idea and report!
A lot of work has been done worthy of the five!
Interestingly, but on RECARO covers?
do anything with the seat - the pillows will not work from this.
airbags are triggered by the airbag control computer, which in turn receives information from sensors located on the front spars.
and in general, in which case they turn off the plus from the battery, and not the minus
I also wanted to remove and wash the covers on my bB. But I heard a horror story that if you remove the front ones, the pillows can work ?! Now I don’t know what to do, I don’t know if it’s true. Before dismantling the seats, did you disconnect the minus from the battery?
yes no, it didn’t seem to hiccup) Well, how did it work out successfully? Gained experience?
Dimas, well, you are a troublemaker! You must have been pissed off when I put them back on.
Well, depending on how you look ... Naturally, constantly remove covers and I will not advise. But I took pictures for reasons that the car is already 8 years old and it is unlikely that anyone has done it before me. Naturally, I use cleaners more often.
AND HOW! Now I know for sure - PROFAM to help everyone! After two trips with children, I realized that the game was not worth the candle!
2 holes! Everything is ready, it remains to put it in place! And this is a cap!
Thank you. were there many smoky holes? I wonder how you closed up? I'm fine - no prokur at all. Write, we'll see.
well done! I messed this up too! also seal holes from non-born smoking passengers)) I will post a report at my place!
Everything seems to be clear from the photo and even schematically I drew. Spokes poured into polyurethane must be connected with spokes threaded into the skin. Connect with brackets. Some plastic clamps are also used for simplicity. Skill is needed to mess around with brackets and tools (pliers and narrow-nose pliers)
For the life of me, I can't figure out how it works! Stretch spokes! how does the tension of the covers interact? If it's not difficult to explain the pancreas. I took it apart on my VAZ 21099. there seems to be the same principle for everyone! When I took off the reverse side of the covers, there were shreds for metal knitting needles, there were rings that held small knitting needles and large knitting needles, if these knitting needles were soldered into the foam rubber, I disassembled it quickly, I didn’t understand how it all works, I assembled the seat without knitting needles, the result is — the factory tension is gone! I'll be shooting and thinking again one of these days. As I understand it, for the place of the wheels, you can use plastic clamps, BUT what about these knitting needles? Question.
Thanks for the detailed description and illustrations. Today I decided to do the washing experience presented above) In general, everything was clear, and what was not clear became self-evident. In general, I took everything off, washed it, and now it is drying. When I put it back I will use nylon clamps, I peeped it, I don’t remember who, he did the rear sofa there.
The backrest tilts forward by 40 degrees if I'm not mistaken. For a coupe, it is necessary that there is a lever on the back for this from the side of the door and that the seat moves forward.
Can you tell me if their backrest folds forward? I want to put them in a compartment?