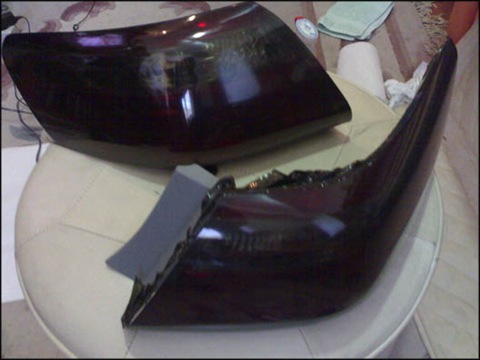
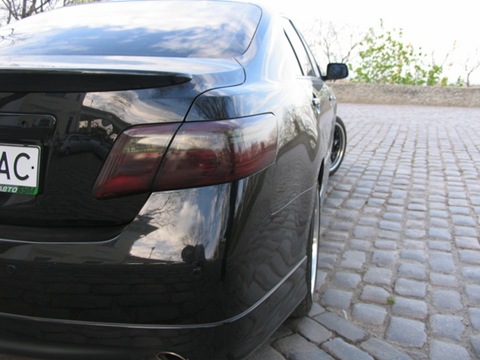
Blackout 2 - Toyota Camry, 2.4L, 2006

around August-September, I darkened the taillights, no, not with a tint film in the trash, as is often found in the domestic auto industry, but with a good light-transmitting Oracal ...
 Mileage: 3,000 km
Oracal is a film, the main use is for advertising signs, posters, etc. Oracal 8300 series, bought in any office that deals with advertising, or in any office that makes stickers on cars.
It took a lot of film, because the first time I did it, the subsequent times, it took as much as it was necessary to cover the surface of the lantern.
I thought that paint with a spray!
about the film - it's good, tk. did not like it - tore it off!) and amazed how much film was gone)
then it burst from overheating with a hairdryer, then it pulled it too much, then it left too bad bubbles, it took off and played again.
-the film Oracal 8300 is bought, you choose what color you need,
-take off the lights, it will be extremely crap to remove, since you need to remove the rear bumper
-you prepare a clean kitchen towel or microfiber in advance, what would be less lint, mister muscle (he gives less foam to compared to similar products.), and a squeegee, a bowl of water, a stationery knife, and a household hairdryer, preferably more powerful.
-cut off the necessary piece of film-
ideally wash and wipe dry the surface for
gluing -apply more Mr. muscle-
put the adhesive side of the film on the glass that is in mister muscle-you
suffer a lot of time until under the heating of the hair dryer you remove the film with a squeegee on all corners and irregularities of the headlight leaving no bubbles. :)))
- you cut off unnecessary pieces of the film with a stationery knife - you
remember the removed bumper and a lot of time spent gluing the film :))) - you
install the lights back by screwing the bumper back. :)))
In total, when I did the 1st time, everything about everything took about 6 hours and 7 running meters of film, and if I'm not mistaken, 1 bolt from the bumper.
in subsequent times everything turned out much better and faster about 3 - 3.5 hours for everything about everything.