
Lesson on converting cars in Mafia 2 (Mafia 2)
And so the new version of ZModeler 3 (3.1.3) where available to work on Mafia 2.The lesson is designed for experienced users,so it will describe tips on converting cars in mafia 2.
Introduction
To convert cars in mafia 2 , you'll need to get with the program:
Photoshop , SDS Tool GUI , and ExpSDS Material_Converter
Machine try to look for so that you export the model file VertexBufferPool_0.bin was the size of about 2 MB.
Conversion
For example, converting take car from GTA 5. Import machine (all LODы) with all necessary textures will continue to adapt and keep using Zmodeler 3. Since Mafia2 uses only two levels of detail (high and very low), converting details can be left naively (L0) and the smallest (usually L3) LOD. The rest can be removed (by selecting in the list object L1 or L2 and pressing a small button Del in the string with buttons Convert to Compound and Dismiss). This action will isolate the object specified level of the compound object , therefore, appeared objects in the hierarchy (no name) then need to remove the right click menu item Edit->Delete. (Fig.1).

Can now save the model and check the file size. Important : to save .z3d need without textures ( to do this, temporarily disable the option Store Textures in Settings - > General -> Files- > Z3d Open & Save -> Store Textures ). File size should not exceed 2 - 3MB , 2MB where the optimal model and koliziâ recorded in VertexBufferPool_0.bin and the size 3 m used for it would be almost critical size. If the file size gets to 3 MB or above the possible error in the game or the game crashes.
Now you need to prepare your model for replacement. For this you need to import a car from Mafia 2, try to pick up the machine so that structurally (elements: door / hood / trunk /bumper / and location) the car was similar to your model (Fig.3). If your car has two doors , and the replacement machine look with two doors. It is strictly forbidden to remove lack of demand items from a hierarchy of the original model. unused items can be replaced by a very simple geometry (one small testing area and to hide the geometry inside the body, or simply to convert the object to dummy ) (Fig.5)
Unpacking models running program SDS Tool GUI ( see the manual for unpacking and packing of SDS files). In the folder rasparennye model files with Notepad create an empty file ( the name of the car ).mafia. Import and export models in Mafia2 is in the folder and the file with the extension .mafia only a starting point for import / export , its contents are not important in the game or in the unpacked data there is no such file.

Analyze how to construct a native model, check the location of the rotary axes of the doors/hood/trunk, make sure raskhodka parts this car is suitable for replacement.
Now you will need to assemble your model by analogy of the original machine, replacing identical parts (geometry) for L0, L1 inside Compound objects your geometries. Important: to change the local axes of the parts having a collision is impossible. This applies to doors, hood, trunk, bumpers, muffler (keep the axis of the original model for copying, if you change all duplicate objects of a whole).Also you can't touch deformer model (deform_) if they move,model the game will be deformirovanii. Most of the other parts, you can call randomly and ask him them an arbitrary axis (left axis from the new model). (Fig.2).


The combination of models and parts replacement must be performed with the above constraint on the invariance of the axes object containing the conflict, as well as on the invariance of the axes themselves of collisions. This limitation also extends to the driver seat (fit character height cannot be adjusted.It is further assumed these restrictions to be addressed.
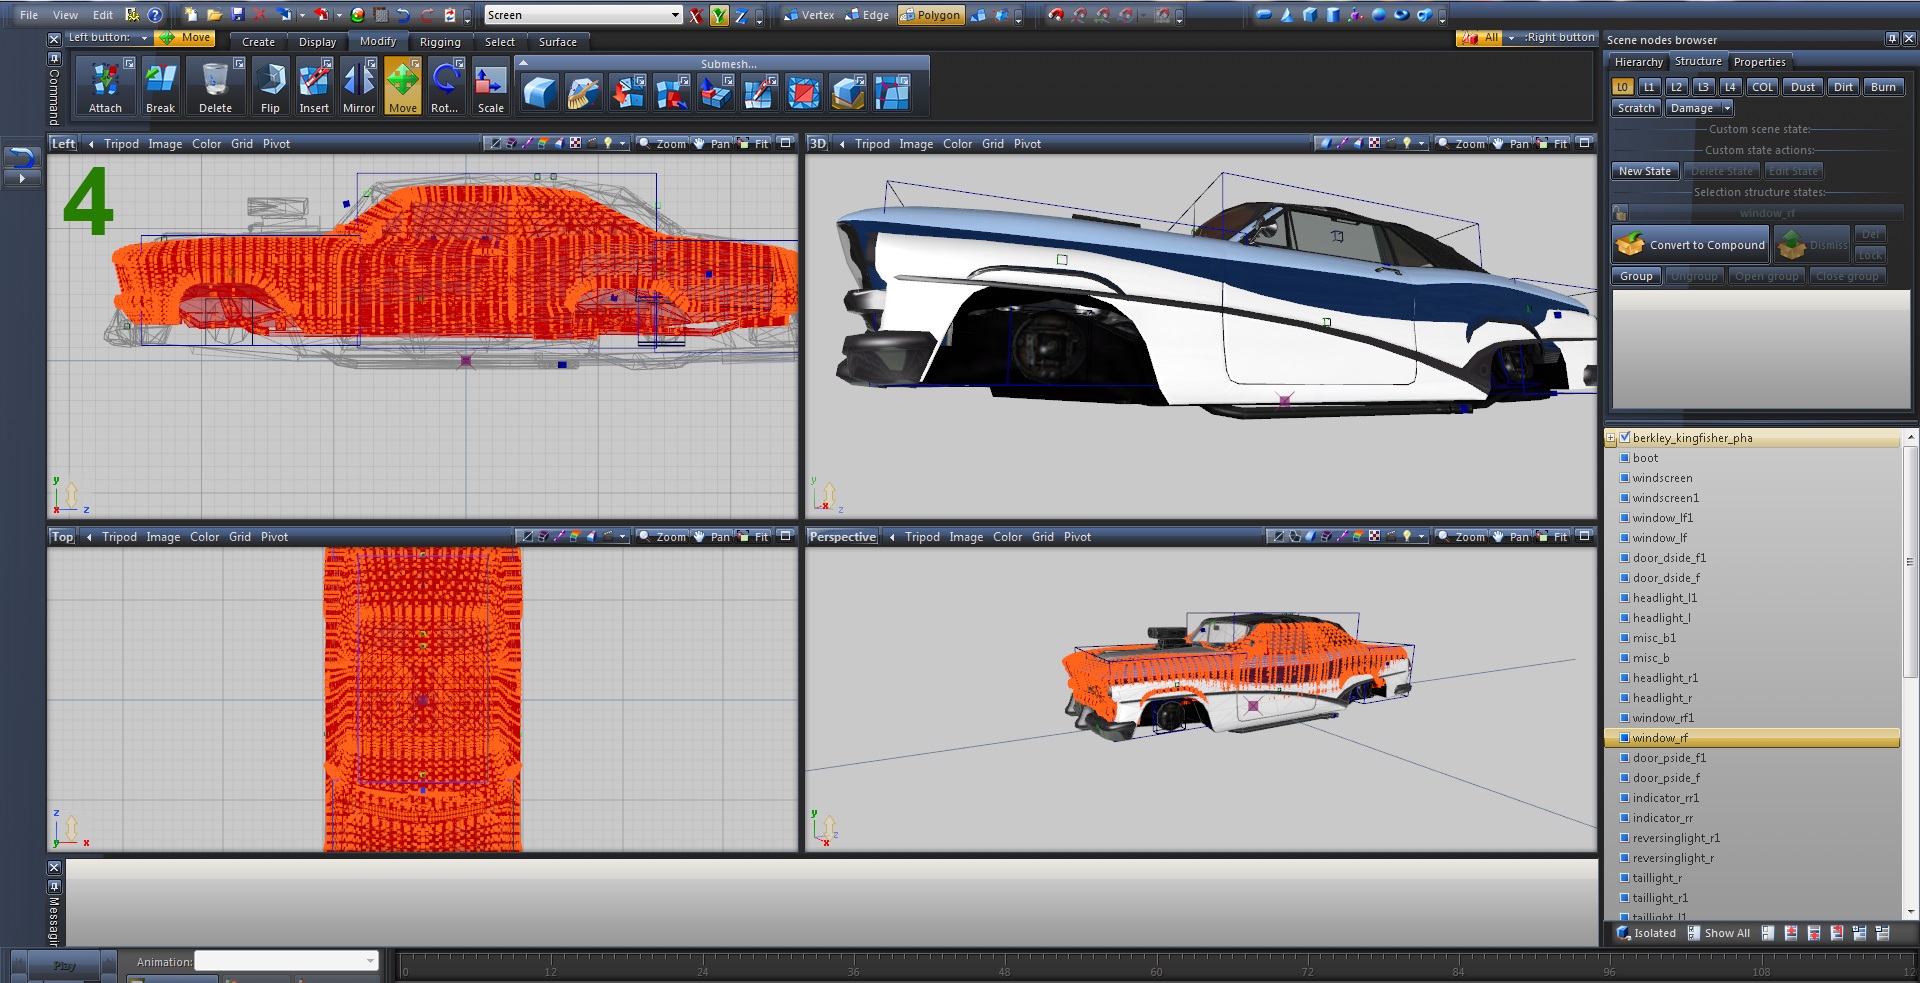
The fit of the model will not be perfect, but try to adjust the model in such a way that coincided as much as possible of the axes from those that cannot be changed. Give priority to the front doors and the hood, they open up the game more often - the rear doors and the trunk may have not quite suitable axis, but they are in the game open much less frequently. (Fig.4 and 4.1).The rest is all set up for your car axle can safely take from the new model.

Replacement parts standard. If you have never worked with Compound objects, view any video on the replacement of a car in GTA5, there is this point will be reviewed. How to get to the steering wheel, put your steering wheel on the native wheel. The driver's hands cannot be set as the landing place of the character, so putting the steering wheel (Fig.6).

In the hierarchy of the model has a few branches, one of them starts with the name containing the end _rain - this branch contains an object for rendering splashes and rain drops on the surface of the body. Another branch contains an object of bizarre shape inside (most likely used for the fire effect in the combustion car) and, in fact, a branch of the hierarchy of cars. Before exporting, you need to drag the branch corresponding to the vehicle above the rest, so she was the first (Fig. below).
.jpg)
Additional objects of the hierarchy, which are present in the original model remain unchanged, move or even delete does not in any case impossible,such as _deform,except when _deform is a piece of what part of the car. In other cases,когда_deform this squares,it is impossible to move them,it will cause damage to the machine.
Applying materials to the convertible model.
Fully select your model and go to polygons mode (Fig.7) On polygons mode, click None, then select the polygons corresponding to the coloring parts of the body (use the Select tool\By Material) and apply to selected polygons of the native material of painting of a body; not yet clear the selection. In order for the model painted, it is necessary to specify the number of the Flag in the properties (Properties -> General -> External State -> ). For painting the base color vkluchen Flag 1, for added color use Flag 2 (Fig.8).


Then, select the polygons that match the chrome on your model and apply a material of chromium from the original model (Fig.9.1).
It is strongly recommended to use native material for headlights and license plate. This is standard material in Mafia2 is called GPLC and only he can Shine in the game when you turn on the headlights, braking, and only employs the symbols of the number plate To apply the material safely to the rounded headlights and taillights on the type of the original models. To replace this material, as well as the texture on it is impossible, it is used in all models in Mafia2, so you'll have to redo the texturing (UV Mapping) on the respective polygons of the model to use the standard texture for headlights with material GPLC. If this limit is too jetskee and you want to leave the lights with individual texture for your machine, effect light will have to sacrifice - the game will only Shine a light (Flare effect). This is acceptable for small rear lights, but barely acceptable for headlights.

The conversion of the materials (application of Shader Mafia 2).
For conversion of materials you have to press one click on a material and see what it is: it is possible to enable/disable the checkbox on the material - in the 3D window will disappear/appear the polygons corresponding to this material. The conversion performed by a script, invoking the menu in the right-top button of the material editor (the icon material with shesterenok) and choosing there the configuration from the thread Mafia 2.
For salon it is recommended to use Shader Vehicle-generic you can apply this Shader to other elements, this error will not be considered, but for the hood prostranstva you can apply the Shader diff.

When peredelyvaemyh material glass in the tab User-defined options you can make a property Hash from the original material for glass. Important: in the game there is only one material with each unique Hash value - do not use the same Hash on different materials. About the inability to change texture on material GPLC (lights) mentioned above. (Fig.9.3).

It is IMPORTANT
The number of new materials for cars are limited,so please note that the number of new materials,in addition to the standard, should not be more than eight (8). If there is more,the model will work,but in case of accident,shooting, or just to come to the car,you can throw. For the first health check of the model to reduce the number of materials not necessarily,but in the future please, not in demand with material textures have textwrite to other material.
If you want the material texture lights remained intact, it is also possible to apply the Shader Vehicle - generic, in this case it will break,but not glow texture, it will only flare effect.
For the rest of the materials (interior, bottom, badges, engine Bay, etc.) the same - we select the appropriate Shader and apply.
Again, for the correct working of the material in the game (painting, breaking glass, headlights, blackening when burning) on the materials of the paint, chrome, lights, glass need to leave the appropriate native hash from the model. The hash for paint from another model will not work for your model. Also, remember that pointing to a hash, you replace in the game this material is their.
Once complete with the materials, you can begin to first export your model.
Make a separate folder for exports, put the exports file in the name of the car.mafia .
Click export, make sure that the log window has no errors. From the folder with the exported files are copied FrameNameTable_0.bin FrameResource_0.bin IndexBufferPool_0.bin VertexBufferPool_0.bin and put it in a folder with the unpacked machine.
Model file,then the program SDS Tool GUI pack changes the archive back.For Etowah in the center of the program, click on the arrow back <.
ItemDesc may yet leave in place,assuming that has not changed Coliseu your model. If you replace the game first time game does not start, restart again and the game will take on a new your model.
If you replace ItemDesc your models appeared on top of the hole, can install from a backup ItemDesc from the native model.
Now you need to register the materials from your model in a common base game default.mtl (mafia 2\edit\materials\). The materials in your model are written to the export file (name avtmobilya).mtl in the export folder.
For this you need to copy export file name of the car.mtl and paste in the same folder as defailt.mtl. Open the program Material_Converter.Download http://www.playground.ru/files/mafia_2_material_converter-77247/
Click Open and select the file default.mtl, located in the root of the game. Next click on Merge (*.mtl) and select export file the name of the car.mtl and hit Save. So you add your .mtl with a game.
Even when merging textures recommend first to open first, your received .mtl and remove (this is required) from the settings from the original material and then save only with new material. This is in order that would be when merging files that do not have shifted the original location settings from the new car. The game is capricious responds to any changes if parameter original material will stand in its place, sometimes this leads to not correctly work textures.
Important: to publish mods need to make a file only with the new settings in your .mtl.
If you used the original materials (kept the Hash value and only changed the textures), then it is advisable to find these original materials, and to change the names of native textures on their own.In this case, you can leave the original material.
Thus you will have was new/changed materials from your model, if this is not done, then texture the model will be bright green.
Lesson on the Boxing new textures in the archive of the car.
Now you need to prepare a previously saved texture (unique to your model) to pack in .SDS archive. Textures in mafia 2 doublerooms: one texture with higher resolution and the other in the lower half of the permission. To create such a couple of textures you need in Photoshop to save each of your textures as imatture.dds and when saving to specify No MIP Maps. Then reduce it by half the texture (Image -> Image Size and enter half size, both vertically and horizontally) and keep this texture in a separate folder from the texture more razreshenia,because the names of the textures will be the same, but with saving this time with the option Generate MIP maps. Be careful that both the texture, should be with the same name Texture.dds (Vysokova permission) and Texture.dds (lower half of the permission).
Important: the Size of the texture in Mafia2 must not exceed 1024 x 1024.
If your texture is larger than the allowed size, reduce it to 1024x1024, and this image will keep that,and a little texture to 512 × 512, respectively, and also save. Textures must be in different folders,so it is important not to confuse with zapakovki.
It is also possible to transform an embossed texture for body and chromium to produce a correct mapping. The texture of the terrain in Mafia2 use either Alpha 8.8.Luminance, or RGBA textures of the terrain, where the channels R and A are swapped (such textures appear in the program bright crimson instead of the usual purple).
After preparatory work with the textures you need to pack them in an archive program ExpSDS.
Download: https://yadi.sk/d/AH5dDZKdr8Yzp
The author of the program Y. U. S. I. K (PlayGround.ru)
In the program window ExpSDS click Open and select the archive of the sds model of the car (figure below).

Further work with the list in the left part of the window. Small textures are in the tab Texture, but the greatest razreshenie textures rendered in the tab Mipmap. To add textures hover over the tab, right click mouse and select Add Files (Fig.below)

Tall and small textures should be with the same name,so for convenience and that would not be confused in texture,recommended when creating textures, create two folders.One sign as Mipmapin this folder put the texture higher size,and textures of the smallest size (two times smaller from the top of the texture) create a second folder Texture and attach the texture.
That would add to the program ExpSDS several textures at once, when you select a texture, hold left Ctrl. Add texture correctly,I will repeat the names for small and large textures must be the same. And packaging you need in different sections. For textures with higher resolution is a tab Mipmap,and for textures with low resolution tab Texture,respectively from zagotovlen folders roll the texture in the corresponding sections.
Next, press Save again and select your file and press save (Fig. below).

This way you will still have all the textures in the archive with the avtmobilya.
All, check our car in the game. If everything works well, then go back to zmodeler and start to prescribe the polygon ID numbers to the polygons. Rooms entered for glass on the material of glass, for lights, and license plate on the material of GPLC.
For Windows ID number.
1 frontal (left), 2 (right) or just 1 if it is common.
The window in front left door 3
The window in front right door 4
Glass front left door 5
The glass on the right front door 6
Glass rear left door (coupe,rear glass) 7
Glass on rear right door (coupe,rear glass) 8
The window in the rear left door 9
The window in rear right door 10
The rear window 11
To Light:
48 lights front left/right
49 turn Signal left
50 turn signal right
51 stop Central
52 foot left
53 foot right
54 reverse left/right

Glass will be pumping and the lights burning, provided that they are assigned to their materials for the light (GLPC) and glass (........_glass) .
Next, create body mapping (texturing) on a standard dirt texture on the second UV channel (standard procedure).
The application of vinyls.
For applying vinyls need to be replaced in the material colors of the body, the texture of the mud on vinyl, and specify channel 3 (pic below), and click the Dust. Instead of dirt will appear vinyl (as mapped to the third UV channel). Make sure the geometry object in the properties exhibited three bands of UV: Properties- > Mesh- > Vertices- > Format- > UV Channels = 3 and click Apply.

The mapping generated by the tool Surface\Mapping\Edit UV in the form you need. In the appeared window, set channel 3 UV and Generate New and also recommended to turn off Continuous Mesh surface.

You should protectorate entire body, as vinyl is applied on the entire body. The parts where it should not just apply to the empty texture, and the rest do about the screen shot below: the side panel at the bottom, over her hood.

Next, click export, collect SDS again,prog SDS Tool GUI and are satisfied with the result.


PS who doesn't want to mess with the pack it texture and mess you can create one overall texture and fully pretextural your model. Having thus similar to the native machines. The texture can be saved under the name of the original texture of the model, thus do not have to create new materials, which means the game will turn black when burned and the body and interior, everything will light up and run on their machines (while maintaining the native Hash values on materials and replacing only textures). This assumption is again not relevant to the material of the GPLC, the texture of which can't be changed.
Update
Now check the texture there was not a large utility,much easy installation of textures as a modders there and easy to use.Utility and export file (the name of the car).mtl throw in the edit/materials. Next you remain to run a utility program running in the background,so you press nothing.Thus the program itself will take the data from .mtl fashion in General default.mtl
Download MafiaIIMaterialsMerger: https://yadi.sk/d/_447R6tVsWoEv
The author of the program: Oleg (http://zmodeler3.com )
Update
Now available import\export wheels.The replacement model of the standard procedure,but note that for files wheels worth protecting from new materials. So you have first to alter the original texture and then protectorate model wheels.
Update exporter from 15.01.2017
Optimization improved the model in the game.Simply podeseni game while shooting or finding the character in the car will not.
Update exporter from 30.01.2017
Added import\export characters NPCs in mafia 2 (the main characters use physx, so the game does not give them any changes). Before you import you need to remove a tick
In mafia 2 characters for the most part protekstureny almost single material, the exporter is difficult to export such models, so that to export your model, you need to copy once the clothing material and apply this material what part of the character, unless one copied material will not be enough, copy again the material and apply a different part of the character of this material.
For best display character,it is recommended that the material the eyes move to the bottom of the list in the Material Browser.
Please note, there are no improvements in the work of the exporter of the characters.
Update exporter from 10.08.2017
The problem with otobrazhaetsya new skins in the game.Plus minor bug fixes, now no need to copy one material and make one overall texture as it is made from native skins. Apply the Shader to the clothes or the Shader from cars to textr skin.
To start, you can precisely adjust the new skin is the size of the model the model, then copy from the original model, the impact on new bone (Rigging---Copy Weight) (the bones themselves moving not or you the game will be a behavioral model, so you need to fit a new skin on the original), replace the model and then apply the Shader to the clothes to the new material, don't forget to start to prepare the texture format .dds and two sizes (large and small). When you're done you can export the model.Texture pack in the archive model program ExpSDS, then don't forget to exported .mtl model of your skin to register in default.mtl. It is important when registering your .mtl or for further publication of the mod, delete the original parameters from an existing material.
Update exporter from 28.10.2018
Added export of new cards.
Video tutorial on cards:
she does not rummage, and understand it will be very difficult, so deal unlikely to become, but the mountain of the plus sign, you definitely deserve it)
Дрифтер_783
It makes no sense,above are links to the program,it is constantly updated and to buy you still will have to contact the developer.
agens
hi, I dropped my Mustang gt500 and made the check-in textures question do I need to do the registration of the textures when I throw for example a Dodge Challenger?

Roman Kolyada
First you need to extract sds files prog SDS Tool then unpacked the files to create a blank Notepad file with the extension (name anything).mafia. Booting from this file and export when you copy this file from the import and paste in the folder of the export file.Otherwise exported or anything.
Roman Kolyada
Models in mafia 2 is Packed in the SDS archive. It unpack, the folder extracted go there and there you will see the name of the car.Throw there a file blank to import all.